


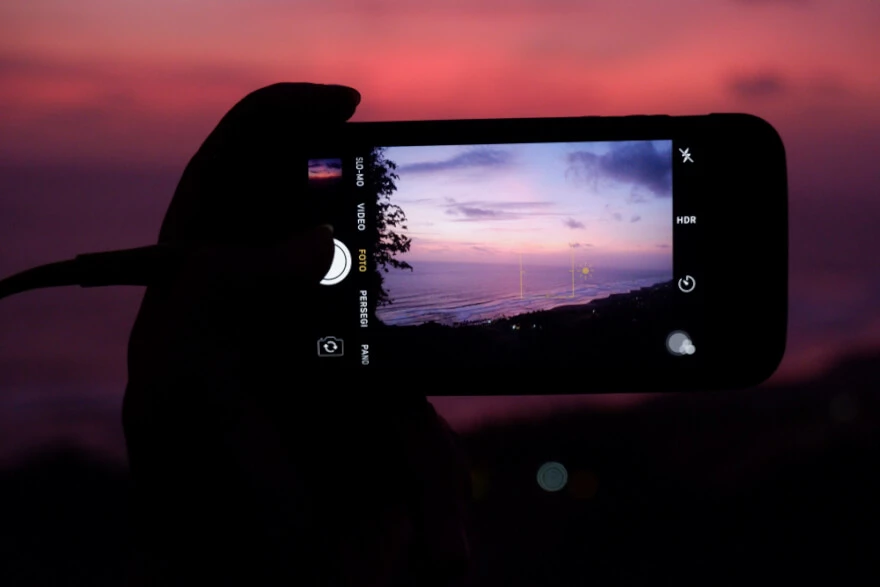
How to take panorama on iPhone
Oct 23, 2018
Who doesn't like beautiful sunset photography? There is something bright and magic at this time of day that catches the attention of almost every person. But being attractive and ordinary, sunset can be just difficult to convey in pictures.
Equipment and camera settings are very important. However, being able to be in the right place at the right time of day is perhaps the most important factor for photographing the sunset. If you are visiting a new city and looking for a perfect place for sunset, it is best to do some online searches. In most cases, you will see sunset images taken from one or two popular places. It may take some time to find out exactly where these locations are, but as soon as you get an answer, you will find out where to go to shoot.

A simple search will tell you when the sunset will occur at your chosen location. Keep in mind, however, that an hour or so before sunset is the ideal time of day for most photographers, so you need to appear at a chosen location at about a “golden hour”.

The difficulty is that sunset requires a good dynamic range for your camera. It is necessary to simultaneously work out both a bright sky and dark earth. Only DSLRs can boast to be appropriate for such hard work. But even a full-frame device (it is believed that its HDR is maximum) hardly achieves a simultaneous high-quality frame of both heaven and earth. A huge influence on the quality of photos has a lens. A critical parameter, in this case, is a lens flare. When the sun enters the frame inside an optical system, the number of light reflections from the lens surfaces increases significantly, due to which the picture loses contrast and “blooms” with sun rays.

It is better to photograph in manual mode. There are several reasons. The most important thing is that each lens has a certain range of apertures for the best picture quality, as a rule, it is f / 5.6-f / 11. Landscapes (including sunset and sunrise) differ from portrait genres. It makes no sense to shoot at an open aperture - detail is low, depth of field will be small and not all objects will most likely fall into the depth of field area (although this may be an artistic design in some cases). Select shutter speed so that the long exposure level of a photo approximately matches what we see with our own eyes. Simply put, if the sky is bright in reality, it should also be bright in a photograph. In this case, an exposure meter can show overexposure to + 2EV. Make sure that area around the sun is not overexposed to whiteness and that solar disk on a picture is guessed. The solar disk, by the way, is almost guaranteed to be white - there is nothing wrong with that. An exception is a final stage of sunset when the disk has almost touched the ground, then it may turn out to be yellow or red.
It is most convenient to use an LCD digital display or an electronic viewfinder when shooting since it is possible to see the result before the shutter is released. For all its merits, the mirror viewfinder is less convenient when shooting the sunset. Be careful when capturing the sun with a telephoto lens. You can spoil your eyes if you look at the sun through a viewfinder for too long.
ISO sensitivity should be the smallest possible, but at the same time, ensuring the absence of "movement". Low sensitivity lengthens shutter speed, but provides a smoother color reproduction and reduces noise levels. Raising ISO sensitivity is only necessary if shooting with a telephoto lens without a stabilizer and a tripod - in this case, blurry images due to handshake increases.


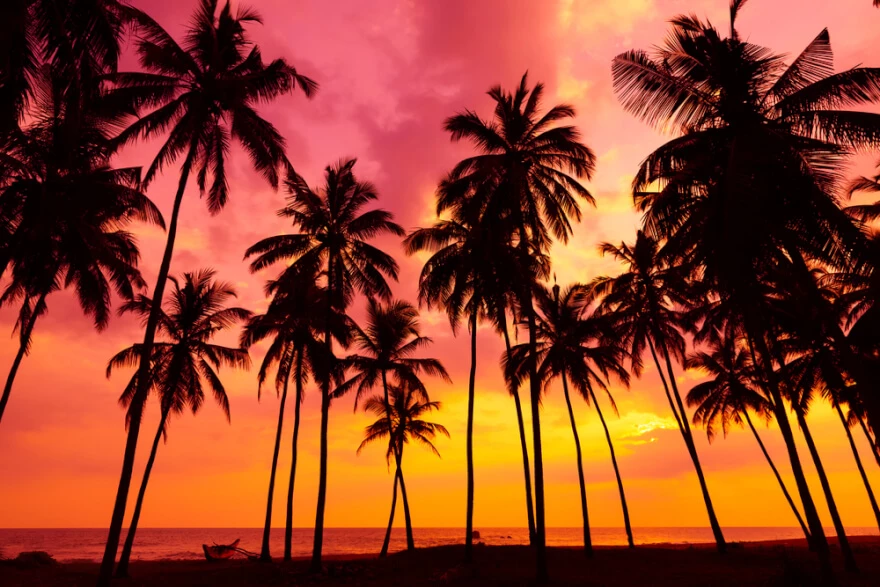
As with any shot, there should be a point of concentration in every sunset picture. And one of the best ways to add interest to any image is to include some silhouette in a frame. It can be something big, for example, an oak tree, or something that is part of the environment, as a fishing pier. You can also use a person for this adding black and white effects. Travel and look for intriguing places that include eye-catching shadows, backgrounds, and elements.
Silhouettes always determine the mood of an image while in the context of your ideas. Putting a silhouette outside the center of a frame is often a good idea to create additional intrigue.
Silhouettes in a beautiful way convey drama, anonymity, excitement, general mood to viewers of your photos and often stand out in an album. They create a strong plot through a contrast of simplicity. This style is in fashion among brides. They love them because they do not give the viewer a clear idea of everything, but leave room for imagination in wedding sunset photography.

An important role in obtaining good shots is played by additional equipment. A tripod will allow you to avoid camera vibrations when shooting at a slow shutter speed that you will need at sunset time. Release cable will not allow it to move at the moment you press the button. The optimal solution for the shooting is a lens with a focal length of 50 mm and above. You can use wide-angle models, but in this case, the sun in a picture will be very small. Long-focus lenses will help you capture it in close-ups. Do not turn on the camera while the sun is still high. Starting work in advance is denied by all guides because you can harm your eyes and matrix of a device.

You must have taken a lot of successful couple shots from your hands. However, there are several good reasons to get into a new habit of taking a tripod with you. It makes the shooting process slower and this is not always bad. When using a tripod, the emphasis is primarily on obtaining a competent love story composition. When the first goal is reached, you can focus on correct exposure. This can be very helpful when shooting in unusual lighting conditions of other people. After you take the picture, change the position. Try a different perspective. Raise or lower the camera. The result is more unique frames, rather than 50 shots that look almost the same. Add romantic vintage filters during post-processing in photoshop applications.
Another reason to get a tripod as the sun hides behind the horizon, illumination decreases. This means that you may need to set a very long shutter speed at which it is impossible to work with your hands. With a camera mounted on a tripod, you can take long exposure without fear of a shaking picture.

When shooting the ocean and landscapes in general, photographers usually try to capture wide-open spaces. A focal length of 14mm to 24mm is a good starting point for taking a compiled shot that captures everything you need. Shooting with a wide-angle will also allow you to focus on sun glare, giving a more dramatic effect. After taking the picture, try adjusting the lens and using a zoom. Play with different focal lengths, isolating some areas. Try to capture the silhouette of a boat or other object in the background of a sun. The only limitation should be the imagination. There are no specific rules regarding focal length, so do not be afraid to experiment and enjoy the process.
Perhaps it turned out to be a little more complicated than one might initially think. But as soon as you find the time to prepare for magnificent sunsets and sunrises, you will get it. Indeed, the true value of photography lies in the appreciation and satisfaction of a moment. And each time, looking at your work, you will experience positive emotions, and mentally return at that time and to that place.
Co-founder of RetouchMe. In addition to business, he is passionate about travel photography and videography. His photos can be viewed on Instagram (over 1 million followers), and his films can be found on his YouTube channel.
Moreover, his profile is featured on the most popular and authoritative resource in the film industry — IMDb. He has received 51 international awards and 18 nominations at film festivals worldwide.


