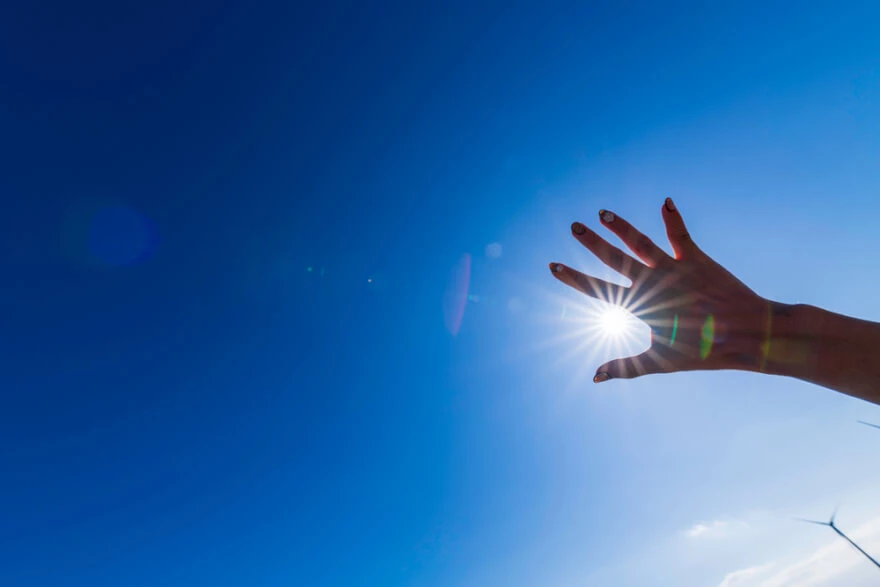
Lens Flare Photography

- What is lens flare ?
- 7 Creative Lens Flare Photography Tips
- 1. Break the rules and use the sun
- 2. Avoid silhouettes with our best tips
- 3. Make random light enter your images
- 4. Focus your frame for light flare
- 5. Choose smart time and place for the best lens flare photography
- 6. Control the depth of field
- 7. Work with environment for lens flare effect
Every tool that you have at your disposal as a photographer can contribute to gain a certain position in this market. For example, there is nothing difficult to shoot against the sun and it is not so complicated to use camera flare, but only few experts can understand that it is one of those techniques that will add fresh ideas to your works. This artistic style was invented and used by professionals years ago and is still in fashion. Usually an anamorphic lens was used to produce these types of images. Still, being created for a compressed version of shots, which need stretching for correct displaying mode, these items were successfully replaced by normal cameras.
Most Star Wars lovers learned this effect watching numerous examples professionally inserted to enhance cosmic feeling.

Nowadays professionals are looking for new ways and approaches to use in their work. Taking into consideration that everything new is considered to be something old and forgotten, everyone is searching for old school techniques to represent in their own way. It is extremely important to change all the time, show something new to your critics and clients, and it is better that this “something” is absolutely unexpected. Glare on photos is, technically, a photographer's mistake, captured as lines, circles and in other shapes. People who create lenses are doing everything they can to prevent lens flare. But if you use them properly, it will look amazing! This interesting feature can give romance and mystery. In addition, it can be very useful if working conditions are not perfect. If you consider yourself to be professional then you will be able to turn a terrible ugly place into something magical.

What is lens flare ?
Almost all camera lenses, except the most simple ones, consist of “optical elements”. Lens flare is usually generated by the light outside the image, which instead of passing along the optical path provided, is reflected from the optical elements inside before it hits the film or digital sensor.
Optical elements usually have different anti-reflective coatings that are designed to minimize lens flare effect, but it is difficult to eliminate them completely. The light source will still reflect a small fraction of the beam, and this reflected part will be imprinted as a blaze in areas with lower light intensity.

7 Creative Lens Flare Photography Tips
1. Break the rules and use the sun
Spring and summer are great seasons for outdoor work, using the sun. It is considered a truly creative way to make shots. Shooting in the sun creates sun lens flare, but instead of considering such photos as defective, you can learn to use this effect creatively and get quite impressive results. Do make shots taking care of eyes and digital devices to reduce post-processing inventive work with annoying photo albums.

2. Avoid silhouettes with our best tips
Silhouettes are fun, but not what we want to get from shooting in the sun. To really get the most out of the setting, you need to pay more attention to the uniform skin tone of your model. Silhouettes are caused by the fact that cameras are trying to display everything at once, not just your model. Having calculated that there will be too much sun and sky in the picture, it provides an exposure for a silhouette.

Try to use necessary settings to obtain a fully controlled result. Otherwise you will probably get highlighted background, which is definitely an essential part of solar shooting, but not what you really need at this moment. It permits to get not only a classic blaze, but a red lens flare due to its intensity and camera settings.
Another great trick to remember is to use an external flash. Some people will find this idea rather strange, but in fact it is one of the best options to apply. Use remote control to send a flash signal a few feet away. It produces more natural effect, maintaining some shadows.
3. Make random light enter your images

Although it is considered that technically optical flare is caused by internal reflections, there is no doubt that sources of high intensity lighting are often needed to make them appear. Such a source can be a full moon, the sun, or even an artificial beam. Even if there are no powerful sources in the image, random light can get into the lens. Usually, the flash outside the viewing angle does not affect the resulting image, but if this light is reflected, it can pass in an unexpected way and get on the film/sensor. Try walking around, looking for reflecting surfaces, which can capture necessary rays and blazes.
4. Focus your frame for light flare

When shooting against light, your camera will have difficulty focusing on the subject, even if you manually select focus points in settings. Try using focus lock, directing the camera to the subject with the light hidden behind it, use autofocus, block it, and then go to framing. Be careful when shooting at open aperture, as the depth of field will be very small, and the slightest movement will lead out of focus. Experiment and see how this can work for you. Most masterpieces have not been planned as an organized artistic shot.
5. Choose smart time and place for the best lens flare photography

Think about the season and what can it provide to improve the frame: spring flowers, autumn leaves? Try to find something more unique than a front yard. Time is one of the most important parts for pictures you want to make, as it determines how high the sun is in the sky. You should place the light near the head of your model to get a really good frame, so it will be easier to play with it, focusing the main subject. Regular photo rules of thirds and golden hours are always ready to be applied.
6. Control the depth of field

This basic photography approach is a great way to add another interesting element to your pic. Lower contrasts and sharper focus aimed at different parts of the frame can create different atmospheres without changing the location and light. Thinking of a right plot and settings, various artistic views can be demonstrated. You might not expect, but these settings can completely change the situation.
7. Work with environment for lens flare effect

It is great to experiment a bit with the environment. Look for things through which the light can penetrate, and make the model move to interact on the photograph. This is really a great way to work out the basic composition, significantly improving results. Any additional features can be easily corrected with professional retouching applications and editors. Concentrate on the world around and possibilities it offers to play with lens flare photo.
Remember that the most fascinating thing about light flare is that you never know what the result will be. The face of your model does not have to be fully visible. Do not analyze too much. Just continue experimenting and discover such crazy effects as rainbow lens flare without additional tutorials. Sometimes photographing against the sun, you can get stunningly beautiful highlights, but the photo will not be sharp. It is not important if you miss some pixel or forget about classic picture making definition. In the end, being a photographer means not only pleasing your customers, but also shooting for yourself!
Co-founder of RetouchMe. In addition to business, he is passionate about travel photography and videography. His photos can be viewed on Instagram (over 1 million followers), and his films can be found on his YouTube channel.
Moreover, his profile is featured on the most popular and authoritative resource in the film industry — IMDb. He has received 51 international awards and 18 nominations at film festivals worldwide.

with RetouchMe


