


The Ultimate Guide to Editing Text in Pictures: Tips, Tools, and Techniques
Jul 2, 2024
To fully reveal creative intentions in the picture, photographers use not only professional techniques and weather conditions, but even a specific time of day when shooting. There is one thing that largely determines whether a photo will work or not, and that factor is lighting. You may be shooting the most incredible landscape or stunning model, but without high-quality lighting, you will only get flat, dull expressionless photos. This is especially true for shooting outdoors when it is difficult or impossible to use artificial lighting. In this case, you will be completely dependent on natural light. Such time intervals are beautifully named: a blue, golden hour, or emerald moment. The latter is associated with a green-ray that appears for a second before sunrise against the background of the sea surface. Tricks and tips are widely used by experts in all types of fine art. What is the golden hour in photography, how to use it correctly, and what effects can be obtained?

Light is the most important element of any image. Without proper lighting, even with a professional camera, it is impossible to get a good picture. The main light source is the sun. It rises at a certain time, makes its way across the sky, and sets. During this movement, the intensity, brightness, and spectrum of sunlight change, shadows lengthen. In addition, the infrared component changes. If you photograph the same object at different times of the day, with an interval of about 60 minutes, then all pictures will look different. The golden hour (GH) refers to two short periods. This is the first hour immediately after the sun appears on the horizon and the last one before it sets. At this time, the sun is low above the horizon line, so shadows from objects will be very elongated, which gives the frame a special expressiveness. The photographer can use the following positive aspects of this time:

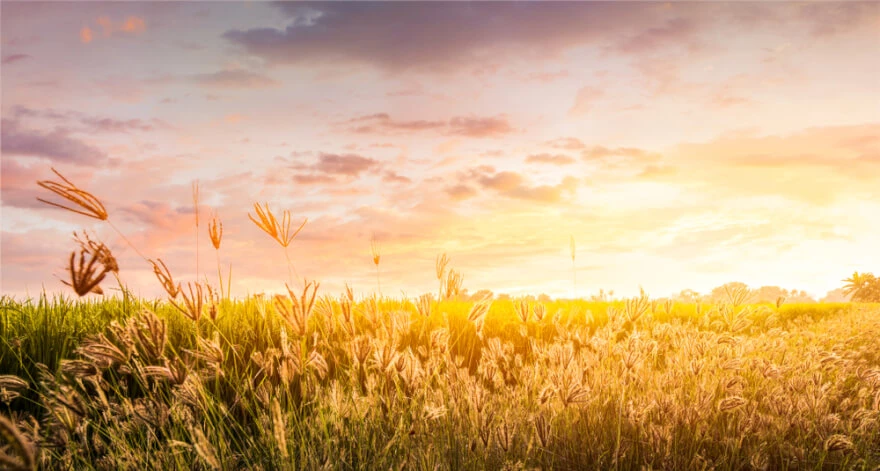
Photos taken during the GH have a warm inner light that cannot be obtained with any photo editor. Golden light fills objects and faces with a unique glow. The contrast of the image is soft and not the same as in pictures taken at other times. In the early morning or evening, the spectrum shifts to red, so even the sea surface, usually blue or greenish, has an orange or pink tint. When shooting before sunset, you can create extremely expressive silhouettes. When the sun is low above the horizon, shadows lengthen as much as possible, which gives photos an extra deep dimension.
Light rays of low sun envelop objects, giving them an amazing charm. You can work with a camera in an urban environment. Pictures acquire dynamism and expressiveness. This time is also suitable for indoor portrait photography. In this case, the model is positioned near the window so that calm and dim natural light falls on it.

First of all, you need to remember that this interval does not necessarily last 60 minutes. Its duration depends on various factors. This is the time of year, geographic coordinates of the location, and the altitude. The time is very short, so you need to carefully prepare for the shooting.
Since the light source (sun) is from the side, practically at an angle of 75-90 degrees, it can be used as a side or backlight. It is the side and backlight that creates volume in every photo, drawing beautiful shadows (side) and contours (back) on subjects.

Sometimes the GH hour lasts only 20-30 minutes, so you should arrive at the location in advance. You need to choose an object, a shooting point, and experiment with the composition. When the work begins, there may not be enough time to set up the camera. At this time, it is better not to trust automatic settings, so you need to choose the white balance, slow shutter speed, and minimum ISO by yourself. For more expressive photos, you can use the "Cloudy" mode.
When shooting right after sunrise or before sunset, the light may not be enough, so you need to have a tripod with you to shoot at long exposures. A modern camera allows you to take a large number of photos in a short time, and this should be used. Lighting changes very quickly and it is important to capture the unique color palette. Then you can select the most interesting picture, and delete all unnecessary ones. The warmth from the low sun can turn a model's bright red clothes into burgundy or brown, so when shooting portraits, you need to choose items carefully.

Working with a camera provides many opportunities for unique photographs. If you place the selected object in front of the sun, then its entire texture will be as pronounced as possible, and the model will not need to squint, since the light is diffused and soft. Direct sunlight is not considered a good solution, but at GH it is quite acceptable. If you shoot against the sun, you will notice a golden glow around objects.
Pictures taken against the sun, with dust or light rain raised by the wind, are very beautiful. Dust and droplets of moisture in the rays of light take on a glow, giving the photo a touch of magic. Long shadows are very expressive in pictures. They complement composition, and it doesn't matter what exactly was filmed. With the right angle and scene, you can get a blue sky at the top of a frame, while the bottom of a photo will appear as if flooded with warm light. Original ratios of colors and tones are not all that shooting in the GH can give.

By changing the focus of a camera, you can get the effect of haze or sun glare on the photo. Highlights are softer and less contrasting, which allows them to be used as an artistic technique. They will add extra volume to the picture. Silhouette photography experts work in this time frame. Diffused light allows you to create original images. The most spectacular photographs are obtained when you shoot with the full aperture. Take a series of shots of the same subject at different apertures.
While shooting is not particularly difficult, beginners can make some mistakes. The most common mistake is incorrect timing. The easiest way to avoid this is to use an online calculator. Another mistake is to underexpose pictures, so it is advisable to constantly monitor the histogram when shooting. It is not recommended to shoot in strong clouds. If the sun's rays do not reach the object, then all the interesting effects of the GH will be zero.


Try positioning your subjects between you and the sun for an interesting backlight. The radiance effect on subjects and subjects makes any portrait photo special and romantic. To keep light from flooding the lens, focus on the foreground. Here you have many opportunities to experiment with angles.
As opposed to shooting facing the sun, backlighting creates those special long shadows that make the shot so much more interesting. It is important to use every opportunity that nature gives to obtain a great shot. Do not skip the chance to memorize this magic moment of a day.

You have a unique opportunity to make your photos visually interesting by capturing long shadows of trees, buildings, and people in the frame. They will be a wonderful addition to your composition, no matter what you are shooting at the time.
A blue sky can be still visible, which provides a breathtaking contrast to the glow in a frame. Shadows of trees and the sun's rays create an original focal point. Play with shadows and allow them to interfere with the composition. Include other interesting objects into the frame and change angles to get a new approach.

If you focus on an object with the sun behind it, you get beautiful edge light. By focusing the camera in this way, you create a halo of light, framing objects with a soft glow. This halo separates the subject from the background and, thus, gives it expressiveness and allows it to be favorably distinguished against the general background. Use this tip for couples and wedding picture ideas. It will be appreciated by all just married or engaged people.

Haze is also an interesting effect that is worth experimenting with. By experimenting with the amount of light that hits the lens, you either end up with a sun flare or an interesting haze effect. To shoot or not to shoot haze is a personal matter for every photographer. If you apply too much sunlight to the lens, you will lose focus on your subjects, but you can experimentally add visual interest to portraits.

Sun flare occurs when light strikes the lens and creates reflections of the light. To get the most out of this effect, stand facing the sun and play around with the amount of light hitting the lens. Due to the fact that light becomes softer, highlights are more artistic. Seaside is always magic without any filters and editing. That is why warm glow will highlight the advantages of beach images even if they were made by a simple smartphone. Use this chance to shoot sandy sealing at a GH.

It is difficult to find a better time to shoot silhouettes than GH. By placing your subjects in front of the sun and shooting them in the same direction, you get impressive results. Silhouettes add drama to your photos, so try playing with the positioning of your subjects and subjects in relation to the sun.

Do not get hung up on portraits. For example, plants and landscapes come to life, and it seems as if they are surrounded by tiny reflections. To do this, you need to shoot facing the sun and position the camera so that the sun's rays flood the lens. For the bokeh effect, simply shoot at a wide aperture. Sunlight illuminates everything in the air, so water droplets and other particles in your images will appear as highlights.

Shooting during the GH brings additional color, texture, and depth to an image without excessive post-processing. Without any doubt, such shooting made a breakthrough in the photography industry. Of course, this means that you will be using your camera at a time that you used to spend in bed, but the result is worth the sacrifice. Try it yourself and you will see how your photos will change. Your photos will be truly transformed as if a professional App filter is applied. Try to make the most of this magic approach in the early morning or just before sunset. Even if you take pictures in JPG, the way you usually do, images will effortlessly take on a dreamy and surreal touch. Remember that you don't have much time, so play to catch the perfect moment.
Co-founder of RetouchMe. In addition to business, he is passionate about travel photography and videography. His photos can be viewed on Instagram (over 1 million followers), and his films can be found on his YouTube channel.
Moreover, his profile is featured on the most popular and authoritative resource in the film industry — IMDb. He has received 51 international awards and 18 nominations at film festivals worldwide.


