


How to Sell Stock Photography
Nov 22, 2021
It would seem that full body portrait photography is the easiest type of photo shoot, but things are completely different in this regard. But what is the big deal? In various types of photography, whether it is portrait or landscape photography, we usually focus more on specific details. When shooting full-length photos, we need to do more preparation, from working with lighting and equipment to working with the model and positioning her in the frame. In today's topic, we are going to break down full body picture ideas with all the details that you need to know to make a quality photo shoot.
Here is a shortlist of our today’s discussion:

There are three standard lenses to use, 35 mm, 50 mm, and 85 mm. The differences here are the focal length and how the main subject compresses within the frame, and field of view, which is basically how wide is your frame. The wider the angle, the more objects you can capture at once. All the listed lenses have their cons and pros in regard to human body photography.
A 35 mm lens gives you a nice wide frame, so you can add a bit more context to your subject with the background and overall scene composition, which is good for outdoor shooting. That way, you can get more immersive pictures of that. Wide-angle lenses make the objects that are closer to the lens appear bigger, which may cause disproportions in your frame between the subject and the background depending on the angle of your shot.

With a 50 mm lens, you can benefit from the better proportion between the subject you shoot and the background. Sometimes there are few objects in your background that you would not wish to capture. And you can just step forward to shorten your frame with a more wide-angled lens, but in that case, image distortion comes to play, and you might lose proportions trying to get a better composition. That is why you need to have all three types of lenses in order to flex between the scenes you shoot. And the 50 mm lens would be a good average that can get the immersive feeling of 35 mm. They are especially good for wedding photos.

The 85 mm has been used to emphasize more of the best subject’s attributes and less of the background and surroundings. The background would even get some natural bokeh effect with an 85 mm lens, that is why it is called the best for the subject and the worst for the background and composition making. The model taking the same space in the frame would have the background closer because the longer focal length compresses the image. If you just back off, it will make the model appears smaller in the frame, which will cause the issue of a lost connection with the model and be more about the scene than the subject. It just makes for a different feel of viewing the photo.
To summarize all the 3 different lens types, we can say that 50 mm is a good middle point to start with, and it is a must-have for beginners, and if you can not afford to have all three lenses, then 50 mm is your choice. The 85 mm would be a better choice for headshots, where you need to shoot the head and shoulders only, because of less distortion. And if you need to emphasize the scene, then 35 mm would be your best choice. It provides you with a wide range of options for your composition, such as aperture, shutter speed, ISO, etc. That way if you shoot the model with 35 mm, you say more about where he is, when shooting with 85 mm you say more about who he is.

Speaking with technical language, you can see the difference in this image, where we have focal lengths in angle degrees.
That way, depending on what you want to benefit from, you can choose the lens for a certain shot. The wider the angle, the more your shot would be about the scene, the shorter the angle, the more your shot would be about the subject and model attributes.
The difference between indoors and outdoors in terms of lighting is that when we shoot outside, we have only one light source, our sun. And we can not control it. The sun is not a soft source of light, that is why there are a lot of glare and shadow contrasts, which is not always a good thing. The only way to get good pictures in daylight is to shoot either at sunset or at dawn when the light from the sun becomes softer. Or you can use ambient shadows, which soften the effects of high contrast a bit but are still not the best way against it.

Indoors, we can control and adjust the light with softboxes, projectors, and reflectors. A lot of people think that the more light sources the better, but that is not how it works at all. All you need is one light source that you can move horizontally and vertically in relation to the model, one or two reflectors, or an adjustable softbox instead.
If the light source is simple and clear, it generates light and when positioned at certain angles it leaves a shadow on certain parts of our model. The reflector and softbox just regulate the amount of shadow. A softbox is an additional light source, just the soft light that doesn't leave any glare. It is used to control the amount of shadow, which is achieved by adjusting the intensity of the light emitted on the shaded area. The reflector is like its counterpart, it simply reflects the light of the spotlight and here it is the type of reflective surface and the angle of reflection relative to the model makes up for all the differences in use.
The difference between hard and soft light is simply the transition between shadow and highlight. When your highlight to shadow is very quick, it is a hard light. If your highlight to shadow is very slow, in that there is a gradation, slowly becomes from highlight into shadow, that is a softer light.
There are 4 common portrait light setups
Rembrandt light
Split light
Broad light
Butterfly or Paramount light
Rembrandt truly liked that dark shadow, and as he would look at the light coming through a window he started to see that the nose naturally makes a triangle on a person’s face

In order to make this light, you need to set up your lightbox above the model and on the side and adjust it until you get a similar effect.
Here is a good example of Rembrandt's lighting. As you can see, the shadowed side is flattened a bit with the use of a reflector or a fill-in card.

But we still have an emphasized triangle on the left cheek below eye level.
Split light is pretty straightforward to achieve, all you got to do is to make the shadow to split your subject’s face or body into 2 parts-light and shadow. To transition this way of lighting, you just need to move your source of light more to the side until the triangle disappears.

Broad light is just another transition that comes from the two above, when you simply turn your model away more from the light source, that way there would be more face highlighted due to the angle and the shadowed part gets less of a part.
Butterfly/Paramount light - is when you set your source of light in front and above your model, that way you get a nice little shadow underneath the nose and symmetrical shadows under the cheekbones. That was called a paramount light because actresses in 20’s and 30’s were unable to photograph without using this type of light positioning.

As you can see from this image, the cheek shadows make it up for butterfly wings on top and the bottom of the shadow.
We have all our equipment set. All we got to do is to position our model properly to emphasize the best of our subject. We are going to split this section into two parts, one part would be about men’s posing and another would be about women’s posing.

If you ask a person who has no model skill at all, he would probably stand in his usual position, which is usually a closed position in terms of body language, which means he is uncomfortable. Our job as a photographer is to fix this and position the model in a way it will highlight sex and confidence.
For the man, our main point of attention is on the shoulders and chest. But the posing is like architecture, you start from the bottom and go to the top building that position. So we start from the feet because it will affect the way it looks over the top. If we consider men’s posing as an alphabet, then we find out that if a man stays in his straight idle pose he looks like litter “i” the line with a dot on top. Our goal is to change it into the letter ‘V’ to emphasize the chest and shoulders. Most of the time we turn the men’s body towards the light, this will make him look bigger and broader. As we said, we start from the bottom. Put your legs together and put all the weight on your back leg and just bend the knee. Going upper, put your hands in the pockets and do a glorified slouch hanging your body. And in the end, turn your body to the source of light. That way you will achieve a good V shape. Here we have a before and after comparison.

Then you can adjust your position and vary it, let us say instead of keeping your hands in pockets you can cross them over your body or hold a cup of tea to add some business style to it. You can make your legs stay more casual way to feel more comfortable and tilt your body to the wall instead, as shown in the image down below.

But as you see, the core position is still there, we have our V-shape of that body turn towards the light source. In most men's fashion photoshoots, you will see the chest emphasized with that turn.
In order to make your model do the posing the easiest way, you can play a mirror game. Stand in front of each other, then you lead,and your model just follows your position.
Here is a shortlist of tips for men’s posing
If you put your hands in your pockets, make sure your fingers stay inside and not stick pointing at something else.
If you wear a jacket, then make sure you have it buttoned only on the top button or let it be completely open instead.
Hands are the 2nd most important thing in a photo, so make them busy with something. For instance, one hand is in the pocket, another holds your jacket over the shoulder. Or you adjust your watches or roll up sleeves using both of your hands.
If you cross your arms, make sure your fingers do not cover your biceps at both sides. Make it at least stay exposed on one side, or hide your hands under it to make your biceps look bigger with it. However, if that is a big problem, you can always enlarge body parts in photoshop or with an app.
Tilting your body to the camera and the chin works great to mask your body imperfections like double chin and belly.
Turning your body to either side means your feet should follow the axis of rotation.
Keep your body turned toward the light, turning it away will make your pose look feminine.
Holding your hands in your pockets, make sure you leave gaps between your elbows and waistline to show the body silhouette with it.

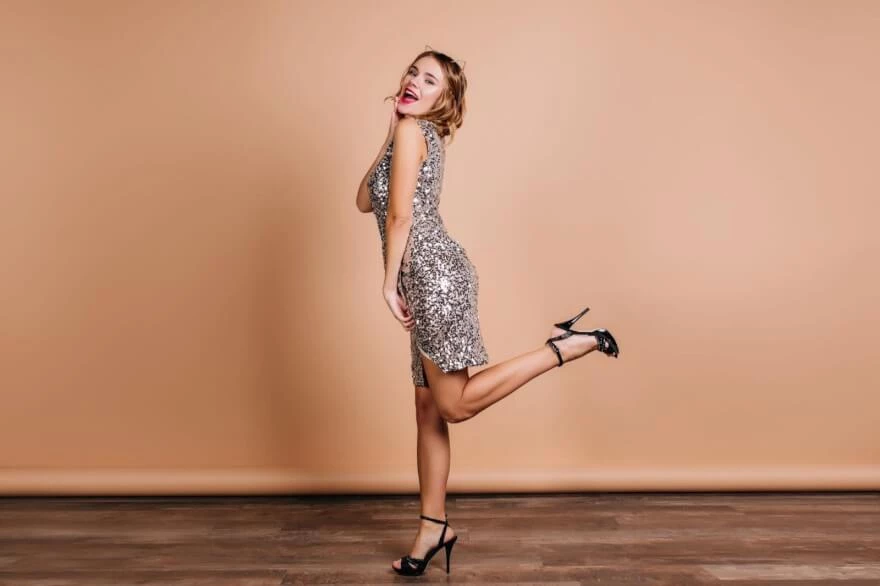
The full body picture of women is very different from men’s. If men’s body is defined with chest and shoulder making it for V-shape, then curves define female posing.
Starting from foot, we never stand flat-footed. At the very least, all we do is put the feet together and bring one knee in front of the other like in the picture below

You can also do the mirror game to make your model get used to posing, and it is very important that the word posing would not be demonized, you need to deliver that the posing will emphasize the best of her. To release that tension, you can say, “I will make you shine brighter than ever before with a simple direction”. Giving it logical reasoning is a really important part of the process. So educate your client as to what you are doing and why you are doing it.
As we place our feet, we need to make beautiful curves. To show the curves we need to turn a body on a bit of an angle, bend a knee, tilt your shoulders a bit towards the camera and then put arms off the body. And here we have a beautiful shape with that curve line that we have in the image right below the header.
As we mentioned earlier on the men’s posing, the light source direction could make a lot of difference. That way, you will look more feminine if you turn away from the light.
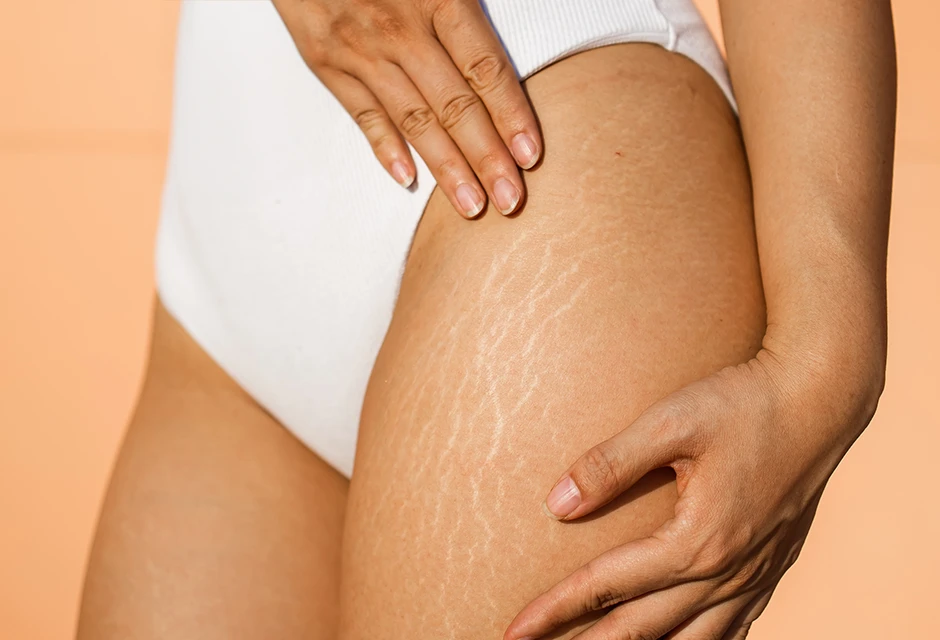
If your model has a small bust, then we have to make it look bigger. You can do it by leaning your model shoulders back a bit. And the same works in the opposite direction for women with big busts. You can also make breast look bigger or smaller with our app, in case the posing did not make it up. The same could be done with our body hair removal, in case of some growing sticks out, while the pose itself is great by any means.
Also, if you want to emphasize any body part, you just push it towards the light, whether it is being a breast or butt.
So that is the foundation of the female pose. Then you can adjust it by expressing with your hands, you can hold a cup of Champaign or touch your hair while following the rule of curves and light at the same time.

He started his career as a professional photo designer and retoucher. Professional commercial photographer with 20 years of experience. He is a leading advertising photographer and has worked as a food photographer with Michelin-starred chefs. His work with models can be seen on the calendars of many leading companies in Ukraine. He was the owner of the photo studio and photo school "Happy Duck".


