


DX vs FX format. What is better?
Sep 15, 2020
The history of creating an image without the help of paints interested people many centuries ago. The first remaining camera-made image was provided by Nicephore Niepce with his “View from the Window at Le Gras” in the early 19th century. Since then, a lot of time has passed, and the constant development of technologies has brought innovations in the field of photography and video filming.
Millions of images are taken every day in all corners of the planet. People retain moments that will be remembered over time and, possibly, bring a tear to someone’s eye. These can be the lively emotions of their loved ones or the perpetuation of transient natural phenomena. In the era of social media, it is difficult to imagine someone who would not have photographed something for blogs and personal pages. And if a person is creative and truly interested in photography, he or she can arrive at pictures or videos made using the hot and happening time-lapse technique.
While surfing the Internet, each of us has ever gotten stuck on short videos of sunrise or sunset, northern lights, and the movement of stars. To create such visuals, photographers use time-lapse photography. To give a simple definition, it is capturing slow motions, which look accelerated several times in the final result.
The creation process consists of several steps. To begin with, a certain number of photos are taken at a desired interval (these will be video frames). Then, processing takes place, and the last stage is editing. You might be thinking why not just shoot a video and speed it up afterward? Unfortunately (or fortunately), it's not all as easy as it sounds. The period of a flower blooming, the daytime phases of various plants, or a lunar eclipse takes a long time. Therefore, your device may run out of memory, or the battery will be dead before shooting is completed, as well as its quality may differ slightly from what was intended.

iOS device owners may have noticed that they can shoot time-lapse photography on iPhone. This feature is in place in most modern smartphone models, and therefore, many have already tried this type of shooting at home. Basically, the experience covers filming workouts, or walking a dog, or cooking a dinner.
If you are interested in creating time-lapse images and want to understand how it works, start with a simple task, such as filming the process of making a pie. In this case, a time-lapse photography tutorial will not be complicated and multi-step:
You can also just put your phone on a window sill and leave it for a while so that later you can watch how the clouds move, the sun goes down, or the rain falls. Place it horizontally and plug it into a charger if you are not sure how long it will last.
In times gone by, you had to spend a good part of your day to make such a video using different editors, and for beginners, it could take even several days. Now, time-lapse photography apps are developed to facilitate the process. You will find options for both Android and iOS devices on well-known platforms. A good piece of advice is not to fix upon one option but to download several programs, test them, and choose the best version that suits you. When it comes to Apple products, the most popular app for time-lapse photography is Timelapse Pro, and Time Lapse Camera is the go-to for Android users.

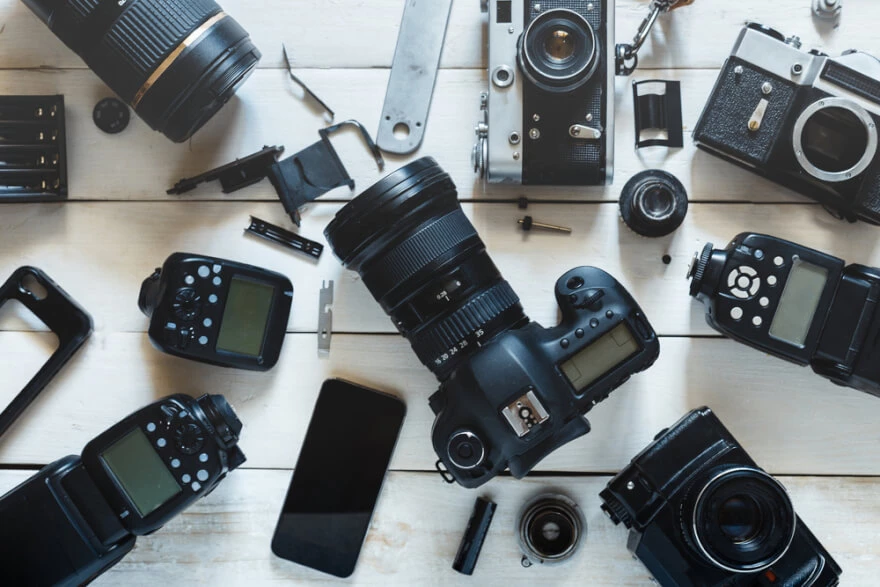
If you are thinking about your own development in this market and an eventual shift to commercial photography, you should use professional equipment for shooting. So what is the best camera for time-lapse photography?
Most modern cameras have a built-in function for creating time-lapse videos, but in fact, any model that has aperture priority and manual mode will help you do the same. The only additional requirement is connecting a remote control to it. Everyone knows that the best products for photographers come from Nikon and Canon. But now, action cameras, such as GoPro or Samsung Gear, are also worth considering. When choosing a model, pay attention to which shooting modes are available. For a time-lapse video, both the mode of the same name and interval timer shooting are suitable. The latter will result in photos recorded on a memory card, and you will construct a video yourself. In the time-lapse mode, there will be a finished video but without access to individual frames.
Since it takes over a thousand frames to create a video, a mechanical shutter can wear out very quickly. To avoid premature lens replacement, it is worth choosing a model with an electronic shutter.

Although the built-in function of time-lapse shooting is, of course, more convenient, creating a video from a series of frames on a computer or laptop rather than in a camera will allow you to apply necessary processing techniques to the images, which will improve the final product. This is where the batch processing capabilities of RAW converters come in handy. With Adobe Photoshop, Adobe Lightroom Classic, Phase One’s Capture One, and other tools, the same settings can be applied to thousands of frames at once. But such work implies plenty of experience. Multilevel corrections, as well as creating videos with time-lapse photography software from individual frames, require a lot of computer power and often take a long time. The Adobe programs are suitable for the owners of both Windows and Mac devices.
In Lightroom, you first need to create a certain set of settings for one of the pictures – a preset. After that, it is applied to the rest of the images. In Photoshop, batch processing can be done using an image processor or macros. This program allows you to experiment with tools, colors, and light better than, for example, Sony Vegas. You can easily find instructions for creating and processing on the official Adobe website.
If a sharp flicker of brightness appears in your time-lapse video, you can easily fix it with the help of special programs and plugins. For instance, Deflicker is a plugin that is compatible with various video editing programs. Its current cost should be viewed on the official website. LRTimelapse is a plugin for Adobe Lightroom. It also can be downloaded from the official site.

A photographer's kit does not end with a camera. The next thing you need for successful shooting is a heavy tripod. A strong stand is a mandatory attribute of a high-quality video. If it is not stable enough, even a light breeze can ruin all your efforts. If you do not have such a solid frame, you will have to make your light tripod heavier. You will most likely find a hook where you can hang your weighted bag. Also, you can buy additional tripod accessories so that you can move your camera while capturing time-lapse images. For example, it is better to move the camera using a special slider or an installed head to create a beautiful panorama.
Use an empty memory card so that you do not have to quit halfway through the process. You may have to shoot over a thousand RAW images, and even using regular JPEGs can take up a lot of memory. It will be more convenient to use RAW ones because you can set white balance during the subsequent processing of photos or directly when stitching the images into a video sequence.
One of the most important nuances is the smooth start of filming. This can be done with a remote control or a laptop directly connected to the camera. Sometimes, it is better to use modern technology, which will ensure that the shooting will start at the right time and without even the smallest shaking of the camera at the press of a button. Moreover, with new models of remotes, you can set both the shooting interval and the number of frames that the camera should take.

Photography is art, and therefore, no one limits you in your creativity. There are many ideas that have not been implemented yet, as well as many examples you can get inspired with and create your own, improved version. The following time-lapse themes are considered timeless classics:
Each such subsequent shooting will be original and different from the previous ones. After all, every photographer uses different equipment, tilt shifts, and camera angles. The process takes place in various locations, weather conditions, and times because every moment is unique.

In any case, you need to understand time-lapse photography settings to make quality and interesting content. Forget about automatic setup — you must adjust everything manually. It is worth choosing the proper mode (completely manual) in which the frames will have the same sharpness, shutter speed, and color. Focus and fix on the required object so that it does not move automatically during shooting. Also, adjust white balance statically, but the image stabilizer should be turned off.
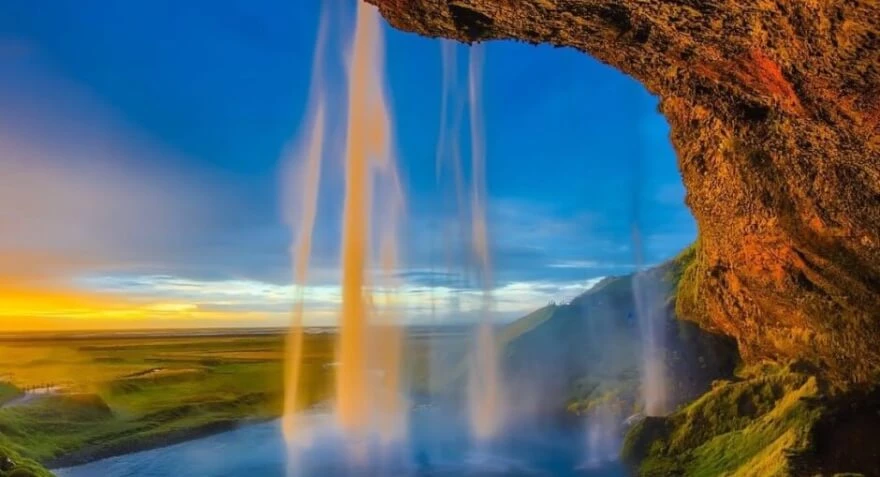
Check out a fairly simple but important formula. The frame exposure must be half of the interval value. The interval depends on how fast or slow the object is moving. Therefore, if you plan to take a frame every 2 seconds, stick to a shutter speed of about 1 second. Based on the idea of the planned video, you should take into account that the interval for shooting people should be about 1-3 seconds, while for traffic and vehicles — 1 second. Adjust your camera in a range of 1-3 seconds when shooting sunrise or sunset. Capture waterfalls within 2–4 seconds, fast clouds —1–2 seconds, and slow ones — up to 10 seconds. It also takes up to 10 seconds to process the northern lights. For stars, you’d better use from 20 to 50 seconds. When observing plants, set a minimum of 90 seconds and up to 10 minutes. And building sites require from 5 to 15 minutes.
However, you should not take this as step-by-step instruction. After all, camera settings can be made correctly only at a shooting location, since they depend on a variety of light sources, both natural (the sun, the moon, and the stars) and artificial (lanterns, the headlights of cars, and others).

As for the shooting time, it all depends. For example, your camera will catch the moment the sun appears over the horizon in 30 minutes, and you will end up with a video that is about a minute long. After the shooting time set on the timer expires, the camera will finish taking shots. You can also stop the process by pressing a button.
To avoid flickering, that is, changes in brightness, you need to monitor the aperture. This can be easily done thanks to lenses with a manual aperture setting, after which it remains unchanged, or you can take pictures in aperture priority mode. Also, for example, on Canon products, you can rotate the lens a few millimeters. After such manipulations, contact with the lens is interrupted, and the aperture remains blocked. It is very important that the lens remains firmly attached to the camera and does not fall off.
The flicker problem arises if the camera calculates one shutter speed for several frames, and then the sun peeps out from behind the clouds or, conversely, hides behind them, which leads to changes in the shutter speed value. In the final video, you will have a row of light and dark frames, and the overall image will flicker. Therefore, it is recommended to use manual mode and shoot each frame with the same parameters.
Another one of the necessary settings for time-lapse photography is the final resolution. To get a high-quality and detailed video, you need to select a maximum resolution value. In the case of newer models, this, probably, will be 4K, but the quality can also be HDR or HD.

So, to avoid awkward and unpleasant situations during filming, read a few basic rules and small tips collected for you here. First of all, check if the equipment is fully charged and there is enough space in the device's memory or on a memory card. To save power on a professional camera, it is better to turn off automatic image viewing.
Now, let's start positioning and installing the camera. Make sure your tripod or other support is securely attached. After that, review manual settings, white balance, focus, and light sensitivity one more time. Take a dozen test shots, and if everything suits you, get down to work. Keep in mind that camera problems occur more often when they overheat. So if you are shooting in the sun, you may want to cover the camera and lens with a white or reflective opaque cloth.
You do not need to focus on one angle to make your time-lapse photography fascinating. For example, if you want to get a long-term video about a city, shoot at different times of the day and in different places. A park or a playground would be an excellent location during the daytime, where you can catch a lot of movements and changes. High-rise buildings look perfect in the dusk. Watching people returning from work and the way the lights in the windows are turned on evokes special vibes. Nights will be a great option for road photography, with cars as the main objects. The busy traffic will do its job thanks to the headlamps and street lights. Don’t hesitate to experiment by moving the camera or changing the perspective, shooting angle, and the proximity of the object in the frame.

It is clear that a lot of time will pass before you become a true professional in your field. To constantly improve, it is worth visiting workshops of more experienced colleagues where you can learn secrets accumulated over the years of work. There are many professional paid courses and free tutorials on the Internet. Do not lose your selfhood and keep going towards your goal!
Co-founder of RetouchMe. In addition to business, he is passionate about travel photography and videography. His photos can be viewed on Instagram (over 1 million followers), and his films can be found on his YouTube channel.
Moreover, his profile is featured on the most popular and authoritative resource in the film industry — IMDb. He has received 51 international awards and 18 nominations at film festivals worldwide.


