


Spotlight photoshoot: ideas for spotlight photography
Mar 31, 2023
Ever wondered how to edit pictures on iPhone to achieve those professional-looking shots you see on social media?
The powerful camera in your pocket is capable of much more than simple snapshots.
In this guide, we'll walk you through everything you need to know about editing photos on iPhone, from basic adjustments to techniques that'll make your images pop.
Let's dive right into the Photos app, your go-to tool for how to edit photos on iPhone. Here's how to begin:

Pro Tip: The magic wand icon offers auto-enhancement, but we're here to take control manually!
The first step in how to edit photos on iPhone often involves framing your shot perfectly. Let's start with cropping:
Pro Tip: Cropping is not just about removing unwanted elements; it's also about improving composition. Try the rule of thirds by placing your subject at the intersection of the gridlines that appear when you're in crop mode.

Rotating and flipping your image is just as simple:
Now, let's talk about straightening those horizons:
The iPhone's Photos app is smart enough to detect prominent lines in your image and can often auto-straighten for you. But don't be afraid to make manual tweaks — sometimes, a slightly off-kilter horizon can add drama to your panorama.
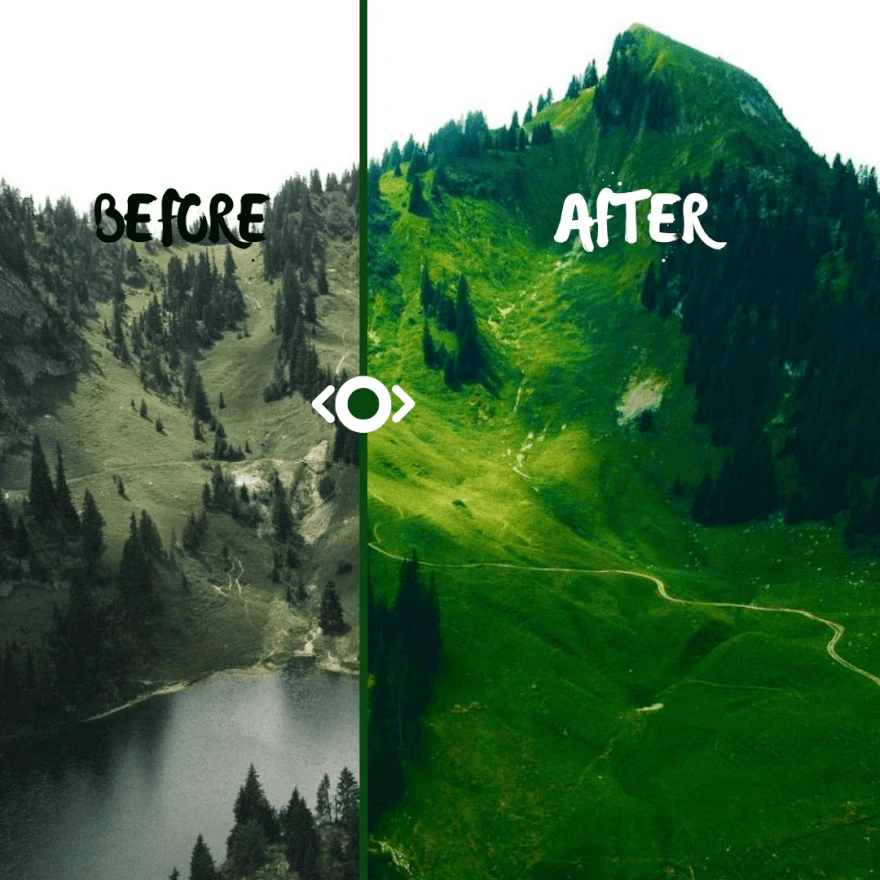
Now that we've got the basics down, it's time to dive into what really makes your photos shine: light and color adjustments.
This is where editing photos on iPhone gets exciting!

Understanding Light Adjustments:
Light is the essence of photography, and controlling it in post-processing can make or break your image. Here's a rundown of the key light adjustment tools:

Color Adjustments:
Color correction is key to achieving professional-looking edits. Remember, subtlety is your friend here.
Sometimes, you want a quick way to add style to your photo. That's where filters come in. Think of them as presets that can instantly change the mood of your image.
To apply a filter:
The real magic happens when you combine filters with manual adjustments. Start with a filter you like, then fine-tune the light and color to make it uniquely yours.
Creating a Consistent Look:
If you're working on a series of photos—say, from the same event or for your Instagram feed—you'll want a consistent style. Here's a pro move: once you've edited a photo to perfection, you can copy those edits and paste them onto other photos. Here's how:
Your iPhone will intelligently apply those edits, adapting them to suit each new image. It's like having your own preset, tailored to your style.
Ready to push your iPhone photo editing skills further?
Let's explore some advanced techniques that can elevate your images from great to spectacular.
Sharpening and Definition:
A little sharpening can go a long way in making your photos look crisper, especially if you plan to share them online where some detail might be lost.
The "Sharpness" slider adds edge contrast, while "Definition" enhances local contrast. Use both sparingly—oversharpening can introduce noise.
Noise Reduction and Vignetting:
Shot a photo in low light? You might notice some graininess, which is digital noise. The "Noise Reduction" slider can help smooth this out, but be gentle—too much can make your photo look like a painting.
Vignetting, on the other hand, darkens the corners of your image. It's a subtle way to direct the viewer's eye toward the center of your photo. Again, less is often more with this effect.

Editing Portrait Mode Photos:
If you've shot a photo in Portrait mode, you've got some extra editing superpowers. Let's unlock them:
Adjusting Depth of Field (Bokeh Effect):
Changing Lighting Effects:
Tips for Professional-Looking Portraits:
Adding Artistic Elements:
Your iPhone isn't just for correcting and enhancing; it's also a canvas for creativity. Let's see how you can add some artistic flair to your photos.
Text Overlay:

Drawing and Sketching:
This feature is great for adding signatures to your work or even creating memes!

Stickers and Shapes:
Pro Tip: Use shapes to create frames within your image or to highlight specific areas.
Photo collage creation is another fantastic way to tell a story with multiple images. While the native Photos app doesn't have a collage feature, many third-party apps like Layout from Instagram or Canva make it easy.

After perfecting your image, it's time to save and share:
Pro Tip: If you're not happy with your edits, you can always revert to the original by tapping "Edit" then "Revert."
For more sharing options, consider using a photo editor app like VSCO or Snapseed. They often have their own communities and can post to multiple platforms.
Now that you've got the technical skills down, let's refine your artistic eye with some pro tips:
Achieving Specific Looks:
Handling Tough Shots:
Even the best photographers encounter challenging lighting situations. Here's how to troubleshoot common issues.
Low-Light Photos:

Oversaturated or Undersaturated Images:
High-Contrast Scenes:
Remember, there's no one-size-fits-all in editing. Trust your eye, and don't be afraid to break the "rules" if it serves your creative vision.

As we wrap up our journey through iPhone photo editing, let's address some common questions that might be on your mind:
Q: How do I turn off auto photo edit on iPhone?
A: Your iPhone doesn't auto-edit your photos, but it might be auto-enhancing them when you view them. To turn this off:
Q: What are the best settings to edit photos on iPhone?
A: There's no one-size-fits-all answer, but here are some general guidelines:
Always let the photo guide you. A sunset might need different adjustments than a portrait.
Q: Can I save my favorite edit settings on iPhone?
A: The native Photos app doesn't allow saving presets, but you can copy edits from one photo and paste them onto others. For more advanced preset options, consider third-party apps like Lightroom Mobile or VSCO.
Q: How do I batch edit photos on my iPhone?
A: While there's no native batch editing, here's a workaround:
This applies the same adjustments to all selected photos.
Q: Are there any hidden editing features I should know about?
A: Absolutely! Here are a couple:

You're now equipped with the knowledge of how to edit photos on iPhone like a pro. From basic tweaks to advanced techniques, your iPhone is a powerful tool for turning good photos into great ones.
Remember, the best way to improve is through practice. So grab your iPhone, find inspiration, and start editing!
We'd love to see your creations. Share your edited photos in the comments, or tag us on social media. Happy editing, and may your visual stories always captivate!
Co-founder of RetouchMe. In addition to business, he is passionate about travel photography and videography. His photos can be viewed on Instagram (over 1 million followers), and his films can be found on his YouTube channel.
Moreover, his profile is featured on the most popular and authoritative resource in the film industry — IMDb. He has received 51 international awards and 18 nominations at film festivals worldwide.