


What is aperture and ISO in photography?
Apr 22, 2019
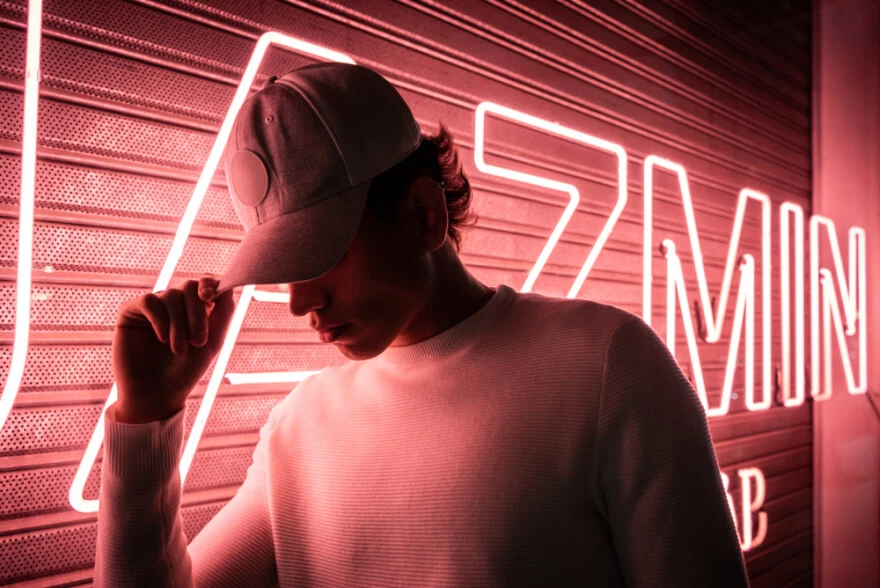
Lights of the night city always look bright and fun, like a holiday which comes after the sunset. Shop signs attract and promise pleasant shopping, the comfort of small restaurants and dancing until the morning. They inspire a long trip along the brightly lit streets to your favorite music and atmospheric photos in memory of pleasant evenings.
Neon photography appeared recently but has already got an army of fans. The main feature of such a picture is the use of neon signs and ultraviolet lighting. Signs usually come in different colors, shapes, and sizes, which makes them an attractive object. The best time to create a perfect image is sunset and night. It is that certain moment when such lights look best and for the same reason they are so difficult to shoot if you do not have much experience in darkness shooting. Remember to avoid daylight and to switch on the flash.

This article will give an idea of how everything works, what you need to learn, how to take stunning pictures and improve your skills in neon sign photography.
This is a shooting technique in which the main role is played by a neon light source. Such pictures are most often taken outdoors in the dark using slow shutter speed, but sometimes photographers create such lighting in a studio.

To start working, you will need:

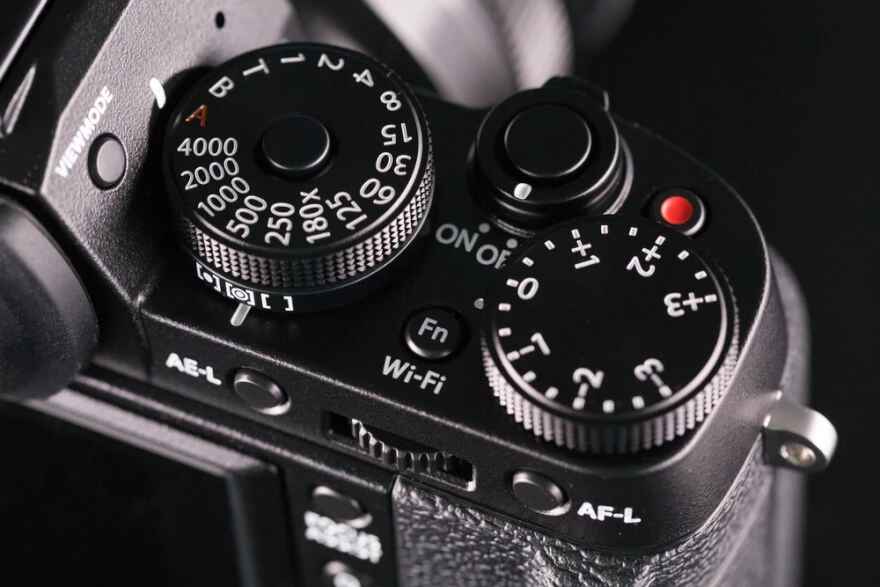
Let's look at the camera settings:
For neon lights photography, the aperture should be between f / 2.8 and f / 5.6 to get well-lit images in low color conditions. But keep in mind that a large aperture will create a blur effect of the background and will not catch all details of your composition. This is ideal for fashion images of shop signs on the streets of a night city. If you shoot in a studio, the aperture should be smaller. For studio shooting, it should be f / 1.4 and f / 1.8.

Set the ISO value to 100 if you are using a digital camera. ISO is usually associated with a high grit, but this should not stop you from experimenting with the ISO value. Since you will practice almost noir pictures, most likely you will have to use a high ISO to get bright and sharp results. This may create noise, but you can hide unwanted noise with the correct exposure or graphic editing.

Make colors appear correctly, by adjusting the white balance according to the lighting at the shooting location. Shop signs come in bright and unusual colors that will look too saturated in your pics. If the white balance is wrong, then pictures will look unnatural, this will be especially noticeable if there are people on them.
When trying neon photo effects, adjust the metering, otherwise, you will get blurry spots instead of bright signs. Fix the measurement in exact metering mode, after that set the measuring point on the sign to check that all details will be displayed correctly.

We recommend setting the shutter speed to more than 1/100 of a second and using a tripod to avoid unnecessary vibrations. Do not forget that almost all signs blink, and their different parts do not light up at the same time. The shutter should be open for several seconds.

Take a few test shots with different settings to understand what is right for you. RAW format is the best option, so you can save more image data, which will make your results better and facilitate their further editing. The RAW format has a larger file size and is more difficult to convert, but after shooting it will be more convenient for you to process than standard JPEGs.

If you are planning on a neon light photography, wait until evening or dusk, the contrast between the darkness around and the backlight will be perfect. Usually, the largest number of signs is located precisely in the center of a big city, where it is always noisy and crowded. The most difficult thing is to find a place where crowds of people will let you concentrate and calmly take pictures without disturbing. Therefore, it is better to immediately find a street in surroundings with a small number of people, even if there will be fewer signs on it, but you will have more time to slowly work.

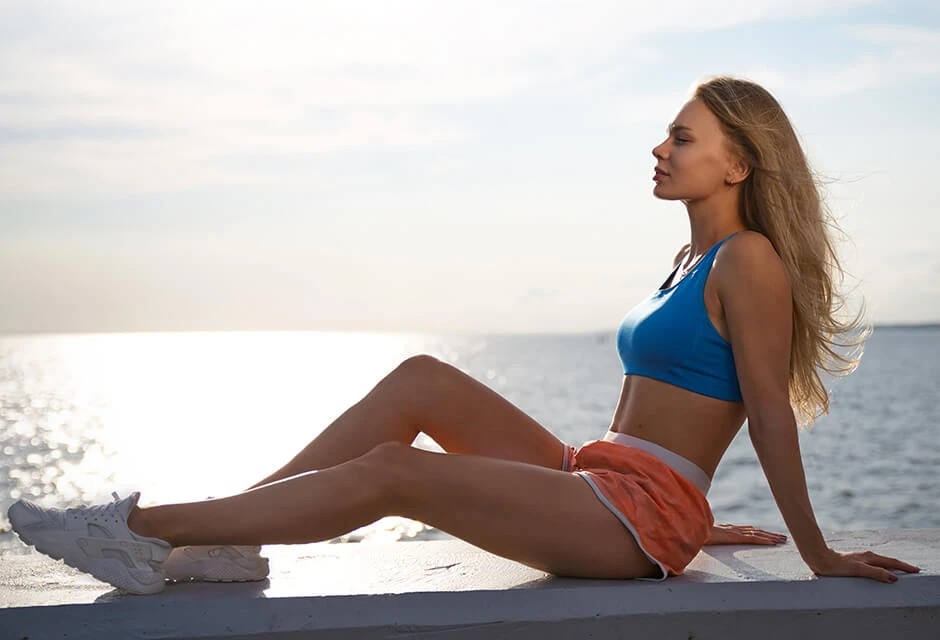
Invite a model to pose and make some stunning portraits. Everything you need is a beautiful display booth or signboard and ask the girl to sit next to it. The best combination of colors for shooting models is considered to be blue and pink. To avoid unnecessary shadows on the face, use a reflector or do it later with a neon photo editor. If you want to enhance the effect of a backdrop, ask the girl to wear glasses, whether ordinary or sunglasses. Cool lights reflection will give the impression that the eyes are shining. The most important thing is that the photographer is not reflected in glasses. Choose the right angle for shooting to avoid defects.

Street action is largely dependent on weather conditions and if the rain on the glass looks amazing, then you are unlikely to want to get wet and hurt for the sake of a few successful shots. If the weather wants to ruin your plans, we have good news: it can be arranged at home. It will not require any extra effort: you will need a computer or TV, a lamp and a camera. The open desired image on a computer or TV, on the other hand put a lamp or reflector and that's it, your own neon space is ready. In addition, find several objects to create reflections: a prism or a CD. Do not hesitate to experiment with different items and paints. A reflector is also useful to direct part of light toward the model from the opposite side of the TV. When taking such photographs, place the model as close as possible to the light source. This will reduce the sensitivity of the camera and reduce shutter speed.

This is a very interesting idea since at home you can spend a lot of time on such a survey, without regard to the weather or rental time of a studio. You can try a lot of shiny or light-refracting objects to get an interesting effect. It is a much more interesting way to use a TV for shooting portraits than to watch some stupid channel. Getting more practice you will be able to publish own tutorials and articles to help newbies in this art.

Another tip is photographs of cars that rush through the city at night and remain in your images. Night shots of roads with bright traces of moving cars look very impressive and quite easy to obtain. Put the camera on a tripod and use a shutter speed of at least 30 seconds. Cars themselves will not be visible, and their headlights and sidelights due to their brightness will be covered by colored stripes and will correspond to the trajectory of movement. So you can shoot not only cars but also boats in the port and planes flying above your head.
One of the most easiest but appropriate ways to get the necessary picture is to retouch it carefully with a specialized editor. View the number of software in the app store of the phone and choose the one which will make you gain the best results in a shorter period of time.

Do not get tempted by automatic modes and adjustments which makes the camera. It is smart and professional, but not artistic. Only a photographer has to decide which elements should be enhanced or hidden in the picture. Create own point of view, avoiding too sharp or blurred images.

A summary of settings for neon portrait photography:
Professional photography provides tremendous opportunities for creating exciting and creative shots that will decorate your collection of photographs and will delight your friends and colleagues. Do not be afraid to experiment and look for new perspectives in this bright and original urban genre!
Co-founder of RetouchMe. In addition to business, he is passionate about travel photography and videography. His photos can be viewed on Instagram (over 1 million followers), and his films can be found on his YouTube channel.
Moreover, his profile is featured on the most popular and authoritative resource in the film industry — IMDb. He has received 51 international awards and 18 nominations at film festivals worldwide.


