


Shutter Speed Photography
Feb 19, 2019
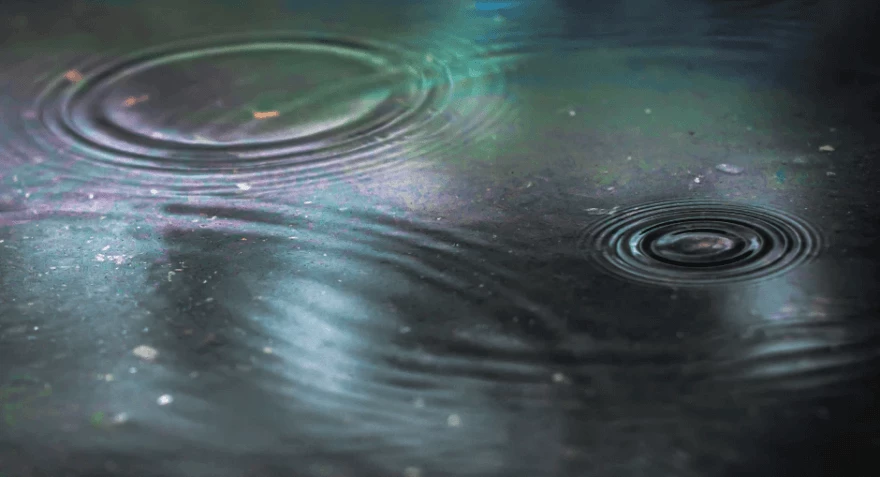

Water is not only the most important substance for all life on our planet but also a source of inspiration for many photographers. Almost everyone has seen mesmerizing photographs depicting water droplets taking on the most bizarre shapes.
It may seem that such pictures can only be taken in a laboratory, or, at worst, in a professional photo studio. However, this is possible even at home. In this article, we will figure out how to get an artistic image of a water drop photography, with only basic photographic equipment plus a little patience and imagination. We will not use chemicals and colouring. We will achieve everything not with the help of the laboratory, but with the help of photographic technique!

If your camera has manual mode and interchangeable lenses (or at least macro mode), this will do. It is also important that the camera can work with a remote flash (which is also needed). A professional-grade DSLR can provide excellent image quality. But Nikon cameras have another plus: the presence of the Nikon CLS (Creative Lighting System) system, which allows remote control of external flashes without additional equipment, which will help us a lot in our work. All Nikon SLR cameras can control external flashes from a distance. If your camera does not have such a system, the external flash units will have to be controlled in some other way.

Why is not flash on the camera or built-in flash work for such a shooting?
Firstly, frontal soft lighting is the least advantageous from an artistic point of view. Second point is that very often in macro shots, this option is not at all possible: if the flash is in its usual place, then the light from it will not hit the subject. The subject being shot is a few centimeters from the lens, and it will always remain in the shadow.

First, organize the "film set". Place the water container and the "dropper" above it. It is better to determine the height of the optimal location of the "dropper" experimentally, but you can start from the values of 30-50 cm. Install and adjust the flashes. If you have one flash, that's okay, you can shoot. But the more flashes you have at your disposal, the more options you have for customizing your lighting. Set up a remote flash operation. Switch both external flash units to Remote mode. Flashes will be controlled remotely, they will be "commanded" by the built-in flash of the camera. In the corresponding camera menu.

Focus manually, no autofocus will have time to catch a drop in motion. The task is to focus the lens at a certain distance, in the place where the drops will fall. Since the shooting distance is very small, the depth of field will be scanty. The focus must be adjusted as accurately as possible. This can be done as follows: let the water in from a "dropper" and substitute any small object under the falling drops, focus the camera on this object. The second way is to pull down a thread with a needle from the "dropper" hole and focus the lens along the needle. Remember that autofocus must be turned off during shooting, otherwise, at the moment, you press the shutter button you will simply lose focus without taking a shot.

The shutter speed should be equal to the sync speed (x-sync) of your camera. Remember that the real ultra-fast shutter speed will work out the flash pulse. Close the aperture to F16 to obtain sufficient depth of field (so that a drop would fit into it), and select the ISO depending on the situation. Feel free to raise the ISO (within reasonable limits!) if your picture comes out dark. If raising the ISO is not enough, set the flash units to a higher flash output: 1/64 or 1/32.

The essence of the filming process is simple: drops fall from the "dropper" and press the release button at the moment they come into contact with water poured into the main container. It won't be the first time to make a good shot! Be persistent, watch the results you get. Be careful not to lose focus.

The advantage of aquaphoto is that water landscapes are all around us. And just about every form of water can look good in pictures. You can even find great shooting locations right outside your home. And if suddenly it seems to you that "something" is missing, you can go further. Large surfaces as ponds, rivers, lakes, and seas can look very impressive in the frame. Look at the surface at sunset, you will be surprised by what you see.

The resulting image directly depends on exposure. The shutter speed may be the same, but the picture changes dramatically when the exposure changes. Therefore, if you plan to use a gradient filter or ND filter, tightly clamp the aperture for greater depth of field, you will need to use a tripod to minimize camera shake and be able to capture water at slow shutter speeds. Note that the movement of the water will be blurred and the painting will look more fabulous. There is no reason to shoot only at sunset. Take pictures all day long. Shoot large scenes. To prevent your photo from being boring, include a coastal foreground.

Prepare a glass or better an aquarium of 20-30 liters. No more is needed, and 10 is not enough. The glass around the aquarium should be clean and not scratched. The aquarium needs to be thoroughly washed so that there are no grains of sand, no dust, or lint in it. Take microfiber, such napkins are sold in stores, just for cleaning glass. Prepare the water in advance. If you pour water directly from the tap, then you will not get anything beautiful. Tap water is filled with the smallest bubbles, and they are something that will ruin your life. And the worst thing is that you will notice this only later when you open the image in Photoshop. The more still water you have, the better. Remember that in a plastic bottle there are only 5 or 6 liters and in an aquarium 20 or 30. Water with ink very quickly becomes dark (it still depends, of course, how much to pour). It is not necessary, but it is better to have water in reserve. At least for the second water change. The ink is shot through the light. There should be a uniform and bright light source behind. If you have studio equipment, then simply attach the softbox to the back of the aquarium. If you have an external flash, then you also need to put on a softbox or something like that. The misty effect of ink in the underwater is a great DIY masterpiece.

Coastlines look interesting on the surface. Trees, buildings, mountain tops, every element that is reflected in the water adds a kind of story to the picture. Note that some pictures can only be taken in very calm waters. Study the "behavior" in a particular area. It is easier to get a good image if the subjects are very close to a small water surface where there are no big waves, for example. The best candidates are small garden pools or small park lakes.
Place the horizon line quite high or low, when photographing. Due to symmetry, it will turn out to convey majesty and the photo will shine. But you don't have to stick to this recommendation at all costs; with a reasonably calm surface, you can even take great pictures without flash.

Backlit photos require special shooting skills. If you are lucky, the light will not be too intense and your camera will be able to capture the picture in full dynamic range. In a pinch, the sun will be too "fiery" in the picture. And since it also reflects off the mirrored water surface, most of the image will be too bright.
If this problem is critical, there is an effective way to solve it. Take several of the same shots with different exposure settings. A built-in camera function called "Exposure bracketing" (or similar) is useful for this. When you activate it, the camera will take a series of shots at different rates when you press the shutter button. Next, combine the result into one photo in post-processing.

You can also use another trick for capturing reflections, use a polarizer. Rotate it until all unnecessary reflections disappear and you get a perfect water surface. Meanwhile, you should not always strive to completely get rid of the reflections. Because this is the feature of such a type of shooting.

Since fountains are usually small in size, they can easily be walked around and photographed from different angles. This way you can make many different images in just a few seconds. If the fountain is decorated with sculptures, you can adjust the shooting angle when they are reflected. This will give some more composition options. Experimenting with shutter speed can help bring your composition to life. Note that slow shutter speed will not freeze the movement, the drops will be blurry. If you want to stop flowing in the frame, use very fast shutter speeds.
Fountains photographed at night are another special case. In this case, you can use a tripod and long shutter speeds to capture beauty. It's also a great way to get a shot without tourists. The slow shutter speed works like an "anti-droplet filter".

Flowing water can be a great opportunity to bring an image to life. Most of the frame can be occupied by the landscape itself, and the stream can add dynamics to the composition. Pay attention to the shape of the stream. When it's just a straight line, you can get a good shot, but it won't be attractive unless it serves as a dynamic pointer and does not lead the viewer's eyes to important subjects. Look for twists and turns and fit them into the image.

Use brightly colored items so they stand out well against a black backdrop or colored wall. This will make the photos bright. If you are photographing small objects, try using at least 6-10 at a time. Try combining items of different sizes, colors, and shapes. The heavier the object, the faster it will fall, making it difficult to grab at the right time. To get larger bursts, use objects with a larger surface or let them fall from a higher position. Wash objects beforehand so the water stays clean for a long time. If the water becomes dirty, replace it. This is quite frustrating as the container is heavy and you will have to do this a couple of times. But the good news is that you will have to work less in post-processing and also get sharper, cleaner images. Make an unsplash video or a stopshot refraction

Go to the nearest body of water and shoot. The still life area that is near you can be very promising in terms of taking interesting photos of various colors and refractions. Use sun, rain, and the wet beach as your assistants. Simple objects can create an abstract meaning resulting in new art. Even a neutral oil splash can become a surreal portrait without any tutorial. Remember to regulate the focal length when trying underwater photography.
Co-founder of RetouchMe. In addition to business, he is passionate about travel photography and videography. His photos can be viewed on Instagram (over 1 million followers), and his films can be found on his YouTube channel.
Moreover, his profile is featured on the most popular and authoritative resource in the film industry — IMDb. He has received 51 international awards and 18 nominations at film festivals worldwide.


