


TOP-5 best Summer Photo Ideas
Aug 22, 2017
Underwater photography is an art that allows you to show an interaction of a human and various elements, water and light, harmony and chaos in nature. In recent years, this genre has become very popular, primarily due to technological progress, which makes it possible to use more and more sophisticated equipment. With a wrong approach and without preparation, this type of photo art can be dangerous both for equipment and for the health of the people. If you are going to try it while you are at a seaside, then you need to prepare in advance. This article will show the importance of safety basics and comfort for beginners, making high-quality images.

Important underwater photography tips to remember, thinking of how to take underwater photos:


Examining the subject is the basis for stunning pictures. This is a golden rule for every picture making guide. Acquaintance with behavior of underwater inhabitants is vital for a successful shot.
Small detail are of great importance for this kind of art:
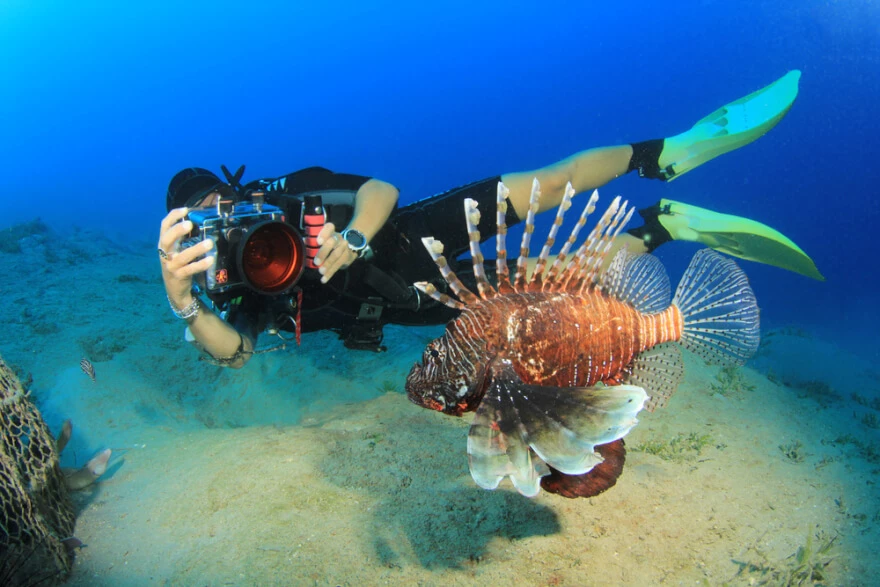
Scuba diving photography should guarantee safety for people and expensive digital equipment. A person working with a camera at a certain depth must have good swimming and diving skills. Being under water, the camera should be held with both hands, and during shooting , the body has to be fixed in one position for a few seconds to avoid blurring effect. This should be learned in advance so that when working, professionals will focus on the process itself, controlling body position.

Before attempting diving in the wild, it is better to remember that oceans are unpredictable. That is why it is better to start practice and improve skills in a pool. You will need a special waterproof camera case. Most popular compact and digital SLR camera models offer plastic cases, which provides a safe and sealed box for the device. This is a good option, because it also includes a polarizing filter, which will reduce glare and unnecessary water reflections.
 There is no need to purchase all possible equipment if you have not yet decided if this style is yours. A small digital device will be more than enough to begin with. It is important to secure its waterproof capabilities and add an extra protective box. In case you are the owner of a camera, which is familiar and easy to use, so go for it and jump into the nearest pool to try it. Many experts use tools which cost more than their houses and cars, but it does not guarantee a successful shot.

There are no drafts and tries in the ocean. All skills and techniques have to be improved at home. Because a shooting moment can be very unexpected and you have no skill and practice you will lose it. It is better to learn every process and spend much time practicing. It all starts with shooting technically correct images; with the right exposure, sharpness and with good composition. In addition to technique, you need to express yourself by showing a creative side and personality reflected in your works.

Shooting from the eye level makes sea scenes more voluminous. When shooting sea life from above, it seems to be a toy. Get closer and take pictures, so that everything in the picture looks bigger and more impressive. Compose your shots while looking at the LCD screen, try to make pictures even from below. This will help dramatically delineate boundaries and curves, which will add unique beauty.

Use a good old rule of thirds to achieve balance in your shots. Do not be afraid to try something new and interesting. Diagonals are also strong and dynamic! When shooting water life, try to be at an eye level with the subject. This will make pictures even more attractive to a viewer. Do not be afraid of an empty space, it works well in diving photography.

This type of shooting starts to be challenging when it comes to color reproduction. If you are working only with JPEG, initially adjust the white balance correctly. In case you use RAW, post-processing will give you more freedom to customize colors. The distance to the subject usually kills colors under the water! Using your own lighting will also help bring all colors to life.
An internal flash of your camera is limited, as it is just not powerful enough, and frontal lighting is not the best option (it aligns the image). The position and angle of the light source can reveal different shapes and textures, so if you are not ready to invest in a specialized flash, you can always start by experimenting with a flashlight.

This setting plays an important role in the quality of colors. It was already mentioned that underwater pictures suffer from a severe color loss. This is due to the fact that components of sunlight with a longer wavelength (especially red and orange) are quickly absorbed by water, so everything gets blue and green even for a human eye. The white balance should help in restoring accurate colors, eliminating dominating color shades. This is not the only secret of getting bright colors. It is necessary to increase the saturation level in settings (or set the exposure compensation to -0.7 EV). However, it’s better to take pictures in RAW format,instead of studying all possible camera settings, and correct colors as soon as a post-processing step starts.

Ability to choose a subject is an important skill for every photographer. When it comes to searching for an interesting model, there is always a chance to make a great shot of the one which is close to your lens. The subject matter does not have to be a rare fish to generate interest; it may even be something simple, but demonstrated in an extraordinary way.
The best time to make pictures during scuba diving is considered to be from 9 to 12 o'clock in the morning and two hours before sunset. This is the period of much natural light, and it enters into the water with a perfect angle. Choose a frame with the sun behind you, and its rays run parallel to the flash pulse. This trick will compensate for partial absorption of light.

Color of human skin looks the most saturated at a depth of thirty centimeters to one and a half meters. At greater depths, the colors become colder, and the whole image starts to "turn blue." Photographing from closest distance, water absorbs light, making the image faded and with a lack of expression. Try to shoot from the bottom or at the same level with the model. When shooting from the top, the image will turn out to be flat.

While most diving picture lovers enjoy embracing the beauty of the scene as a whole: shoal of fish, underwater creatures with a reef in the background or entire coral reef, it would be a good idea to experiment with macro images. Get ready to be closer to the sea inhabitants and capture with macro lens the smallest details, fragile textures and amazing ornaments.

When taking pictures in the sea depth, there are a lot of things that you cannot control. If the situation is not following the plot, do not worry and continue to work. Sometimes spontaneous frames surpass staged scenes with beauty and harmony. You can take pictures generally without any plot or idea. The most important issue is to capture the right moment.

It is better to properly adjust the camera directly in the moment of shooting. This will definitely save your time and effort. But when shooting in the water, changing camera settings for each shot is quite a difficult task. If you want to have fun taking photos while diving, it’s better to use RAW format. The necessary color balance correction, contrast enhancement, fine-tuning of sharpness and saturation will be done later with the help of professional software or mobile apps.

The latest iPhone models have not only improved cameras, but also waterproof abilities. So you can take pictures even swimming in a river. If you are not satisfied with factory settings and still have some worries about its safety, it is good to buy a special protective case. Basically, there are two options: soft, in the form of envelopes, and hard, in the form of sealed plastic boxes. The latter are available with built-in lenses and different functions, such as wide-angle or fisheye. Pay attention to compatibility with your iPhone model.
After swimming do not forget to rinse your iPhone with clean fresh water. This will protect it from possible corrosion. Before you charge and connect the gadget to your computer, wipe it properly and wait a few hours until it is dry.

Underwater photography is a great pleasure. Some people say it is difficult, others may consider it too expensive. If you decide to do it, then you need appropriate equipment and swimming skills. Be patient and persistent. Do not forget about composition rules and focal points. Practice changing camera settings, keep your breath calm. Finally, do not be afraid and unique frames will not make you wait long.
Co-founder of RetouchMe. In addition to business, he is passionate about travel photography and videography. His photos can be viewed on Instagram (over 1 million followers), and his films can be found on his YouTube channel.
Moreover, his profile is featured on the most popular and authoritative resource in the film industry — IMDb. He has received 51 international awards and 18 nominations at film festivals worldwide.