


New Year Photography Ideas and Tips
Dec 17, 2020
Night is an attractive and mysterious time of our lives. And getting new experience is a curious practice. Number of professionals and amateurs publish their works, looking for reasonable estimation and advice. Technical and creative issues play an important role for all photographers. However, there are many technical tools that you need to know in order to get acceptable photos.
Get started with a quick list:


It is obvious that preparation of your device for work at night is much more challenging than during the day or at home. Remember that all possible camera settings and accessories should be checked and located in proper places. Playing with buttons and changing lenses during the night will take much time and patience, instead of making great shots. Imagine yourself to be blind and prepare your camera like you are in the dark room without possibility to control bags and pockets.

If you want to get high-quality shots having a walk in dark time, then you need maximum quality of the file itself, which means shooting in RAW format. In this case, your photo will contain maximum “information” for post-processing, which will give a wider choice of tools to improve the picture. RAW option is especially important for night time photography, because it will retain necessary shadows and highlights. It will be easier to control white balance at home and adjust it with necessary software. Because working outdoors without any light source makes simple things difficult and more errors may occur.

Night photography implies a little light and long exposures, often more than 30 seconds. It is clear that capturing landscapes with hands and keeping the camera absolutely still is unreal. So if you want to shoot at night, it is always better to get a tripod, otherwise sharp shots are almost impossible. In case you can choose a heavier tripod, it will guarantee detailed snapshots without blurring. It is very good if there is a hook at the bottom of the central part of a tripod that will allow you to hang something on it that will make it heavier. This could be, for example, a bag or a backpack. In addition, it is not recommended to hold it with your hands during shooting. In other words, minimize everything that can move the lens after you press the trigger. Even a small inconspicuous movement can give a blur in the final image.
When using a long exposure, even pressing the shutter button can spoil the shot. If the camera has a remote control, use it. If not, use the built-in delay timer to release the shutter. Night shots rarely require haste and instant reaction.

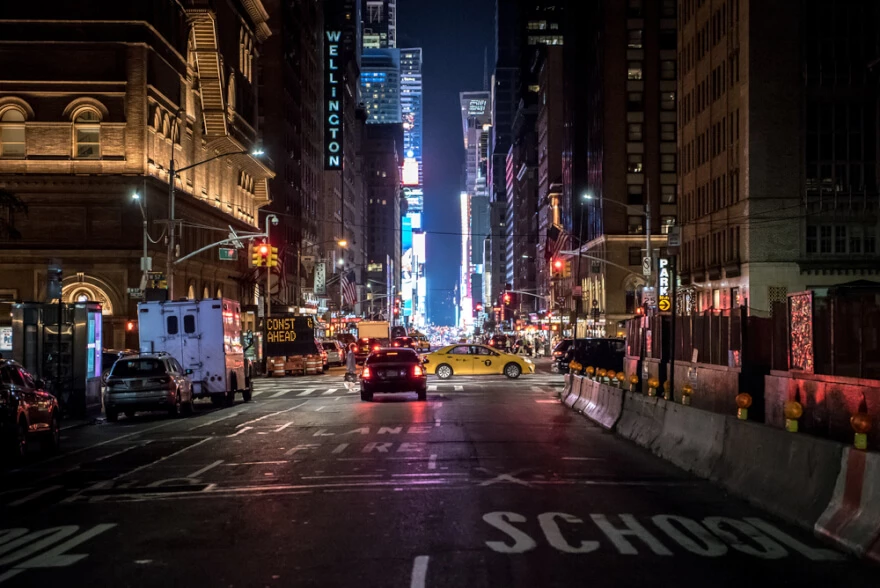
Before you go to take a picture, get acquainted with local sights, city buildings and bridges. This will save your time and allow you to quickly get what you want. Find a good spot, evaluate the lighting at night. If you decide to shoot architecture, estimate the traffic depending on time and place. If you want to capture traces of headlights from passing cars, go for it. In other words, find in advance the place where your planned shot will look best. Places which look gorgeous during the day will not always be that awesome at night and vice versa.

When choosing a right exposure level, do not exaggerate with a choice to achieve artistic effect. Even a professional photographer will usually use from f/8 to f/16, but there is no exact rule here. It makes sense to find average levels for a specific lens. Even expensive professional lenses do not always give the best picture at minimum and maximum aperture values. Secure yourself and increase the chance to get a good and sharp night shot.

The best option is to switch the camera to manual mode (M), so that you can choose a combination of shutter speed and aperture that will give the best result. A good way is to first set the aperture, for example at f/16, and then, focus on tips of exposure to pick up the shutter speed. Take test shots and rate the result with different settings. If the picture is too bright, decrease the speed, too dark, increase it. Remember that the optimum choice, according to digital electronics, will give too bright a picture. Reduce the exposure and the result will be more realistic.

Carefully analyze the scene before taking a picture. Which frame parts are located in complete darkness? Which parts, on the contrary, are too illuminated? How should it appear in an image? Think about every detail. Great contrast between bright and dark objects is especially important to consider when shooting at night. Feel free to use a zoom or find a point that will allow you to get the optimal composition.

Usually, strangers interfere with us during the shooting. But when it comes to night shooting, crowds of people can add variety and a certain charm. If people are still, they can be used as "silhouettes." If you are in motion, then at shutter speeds of about ¼ -½ seconds, you can get an interesting “creative blur” effect that emphasizes movement.

The choice of ISO depends on a type of shot you want to take. For urban scenes with a long exposure, using a tripod, you can choose ISO 100-200. This will help to reduce the level of digital noise and keep maximum details. If you shoot something that even at night requires a relatively short shutter speed, then use the highest ISO possible, when the camera can guarantee good quality images. In addition, remember that very long exposures cause heating of a matrix, and this can lead to a significant noise presence even at low ISO level.
Still, high ISO values, increased possibility of color change, sharpness and dynamic range decrease. If you do not want to get muddy, you should not overestimate ISO too much. Make sure that sensitivity does not rise above 1600-3200.
Usually, an overestimated ISO results appear due to improperly adjusted shutter speeds and apertures.

Blurred images can show one landscape with different moods and effects. It is very easy to achieve with night photography tips, presence of a tripod and long exposure. Try to capture the road with a saturated motion at a shutter speed of 2-5 seconds and individual lights of headlights of passing cars will turn into shiny flare rivers.

It is best to use both. Use autofocus firstly, then change to manual to hold it. Then your camera will not try to “hunt” objects, when the lighting changes and you have to re-focus every time you take a test and select optimal exposure values for the image. If the scene is too dark for autofocus to catch the necessary object, then use only manual focus.

Different hours allow you to get different effects. It is curious that the best time for night shooting is not always a deep night. Often, interesting pictures are obtained at dusk, when lights are already burning, but the sky has not fully darkened. Smart combination of electrical and natural lighting helps to create a truly unique picture. You are unlikely to be able to photograph beautiful clouds, if you are covered with darkness, although in the evening it is quite possible.
It is important to realize that night images must be dark. Do not get obsessed with too long exposures — overexposed shots will most likely be impossible to rescue even using post-processing programs. It is better to shoot the same story at least three times: a little darker, a little lighter, etc. Check several options before choosing the one you need. You are the one to decide which is better.

If you are using automatic white balance control, then it is possible to destroy even the most elaborated frame. Digital devices at night are not able to decide which setting will be right and appropriate. To be more confident and to avoid failure, use manual balance. Try setting Cloudy ~ 6000k, if you want a warmer, more yellowish picture or “artificial lighting” ~ 3200K to get a cooler picture.

If road traffic and headlights require an exposure of 30 seconds, then the star trail can take from 30 minutes or more. There are two methods of shooting. One shot with super long exposure, then series of shots with a shorter, and after that subsequent gluing. The first method can be used if the camera is equipped with a possibility of "infinite" exposure and noise reduction system at high exposures. Even at night, the sky is not as dark as it seems to us. And its light with a long exposure will lead to a very faded and bright sky. You can use a series of snapshots and then glue them together using special apps and specialized software. Take pictures at a shutter speed of about 30 seconds. Try to make as many pictures as possible to guarantee the best result and more options to choose from.

There are experts, which can make images without movement even when the shutter speed becomes longer than 1/60 s. Certainly, it depends on shooting conditions and skills level. But not all of us are able to press the trigger smoothly without creating camera vibrations. In addition, maximum speed for hand shooting also depends on the focal length of the lens. The larger it is, the sharper and the shorter shutter has to be used.
Carefully follow the exposure when photographing: if it becomes longer than 1/60 s, then it is time to change the approach. If you are shooting in A or P mode, you can increase the ISO or slightly open the aperture. If you are shooting in S or M mode, you can set the speed itself. Do not forget that if our object moves, the speed should be used short enough so that the subject does not become blurred in the frame. For example, a walking person is better to shoot at 1/125s, and a running person — at 1/250s and shorter.
But long exposures, with a beautifully blurred motion in the frame are not possible to shoot without a tripod. After all, you will have to shoot several times, achieving satisfactory picture quality with your own errors and experience.

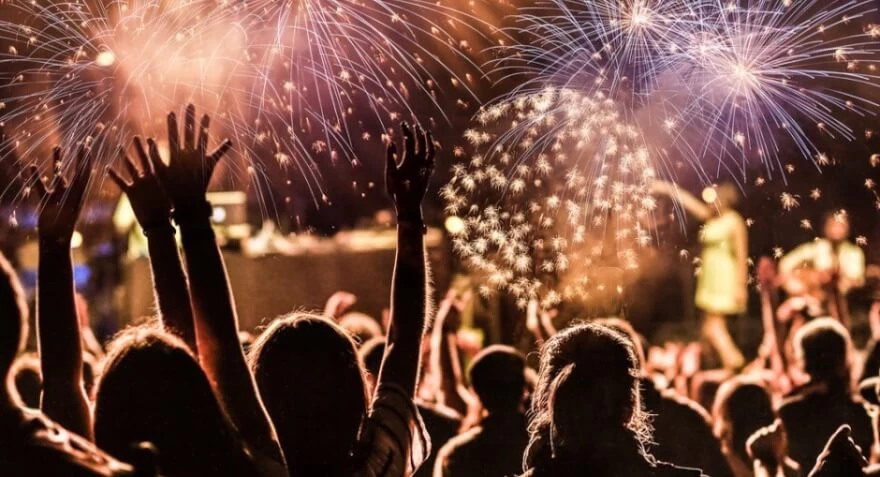
Of course, dark effects add mysterious touch, but more lights will add more options. If you have more light at your disposal, then better shots will be made and post-processing work will become easier. Look for places with street lights, lanterns, shop windows and advertising. Use them! Usually the best option for a photo is in the city center, especially on holidays. New Year illumination and sparkling accessories will help to get a proper night shot.

Aperture setting is a characteristic of every single lens. May the light pass through the lens. This will help to decrease ISO level. For shooting without a tripod in low light conditions, it is better to use high-aperture lenses. They give excellent image quality, allowing to shoot even at relatively low ISO at night.

In winter batteries discharge quicker than in summertime. Especially when you shoot with a long exposure. In order not to end up with a discharged camera keep 1-2 extra batteries warm and charged. So that you can possibly replace them if it is necessary. In addition, avoid frequent temperature change which causes condensation and fogging of lenses, and sometimes to serious problems with electronics.

Photos made in the evening and at night look unusual: moonlight and electric lamps transform the landscape. Your task is just to capture it artistically and technically. Night shooting is actually not that complicated. And even newbies can master it with patience and strong will. Everything you need is basic understanding of all elements and their smart combination in various digital devices. This knowledge and variety of online tutorials will contribute to the best results. All pictures are worth trying and even sad mistakes are going to become important lessons on your path.
Co-founder of RetouchMe. In addition to business, he is passionate about travel photography and videography. His photos can be viewed on Instagram (over 1 million followers), and his films can be found on his YouTube channel.
Moreover, his profile is featured on the most popular and authoritative resource in the film industry — IMDb. He has received 51 international awards and 18 nominations at film festivals worldwide.


