


Action photography tips for beginners
May 4, 2020
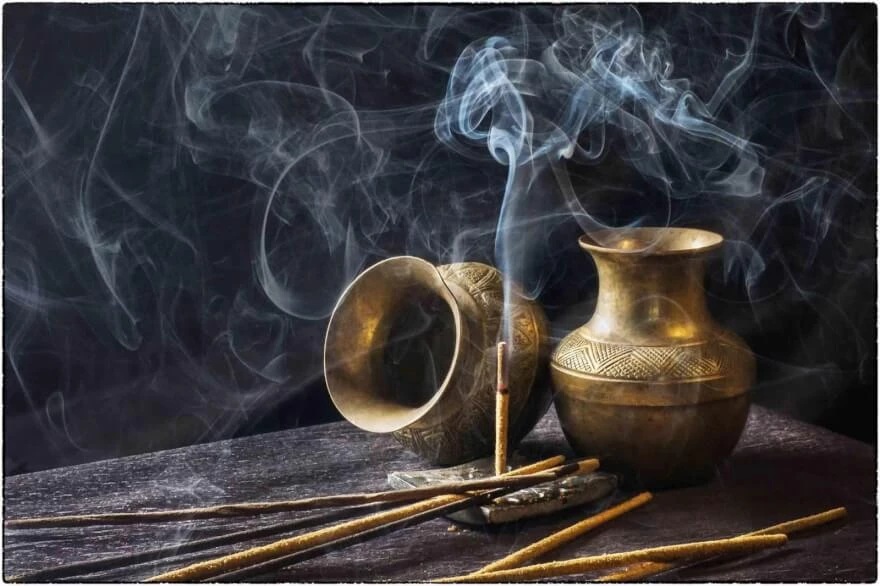
There are many kinds of photography, most of which are well known, but there are also niche areas such as smoke art photography. Such a natural phenomenon as smoke is not easy to capture in all its glory. Photographers have to be skilled and have a good technique doing it to get a nice and smooth picture. Today we will talk about the best way to photograph different manifestations of smoke and how to create different scenes with it.
Our smoke art photography tutorial starts with setting up the scene and doing the right conditions to get the best shots. It includes camera settings as well. But 1st thing we got to think about is what we are going to actually shoot because there are a lot of sources that produce smoke. So here we come with some smoke photography ideas:
The list could be longer, but the concept would not vary a lot, it is more about the scene setup and camera settings.

Shooting put-out candles, we need to be aware that we are shooting in low light conditions. That way, we set ISO to 100 to overcome the lack of light. Set your aperture to f/8 to remain the smoke in focus. Shutter speed set to 1/200 will get more live effect for the smoke. These camera settings are good to start with, and you can slightly adjust them in order to match your conditions, depending on if you are shooting with a sort of background lit from the other candles, or if you have a completely different lighting setup.

Besides the camera settings, we also need appropriate equipment in a line with it in our studio.

Now we have adjusted our camera settings, but before performing smoke photography, we need to make sure that all of our equipment is set in a good way too. Check if your backdrop cloth is stretched enough against the wall to prevent any background texture to appear on it. Set your smoke source 1 foot away from your backdrop. Make sure that your flash is in sync with your shutter speed. Position your lamp looking directly at the tip of the candle or the incense. Your reflector should be in the opposite direction towards the lamp. Establish your camera focus on the tip of the smoking source, that way the smoke itself would stay in focus too. Completed that last step, and now we are ready to perform smoke photography. Do 3-4 shots of your scene and check for results.
Another common way of doing smoke effect photography is to make a portrait of the smoking person. Hard to say why, but a pretty girl with a cigarette still causes more interest in the photo, especially if everything is set up in the appropriate atmosphere and in a good fashion way. We think this is caused by women just doing it with elegance.

Doing smoke portrait photography, we need to adjust our settings for new conditions.
Since here we will have less emphasis on the smoke itself and more on the girl, and the cigarette smoke will be used more as a prop, we will need a more open aperture and lens. This will allow us to capture more light in the frame for our model. In addition, we need to raise the ISO value. A good note here is that you can always compensate for different light conditions with the settings and vice versa, all you need is just to understand how the settings work here. If we compare aperture, shutter speed, and ISO with a bucket of water, the aperture would be the bucket diameter, shutter speed is the time you spend pouring water in it, and the ISO is the value for the amount of water. So keep that in mind and interchange the settings if needed, considering the light conditions themselves.
The 1st tip for doing a smoking person photo is to partially highlight the face of a person. Make the light going align diagonally including most of the forehead part and tighten up to the chin level. That way the smoke will be highlighted going up into the light area of a frame and the other part of the face would stay in the shadow, less exposed. That is a good atmosphere photo.
Another tip is about doing black and white smoking photography.
Here we can play with the contrasts even more. More shadows and highlighted areas build up a vintage atmosphere. What is good about B&W photography is that colors are so simple that even low definition photographs would look smooth. Because the main issue is the color mixing up into noise, depending on 3 major camera settings (Aperture, ISO, Shutter speed). Here you can raise values and get different effects with it without spoiling the image.
After shots have been taken, you need to go for slight editing in the Lightroom or Adobe Photoshop, it is a matter of your choice and preferences. Editing photos even out many flaws with color corrections using software tools. Make sure to not overwhelm the image with effects, it is for corrections and improvements only. If the photoshoot setup is great, you do not even need editing at all.
Co-founder of RetouchMe. In addition to business, he is passionate about travel photography and videography. His photos can be viewed on Instagram (over 1 million followers), and his films can be found on his YouTube channel.
Moreover, his profile is featured on the most popular and authoritative resource in the film industry — IMDb. He has received 51 international awards and 18 nominations at film festivals worldwide.


