


Beach Photography Ideas and Tips
Mar 15, 2019

Shooting panoramas is one of the most commonly used techniques in landscape photography. If you do not limit yourself to the academic definition, then we can say that a panorama is an image assembled from several sequentially taken photographs.
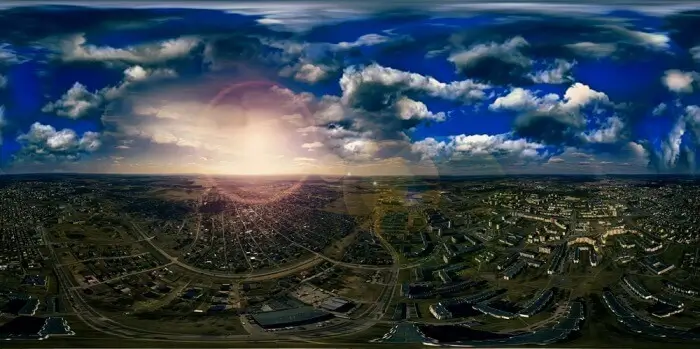
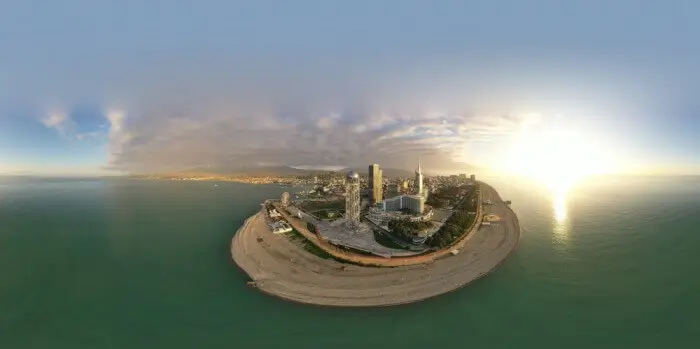
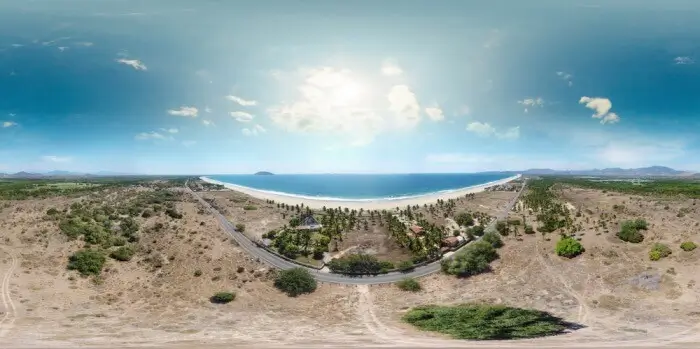
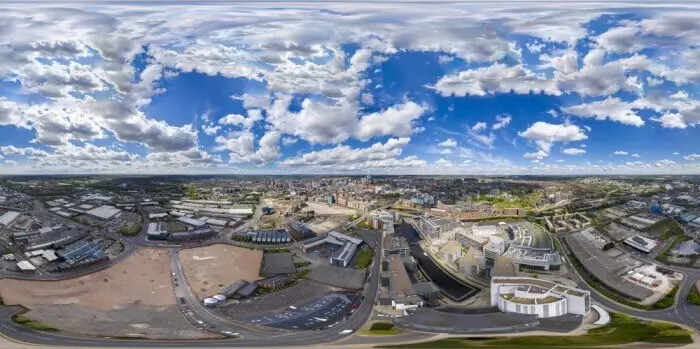
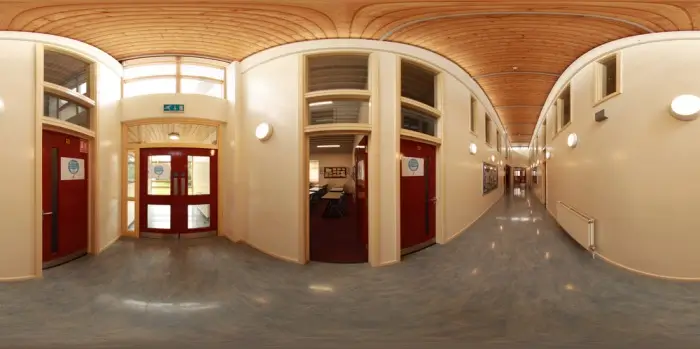
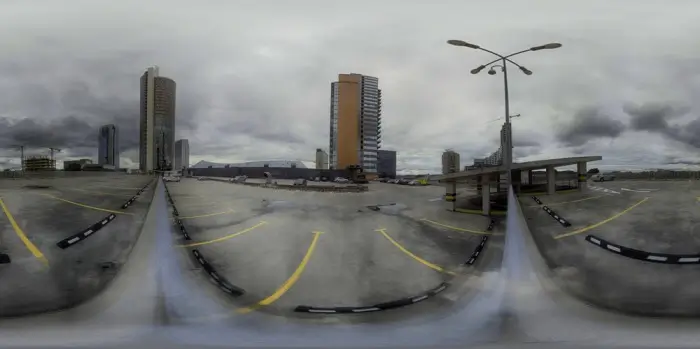
One of the most illustrative uses of spherical panorama projection is to take photographs with a viewing angle of 360 degrees horizontally and 180 degrees vertically.
The projection of a panorama onto a sphere is primarily intended for working with spherical panoramas with a viewing angle of 360 degrees horizontally and 180 degrees vertically. When the horizon is set correctly, it keeps vertical lines vertical, with horizontal lines beginning to bend as they approach the camera. As such, this projection does not give distortion at corners, and it does not have corners as such, giving the same distortion over the entire area.
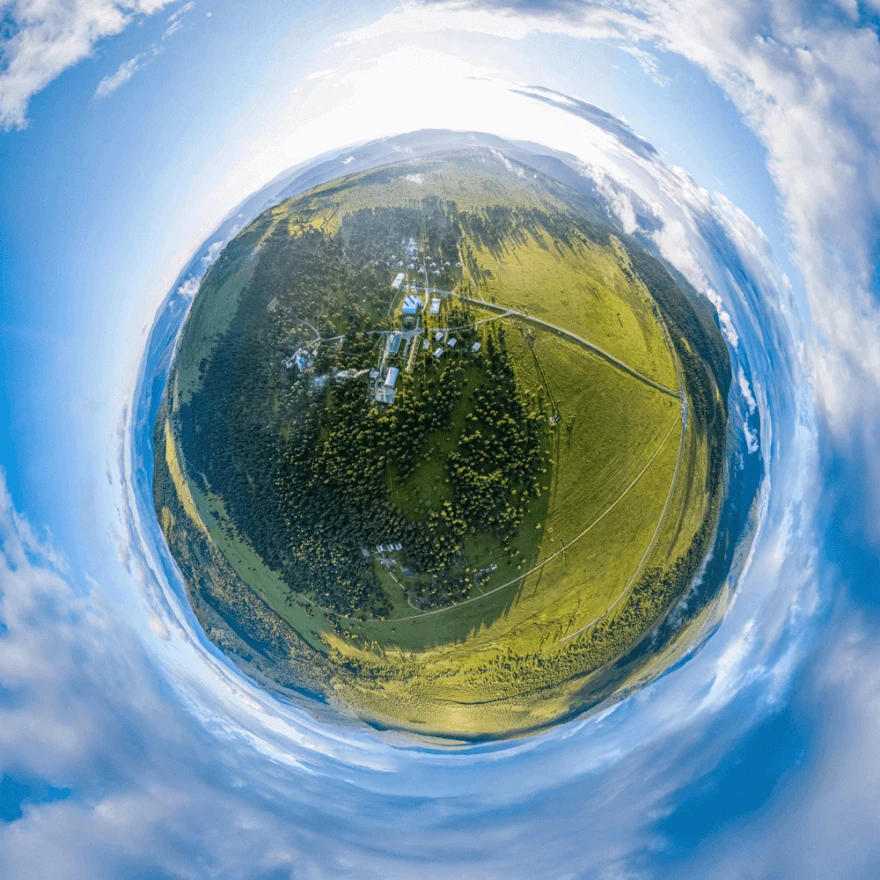
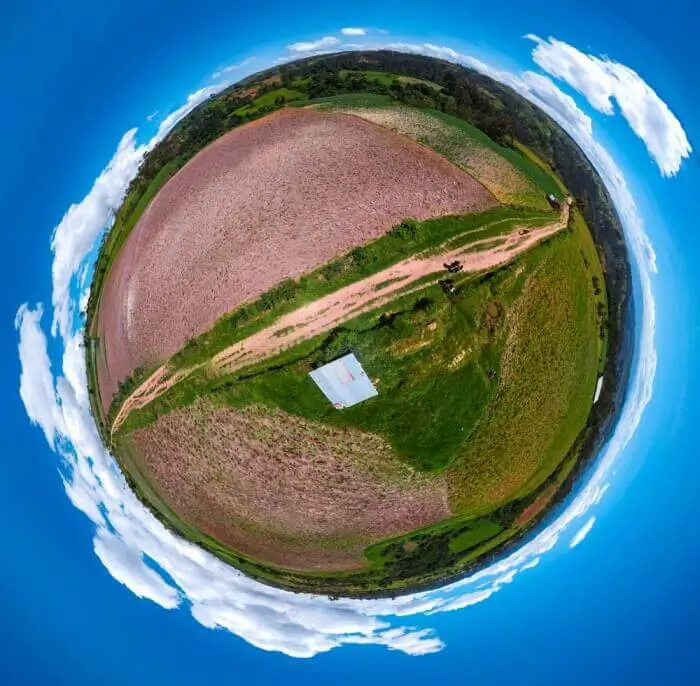
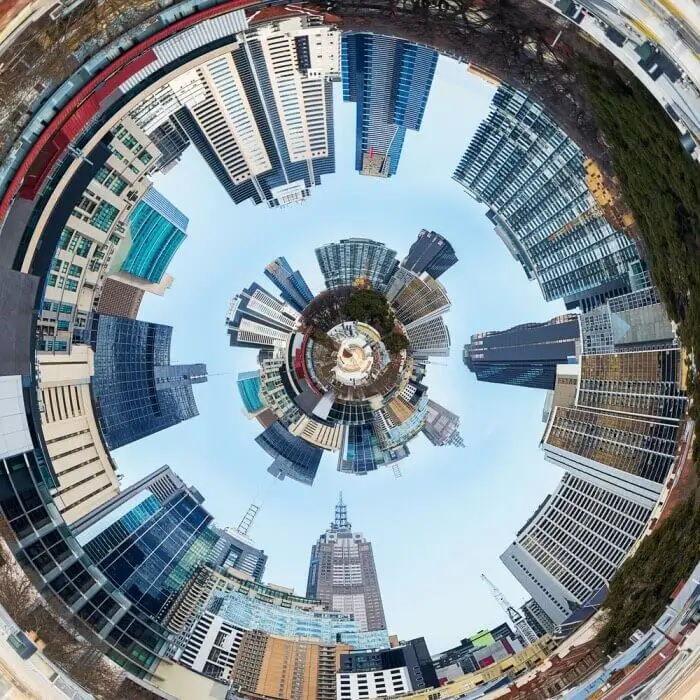
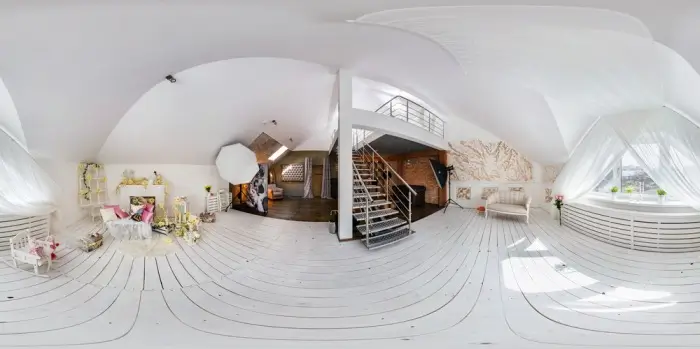
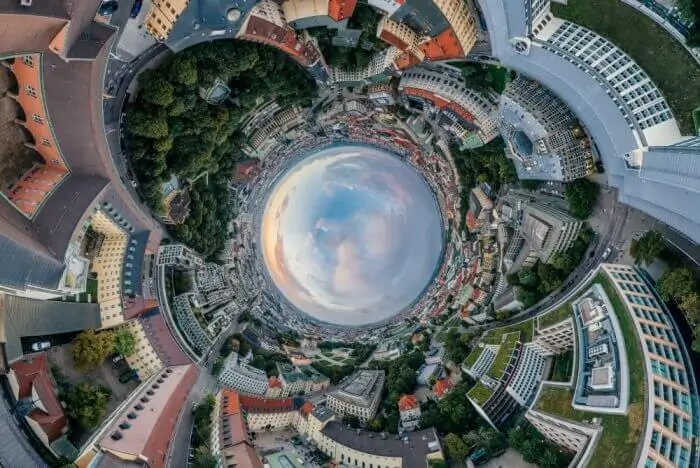
The difference between a spherical projection and a cylindrical projection lies in the flattening of the upper and lower parts of the panorama, while the spherical projection compresses the image vertically as much as possible as it approaches the image border, and the cylindrical projection, on the contrary, pulls it off. For example, this photograph is a panorama of two horizontal frames, and it has an almost square aspect ratio. As a result, 360 photography is an image obtained by stitching several frames taken sequentially from one point.
There are very wide-angle lenses that can cover horizontally almost up to 120 degrees, there are fisheye optics, which, despite serious distortion, are capable of producing a very large viewing angle. But there are scenes in which you want to take an even wider-angle shot! And it is not always possible to take or purchase the widest-angle lenses with you, and the need to shoot a scene wider than the available optics can do can sometimes arise unexpectedly. In this situation, 360 panoramic photography technology will be an excellent solution to the problem. With its help, we can, for example, have only a 35mm lens in our arsenal, take several shots on it and get a picture similar in viewing angle to 17mm optics.
Modern cameras allow you to take pictures of high resolution, however, the panoramic technique can be a serious plus, because just as there is no limit to perfection, there is never too much resolution. More megapixels means better print quality and more framing freedom. Also, the cost of top-end cameras is quite high, while a similar resolution can be obtained by combining just a couple of frames, even from an amateur camera.
It should be noted that it is far from always worth chasing resolution because when shooting a large number of frames, we significantly lose efficiency and problems arise when there are moving objects in the frame, which also creates additional difficulties. However, having such a technique in service will not be superfluous.
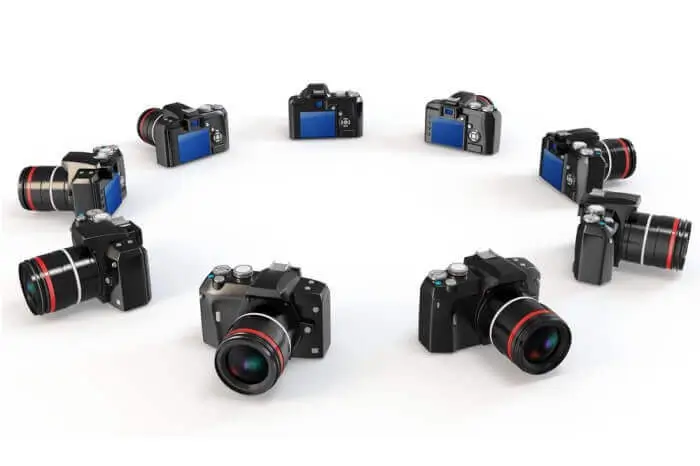
Shooting 360-degree photography is simply impossible without the use of panoramic technology. The process of shooting is not that much different from shooting a regular landscape. It is just that instead of one shot, we shoot several, slightly rotating the camera to a new position. There is an opinion that the rotation of the camera during such a shooting is carried out only in the horizontal plane, but it is completely irrelevant. Providing the necessary overlap of frames, we can shoot and collect shots both horizontally and vertically or in several rows. It depends on the idea and characteristics of the scene being filmed.
The percentage of overlapping frames is worth mentioning. It is important to understand that the overlapping of frames is done so that the collector program can set control points, to determine the same fragments of the landscape for neighboring frames. Thus, the overlap value directly depends on the detail of the scene and its features. For example, if we are shooting a tree in fog, it would be perfectly logical to make the overlap up to 80 percent of the frame, making sure that the most noticeable details fall into this overlap. When shooting a city in which the landscape is replete with a lot of different details, a minimum overlap of 10–20 percent will be enough for frames to "catch" each other. Shooting a daytime scene at short exposures, the lighting conditions change quite weakly. But when you shoot at relatively long exposures in the evening or night, the risk of getting frames with different brightness or other effects is much greater.
One of the main requirements for shooting 360 spin photography, helping to avoid complex assembly, is the rotation of the camera around the so-called parallax-free point. Often it is mistakenly called a nodal point, which formally does not correspond to the truth, but at the same time does not change its essence. In a conversation about rotation around a parallax-free point, it will be useful to define what is parallax, which has to be avoided.
Parallax is a change in the position of the captured object relative to the background. The easiest way to notice this phenomenon can be by putting a finger in front of your eyes, first looking at it with one eye, after the other. At the same time, we will notice that when viewed with different eyes, the background details, covered by the finger, will change first. If we look not at a finger, but at another object located at a greater distance from us, we will notice how the parallax phenomenon is minimized, which allows us to judge that parallax creates the most problems when shooting with a close foreground. While having the closest objects at a distance of 3-4 meters from the camera, we will get not so serious differences in the superposition of foreground details on the background. Shifting the point of view by literally a few centimeters makes the difference in background overlap.
As it was already mentioned, parallax has the greatest effect on objects close to the photographer. This means that from a certain moment, for example, when shooting without foreground or when shooting a distant place with a telephoto lens, you can rotate around a different point as close as possible to the parallax-free position.
In landscape, and especially in street photography guide, when shooting 3D panoramas, it is much more logical to use horizontal framing. That does not prevent us from using any variant of the camera position, even at an angle, making diamond-shaped photographs. The main thing is that it should be logically justified or a reverse version.
Somehow not all photographers can consider themselves simple viewers to understand the final result. Among the most important skills is the capability to see the picture before you capture the frame. 360 images are not an exception, moreover, this photography style needs a very accurate understanding of the idea and plot. No guide that will direct you to a secure way to make perfect 360-degree photography. Of course, there is an app and software or many other ways to correct visual errors or mistakes at home.
Be more specific with your shots. It implies that you're investing energy and time just on those clasps that are critical to you. Being particular will also make your battery last more.
Any moving light source will leave a trail behind when shooting at long exposure. When shooting in low natural light, in the evening, at night, or in the morning, car tracks can become a serious artistic element in both urban and landscape photography. By lengthening the shutter speed to the time the car travels through the frame, we get a solid line.
We may encounter a situation when, during assembly, the tracer rests not on the edge of the panorama, but the edge of the frame. As a result, we get a tracer interrupted in the middle of the image, which was unlikely to have become as planned.
There are several ways to solve this problem:
The solution to the problem lies in increasing the shutter speed, so that the number of cars passing through the frame increases, and the visibility of each tracer decreases. Besides, similar trajectories of vehicles with normal traffic and a sufficient number of duplicates will make the joint less noticeable.

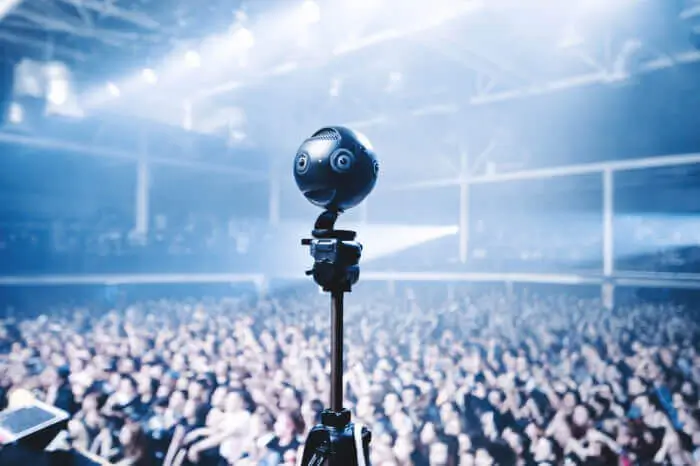
From control devices to electrical segments, spherical photography of various goods and products is the best tool to give visual data that guarantees the trust of a future client, looking at the screen.
While exploring items on the web, people need to basically "contact" the item, especially if it is a jewelry piece. 3D photography permits individuals to pivot, squeeze, and focus in on rings, details, and quality to see everything about the product. Retailers and brands utilizing this shooting method online experience higher purchasing rates, fewer item returns, and more prominent consumer loyalty.
One of the distinctive features, which often makes it possible to distinguish a frame shot with ultra-wide-angle optics from a panorama, is the appearance of its projection.
Projection is a panorama assembly parameter, which is determined directly during processing. At the same time, often photographers already during the shooting must have an idea of what projection he will use.
For a better understanding of this effect, just compare the globe and the world map. After all, the world map is the surface of a globe adapted for a two-dimensional drawing. A kind of orange peel, which was spread over the table surface.
Based on the appearance, two radically different types of projection are distinguished:
As the viewing angle of classic non-fisheye optics increases, we notice the distortions characteristic of wide-angle and ultra-wide-angle. Corners of the frame begin to pull back, the objects closest to the camera increase in size relative to the objects of the middle and background. We observe the same effect when converting a panorama to a plane projection. That is, the projection onto a plane is an imitation of conventional wide-angle optics. Thus, by stitching together many frames shot at an average focal length of 50mm, we can get an image, in terms of angle of view and distortion, similar to that of a wide-angle lens used for shooting.
This type of projection has certain limitations on the viewing angle - upon reaching a very wide angle, say 120-130 degrees, the image becomes almost unreadable due to incredibly hypertrophied nearby objects and strongly drawn angles.
Such a panorama has a projection onto a plane, which allows it to keep straight lines straight and not visually different from a single frame made with wide-angle optics.
But we have all the advantages of classic ultra-wide-angle optics:
When it comes to an artistic shot, and with a smaller angle of view of the panorama being shot, we can distinguish the following positive projections:
Such picture mode guarantees demonstrating all the parts of a room from all edges. This image furnishes organizations with a great number of computerized resources that can be utilized for a variety of requirements, for example, in-store shows, email offers, online business sites, and AR/VR applications, without reshooting an individual location and place. On the web, people can utilize a mouse or touchscreen to "turn" the picture, intuitively pivoting and focusing on different parts of a house to see explicit details.
It is amazingly significant for online purchasers today. Photography will show you genuine photographic adaptation with the capacity to focus on specific parts.
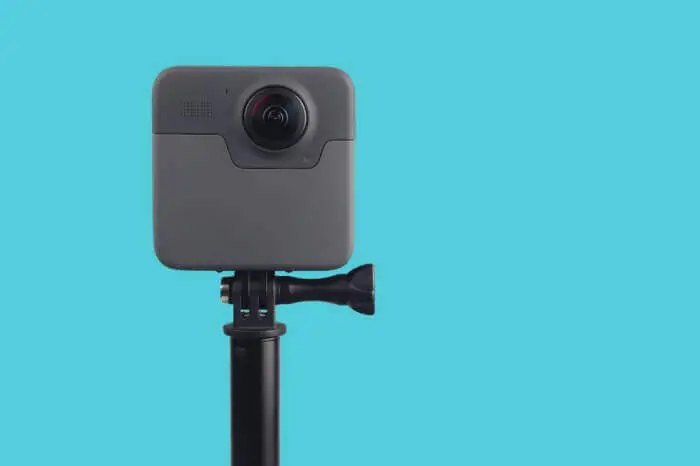
There are no serious requirements for the camera, it is important that it can save exposure settings from frame to frame, the presence of either a manual mode or a well-thought-out semi-automatic. Further, as in classic landscape photography, it will not be superfluous to be able to manually set the white balance so that this indicator does not change from frame to frame.
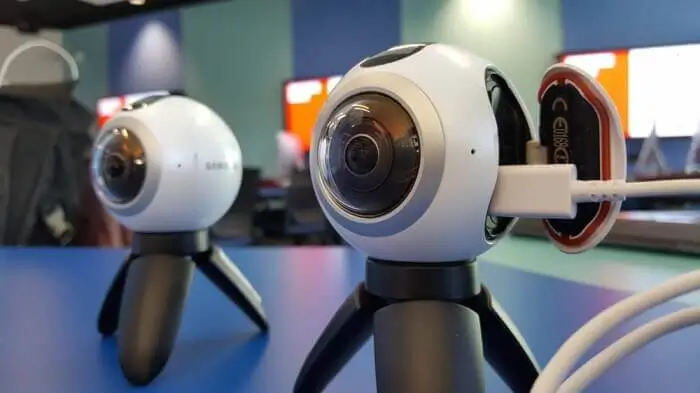
Otherwise, there are absolutely no restrictions, panoramas can be shot on various cameras, as well as smartphones with iOs or Android software, with the presence of the specified settings. Shooting with an ordinary digital device or phone, just the inability to save settings from frame to frame can significantly lower the quality of the finished product or greatly complicate the process. With a wide viewing angle, the illumination of the scene from frame to frame can change, and the camera's automation will adjust the exposure to average values.
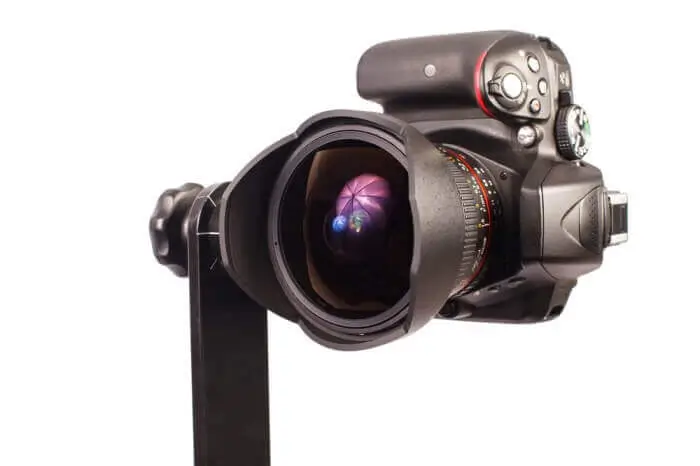
There will be no special requirements for the optics. The only exceptions can be attributed to the so-called creative lenses Lensbaby and monocles, which already hardly anyone seriously uses in landscape photography. You can shoot 360-degree product photography at any focal length. We can mention fixing the focal length and focusing distance - a slightly ridiculous requirement. There were cases when one of the lens wheels accidentally scrolled at the moment of camera rotation or the lens unit sagged under its weight, as a result of which the panorama frames were taken at different focal lengths.
In the simplest situation of shooting in a daytime, when the amount of light is sufficient, and the brightness difference between the sky and the earth fits into the dynamic range of the camera, we can do without using a tripod. It means that you can rotate around a parallax-free point by placing your finger under the lens or by tying a weight on a rope, which will act as a reference point that allows you to approximately maintain the axis and height of the camera rotation.

Let's think about when we need a tripod?
Panorama is an available and inclusive resource for private photographers and organizations to show required items, landscape, or person. One may be concentrated on producing images of a large number of items every day, which expands the throughput and speed of viewers looking and sharing pictures online.
3D panorama models have generally been utilized in movies and computer games. Nowadays many retailers have shifted to online sales and need 3D in their web-based business methodology. Panoramic models give the client a remarkable perspective on an article which demonstrates it’s quality and company AR innovation.
Hand-held rotation of the camera gives us some freedom in choosing the rotation point, but at the same time limits shooting only to bright, mainly daytime scenes. While rotation from a conventional tripod head, on the contrary, allows you to shoot almost any scene in terms of illumination and brightness difference. It forces you to rotate the camera relative to the axis of the head itself, which causes parallax and difficulties when stitching the foreground, as a result.
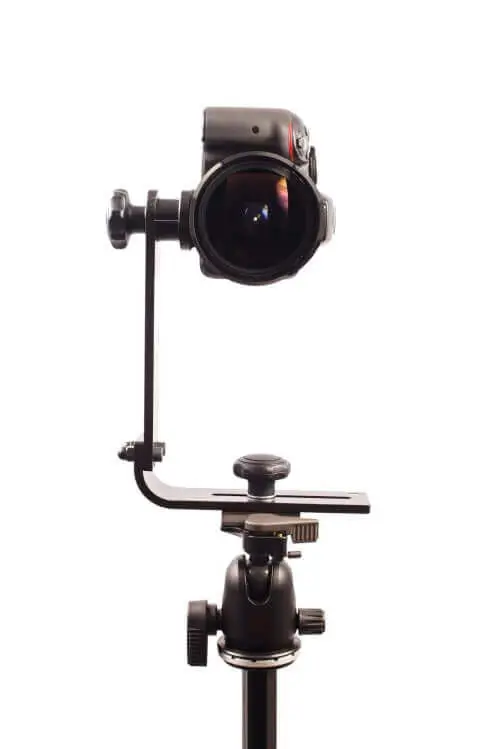
A panoramic head or a full panoramic kit helps the camera to rotate in two axes passing through a parallax-free point. This means that we can shoot panoramas in several rows, even with a close foreground, without fear that camera movement will complicate the process of assembling the panorama in the editor.
A horizontal rotator is installed on the tripod, a device that allows you to rotate the entire structure in a horizontal plane. This rotator has horizontal and vertical bars that carry the entire system outside the axis of rotation. A vertical rotator allows you to tilt and raise the camera and the so-called nodal slider. It is a bar, to which the camera is attached to and is brought out to the distance necessary for rotation relative to the parallax-free point.
A complete top-end panoramic kit will allow you to shoot very wide-angle scenes, including those with a close foreground, including spherical panoramas. Panorama mode on iPhone allows you to take vertical and horizontal panoramic shots, as well as macro shots with beautiful views beyond the usual format. This shooting method is ideal for taking photographs of landscapes, architectural groups, cityscapes.
Shooting spherical photos have little in common with the classic shooting of objects. That is why retouching should be done in another way. Considering the angle and plot of the image, use various tools to improve the idea. Download editing apps to apply different filters and editing tools to see the difference. Shooting with a handheld camera includes your hand, as you're holding the camera or a selfie stick. In these cases, if the plot does not include such an image in the picture, use eliminating brushes to stitch the photo, excluding objects which should not be present.
Try including a picture of the camera itself to try a creative way of shooting.
By default, shooting takes place from left to right. Direction can be reversed by touching the arrow in the center of the screen once. While taking a picture, the camera can be stopped by pressing the volume down / up buttons, which in this mode work as "Start". In the process, you need to ensure that the movement is not interrupted, and the arrow is as close to the middle of the image as possible. To take a vertical 360 ° photo, just turn the phone clockwise so that the start button is on the right, and move it from bottom to top during shooting.
The more excellent pictures you can give at various points, the better. The advantage of 360-degree photography is that it naturally delivers many ready pictures unbelievably rapidly. For certain item types, these pictures would then be able to be utilized in a cycle called photogrammetry, that utilizes programming to fasten various picture edges together to make a 3D.
Utilize a similar 360-degree photography cycle to catch broad visual data of items, including measurements, and reuse those pictures to make 3D models for your AR/VR item experience. This photography type and 3D models are both used to upgrade the item representation experience and increment buying certainty. There are different advantages while thinking about the incredible blend of 360-degree photography and 3D models. Use the option, which your fashion trend requires.
To obtain balanced brightness in some shooting conditions, it is sometimes necessary to turn off automatic exposure and focus. You can independently set a point for determining these parameters by touching the area of the image where an object of medium brightness is located. Also, this setting is relevant when creating macro shots, when the subject is at a small focal length. You need to hold the phone with both hands, while not stepping from foot to foot or spinning. To keep track of the horizon, you can turn on a special grid. When shooting from left to right, it is better to direct the phone with your right hand, without moving your left or changing the position of the index and thumb that fix the lens. When you finish shooting, the photo will be added to the Camera Roll. The image can be edited like a regular photo, add filters, and share with people a full, high-quality, artistically designed picture. All the features of the editor will help you study an independent review of the program.

Spherical videography and photography are where photographers utilize particular hardware to catch the whole perspective of a wedding scene, function, and gathering rather than only one level two-dimensional picture. Photographs and videos let you glance around toward any path from a solitary standing position thanks to an aerial view. Such a way to store memories is a great option for people who are using tablets. You can glance around to see the lady of the hour make her passageway by moving your gadget around to change the view (or tapping and hauling). In case you're in an internet browser on a personal computer you can snap and drag utilizing the mouse. Try such an innovative way to perform a wedding album.
Nothing ruins a picture like an unexpected and unplanned presence of a photographer, clustered over telephone squeezing the screen control, diverting from a generally intriguing perspective.
To eliminate your presence, it is enough to hide. A tree, or even inside a vehicle, for example. The key is truly knowing where and when you have a place in a scene. In an unblemished scene where you're catching cascades and birdsong, seeing you punching at your telephone is going to ruin the state of mind. In case you're shooting a bustling city scene, however, seeing you there fixed in the crowds of workers could make a good option.

At times we can modify our pictures just later, after our excursion. In any case, fortunately, adjacent to innovative camera positions we have different weapons on the spot, picking areas and finding the ideal camera position.
Choose "right areas", because it isn't just about looking for a pleasant spot to shoot. Pretty much every area can shoot an extraordinary 360 photograph, yet we need to locate the ideal spot there, as well. For example, we can mess with separations, moving nearer or further away from specific items, attempting to shoot unbalanced pictures.
It requires some training. If you are searching for a truly overall quite clear handheld shot, put your camera directly over your head and afterward move the picture toward transformed objects. Use a trick of putting a camera on the top of our head or use a selfie stick to put it much higher. Hold the camera straight, so subsequent transforming the 360 picture into a spherical panorama will be imperceptible.
Co-founder of RetouchMe. In addition to business, he is passionate about travel photography and videography. His photos can be viewed on Instagram (over 1 million followers), and his films can be found on his YouTube channel.
Moreover, his profile is featured on the most popular and authoritative resource in the film industry — IMDb. He has received 51 international awards and 18 nominations at film festivals worldwide.