


Lens Flare Photography
May 20, 2019
Studio photography includes many different genres and styles of shooting. Masters and professionals most of all appreciate beauty and fashion, as you need to completely think through the image of models, posture, light and photo filters. Such work should be completed without any flaws and inaccuracies. Talking about beauty shots, close-up portraits are often considered to be representative, which make visible all wrinkles and small flaws on a face. Preparation for such a photoset should be carried out carefully. Of course, you can fix everything and even add makeup using only editors, but does it make sense? The face will then look very artificial, which does not attract the attention of viewers.
This article will describe some technical tutorials to understand conditions which may affect the final result and of course key tricks of how to do makeup for pictures.

Before you start shooting makeup headshots, you need to choose a studio. Not every photographer has his own premises for shooting, so it’s better to choose an already prepared studio. In new premises there may be lack of light, shadow, backdrops and other poor conditions, including small areas. If the ceiling and floor are too close, lighting from the flash can be ugly dispelled. Also, make sure that walls are not too bright. It is better to have special studio props for a perfect picture. Well, if the studio has professional equipment, it can also simplify the work of an artist sometimes.

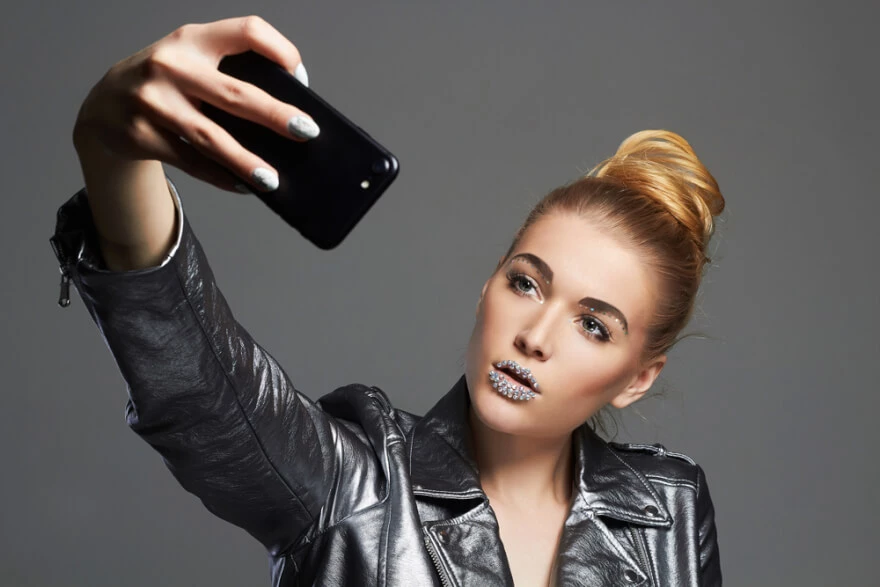
Makeup photography is a special category of art. Here, the brightness of colors and textures is of senior importance, since lighting equipment often "eats" the contrast in make-up, making it calm and sustained. If we want to create a truly spectacular image, then we will have to use cosmetics generously. Such make-up may seem too bright to the model, and the layer of tone and powder too dense in comparison with what is used in everyday life, but all doubts will dissipate after taking photos.

The camera, unlike the eye, is much more sensitive to skin defects, so the first step is to equalize the overall tone of the face and mask existing problems: blue marks under eyes, inflammation, wrinkles, signs of fatigue. This will do the right base for makeup, foundation and correctors.
The main problem of skin in a photo is oily shine, so choose matte tonal tools. The texture should not be too liquid (transparent), but not too dense, in this case there is a danger of getting a flat, inanimate face in the photo. It is also preferable to use dry correctors (modeling powder), they look much more advantageous, making skin velvet. It is better to use a transparent powder, it is lighter in texture than a compact one, but it mates the skin just as well as the first one. With an open dress on the neckline and shoulders can be applied a little bronzing powder with a slight shine, which will give the skin brightness.
For the eye area, it is important to choose a means of light texture, because too dense correctors can emphasize wrinkles under eyes.

Great attention should be paid to correcting the shape of the face, because due to the bright light sources used at photo shoots, the face of a model without additionally added reliefs will look flat. Correction can be made with dark matte powder after you have applied a tone and powdered skin with a transparent powder. The main areas of correction are zygomatic dimple, temples, hairline, wings of the nose. It is also necessary to emphasize the chin line so that it does not merge with the neck. These are basic guidelines to make up your mind on makeup photoshoot ideas.

What is the difference between everyday eye makeup and makeup for photo? Colors should be applied a little more brightly than usual, but the feathering should be done absolutely smooth and symmetrical.
Ideally, at least three colors should be chosen so that eyes do not appear flat on the image. An important point: if you first powder the eyelids a little, shadows will not roll down and hold on for a long time, conveying all the color saturation.
It is desirable to use matte or satin shine shadows; in the photo they will look brighter than the shadows with shiny particles. It is best not to use red and pink shadows, which will make eyes painful, if this, of course, does not contradict the plot.

By emphasizing the outline of the eyelids with a pencil and shading it, you will create a soft smoky effect that does not allow eyes to disappear in photos. To make your eyes larger, use the kayal of light shades, puting it along the line of the inner eyelid.
Eyelashes need to be thickly covered with mascara, in a makeup for photoshoot it is almost impossible to overdo with mascara. For filming it is very convenient to use false eyelashes; do not be afraid that they will look unnatural: the main thing is to choose the right length and gently brush your eyelashes with a brush.

It must be remembered that in a black and white shot every dark color will turn black (or almost black), and any light color will turn almost white. For example, bright red lipstick will come out almost black, as well as, for example, bright green shadows. Therefore, you should not let your eyes down with a blue, green or black pencil, because they give too sharp colors.
In black and white photography, clear lines are very important: underline contours of your face, eyebrows, lips. In a lip make-up you should prefer a rather light matte lipstick, in the center you can put a highlight on the transparent gloss. When performing makeup for such a shooting, it is better not to use mother-of-pearl and violet shades, because it often looks bad.
If we talk about the photoshoot makeup tips in general, then the cosmetics on the face should be enough, but it should look stylish, creating a single frame. Smooth complexion, velvety skin, thick and unrealistically long eyelashes, clear eyebrows, pronounced cheekbones, inviting lips and eye catching can become a key point of perfect makeup for a picture collage.

Planning yo go outdoors you need to consider all possible weather conditions including wind and rain, even snow sometimes. Because even the most expensive equipment can prevent wet hair and mascara all over the face. Only beginners can make such a mistake of not considering weather an important part of the process, which can help or destroy the process.

You need a camera capable of transmitting good details. In this respect, cameras of early models are fundamentally different and those whose matrix size is 24x35 mm. The latter (with a large matrix), picture will be much better, but the price starts from $2000. Sometimes for a makeup artist a good old DSLR is more than enough. Cameras costing up to $2000 differ from each other mainly in ease of use and speed. If you slowly take pictures in the studio, the speed does not matter, and you will quickly get used to the arrangement of buttons. So just take the one that you have best in your hand. If it is a Canon or Nikon, the easiest way is to pick up accessories. Well, of course, the newer the model, the more likely it is that the picture quality will be better.

Bad news is that the usual 50mm lens does not suit you. There is a common misconception that 50mm is a portrait lens and is sometimes advised to make-up artists. Although it is for you that it does not fit categorically. In my opinion, the best option for you is a portrait lens with a focal length of 85mm. Sometimes in order to show the texture, photographers take beauty headshots with a macro lens. But such shooting requires a lot of hours of retouching afterwards, and if you know how to do this, then you probably don’t need to download any tutorial.

Option one, cheap and nice, is a camera flash of a camera model (like Nikon SB-700) aimed at the ceiling. At the same time, the ceiling should be white or gray (neutral) and it is desirable that walls should also be neutral (that is, not colored).
Option two is a right one to buy studio flashes.
If you are photographing wedding models with excellent skin, I suggest taking one flash with a portrait plate and a second one to illuminate the background.

If you are photographing models with skin that is far from being perfect, then it is better to take three flashes and two softboxes for them, for example, 45x45cm. Softboxes are needed to get a soft, light and shadow pattern without sharp shadows.
You need to put flashes on something. That is, for each flash you need a stand.
One more thing, if we use a flash with a portrait plate, then we will need a reflector. It must be kept by someone, or if you don’t have free slaves, you need to take a reflector stand and reflector holder.
Control if you remember all the tips and have made the list of equipment which is going to help. Such an assistant will work like a phone app reminding every time how to take makeup pictures.
Co-founder of RetouchMe. In addition to business, he is passionate about travel photography and videography. His photos can be viewed on Instagram (over 1 million followers), and his films can be found on his YouTube channel.
Moreover, his profile is featured on the most popular and authoritative resource in the film industry — IMDb. He has received 51 international awards and 18 nominations at film festivals worldwide.


