


Types of camera lenses
Sep 9, 2020
How do you frame your shot to make your stories more interesting? How can you draw attention to your subject by using composition? There are a lot of different compositional techniques in photography. Most of them even stated as rules such as Rule of Thirds, and Rule of Leading Lines are the most common of them and well known. In line with these rules, symmetry also takes its place. In this article we will explain the rule of symmetry in photography, how it interacts with other rules and techniques, and see all that in examples.
If we define symmetry in its purity then it is a compositional technique where the image could be flipped around the axis and the result would stay the same. There are three lines of symmetry in photography: we can flip the image horizontally, vertically, or rotate it radially. Symmetry could be stated with lines, objects, and colors, so whatever mirrors nearly perfect has symmetry in it and could be used for framing. What symmetry does as a look is it cleans thighs up. It makes things look neat, tidy, and clinical. The best way to find symmetry for your composition is if you like to travel with your photo gear. You can find symmetry pretty much everywhere, as you will start actively looking for it.

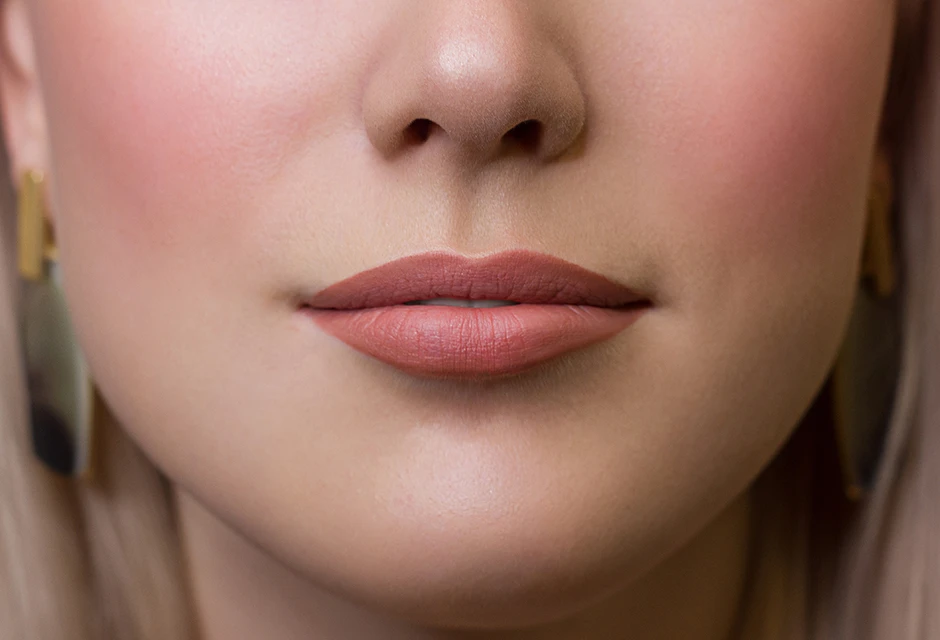
Symmetry is also known as centering. As they say, symmetry is what makes an extremely attractive person attractive. The same goes for an aesthetically pleasing photo.
Centering and symmetry are techniques that involve placing the subject in the center of the photo. This creates a sense of balance because it is evenly distributed on both sides. The best way to use this technique is to imagine having the image down the middle and making sure both sides are like mirrored images of themselves.
As there are over dozens of compositional techniques out there, it doesn’t mean that they contradict each other. On the opposite, they may even complement being part of each other.
Such techniques as Leading Lines and the Rule of Thirds are good examples. So let us define each of them and see how they interact with each other to improve your composition.
When you are in photo school the rule of thirds is one of the things you learn first. It is a compositional guideline that breaks your frame down into thirds. There are two horizontal lines and two vertical lines effectively breaking your frame into nine sections. It also creates four power point crosses. These are fantastic areas in the frame to place your subject because the viewer’s eye is drawn to these cross points according to the rule of thirds. According to the rule of thirds, positioning your subject on these third lines will improve the composition of your photography. The easiest way to start implementing this technique is to go into your camera settings and turn on the grid lines. Most cameras have this functionality, you just turn it on, and suddenly through your viewing screen you can see these rule of thirds gridlines, and you can start framing up your photos or even videos to fall on these lines.
If you just pull out your camera and frame the subject as it is, moving it to thirds lines you will see dramatic difference in how much better the shot appears. There is a real emotion that rule of thirds helps to convey to your audience. If you shoot horizon, you might want it to fall on the top or the bottom of the horizontal third as opposed to the center of your frame. It is going to add more emphasis to your subject and to the composition of your shot. A ton of Hollywood movies use this technique, and you can start noticing that watching your favorite movies with the rule of thirds in mind, and you will see how many shots follows this rule.

What rule of thirds has to do with symmetry? Well, the grid lines create 9 sections as we said before, using power points of the lines’ intersection is a good way to frame your shot. However, with the grid line, you can also be centering. The centering technique is reserved for authority or for teaching. You will notice that in videos or photos, the teacher is often center-framed looking right at the camera. So this is not exactly following the rule of thirds but showing the authority of the person who is teaching or influencing you by breaking the rule of thirds to some extent.

These are visual pathways taken from things within your environment. So if you go out and shoot, look for some of the natural lines in your environment that might come from a fence or a building or roads and rivers and use these to draw the viewer’s attention to your subject. These are great for portraits as well. Put some lines in the back of your subject to help again draw the viewer’s eyes in towards whoever or whatever it is you are shooting. As we mentioned earlier, most TV shows and movies use leading lines to help show where a character might be going, or they help draw your eye toward where you want to be looking on the screen. You also break this rule and make chaotic lines to help confuse the viewer or the subject in your frame. Leading lines could be used in combination with the symmetry rule, they do not contradict each other and can follow each other. Imagine you have a road or a river used as a leading line, and then you have 2 mirrored sides on the left and right that follow the symmetry rule in addition to the leading lines. You can place your subject in the center with the leading lines going to the center or behind the subject. Only your imagination here is the limit, but knowing other techniques will also help to improve your symmetrical compositions that way.

Balance and symmetry in photography are usually going along through the composition. A good composition supposes to have a balance in the frame which compliments the symmetry as the balance is an essential part of it. If you have one side of your frame that has a lot going on and not a lot is going on the other side of your frame, you might want to start thinking about this tool. How can you balance shots like this? Well, if you are taking shots of an interview where you have your subject on one side of the frame and not a lot on the other, try adding something to the other side of the frame. It could be a lamp or a portrait or something that can help to balance things out. Having everything balanced out helps your viewer feel a lot more calm and relaxed and at ease. As for symmetry, here we can fill the frame with something mirroring each other. For instance, speaking about the interview, we can frame the shot to see both the interviewer and interviewed person in the frame and some balancing furniture in between, such as a lamp or anything else. This will follow both rules at once, the rule of symmetry, and balance, and you can also apply the rule of thirds here.
The best example that most of us can observe in real life would be an image of a railway station, where we see 2 ways and the middle platform where we can accentuate the subject in the middle while both sides of the railway station stay mirrored to each other. By doing this we create a sense of balance in the photo and the viewer’s eye will be drawn to the subject without being distracted by interiors and other elements. It also helps when you use symmetry when combining objects in the background. For example, try placing two trees or two people on each side of your subject for a symmetrical composition.
If you live in a city, the best place to go looking for symmetry is a business district with loads of glass buildings. Glass can reflect and mirror the image with the right angle used, therefore if you have a hard time finding natural symmetry you can also be tricky.

When you do symmetry photography, small body adjustments are really important here because we need to find a perfect angle. Make those micro adjustments of your body a little left or right to get everything bang symmetrical and level.
Symmetry is the most common appearance in nature starting from animals and ending up with landscapes. Horizontal and vertical symmetry could be found everywhere, for instance, we as a human have vertical symmetry in our bodies alongside most animals.

Horizontal and vertical symmetry also could be found in landscapes with developed mountains and rivers, and it mostly depends on the angle you shoot.

Radial symmetry has lots of examples in nature, and we will show the best examples in the paragraph below. It deserves a specific place in this article due to its natural beauty that we only notice at a subconscious level but we never look at it from the math standpoint and perspective.

Symmetry is an essential part of nature. As we have mentioned earlier a person is more attractive to us if he has good symmetry in his face. But that symmetry is bilinear, which means we can flip the image over only left or right to see it is the same. There is also radial symmetry exist, which is as rare as wonderful at the same time. Let us take a look at the examples that can naturally apply radial symmetry in photography.
The water biome has it in its purity. And the best example is starfish. It has perfect radial symmetry, which means however we rotate it, it still stays the same.

Have you seen a spider net? What does it look like to you?

Flora is also rich for that occasion, while photographing flowers you can also see how they form radial lines of symmetry.
Have you ever noticed radial symmetry in bee hives? They form their Honeycombs in the shape of hexagons to bring the dust collected from the flowers that have the same radial symmetry. Is that coincidence or related?

How about going somewhere outside the earth? The first thing that comes to mind is the way galaxies form. It has pronounced radial symmetry on the most global scale we can imagine and observatories capture this all the time.

If we talk about symmetry in its purity, which means that we can flip the image and see pretty much the same shot, horizontal symmetry is one of the ways to represent that. Horizontal symmetry has good use in landscape photography. If you have a hard time looking for other compositional techniques, you may find symmetry around you much easier. As we mentioned an example of a shooting glass mirror of business centers, we can find the same reflections in nature. And the best example here is to use lakes and rivers to reflect the background.

For instance, we have a mountain in the background with the flowing river beneath or the lake that we can reach out to. Angle your camera towards the water to get the perfect symmetrical image. That way the reflection of the mountain will be presented in the river when the river itself splits the image horizontally. That is the way you do symmetry photography in nature.

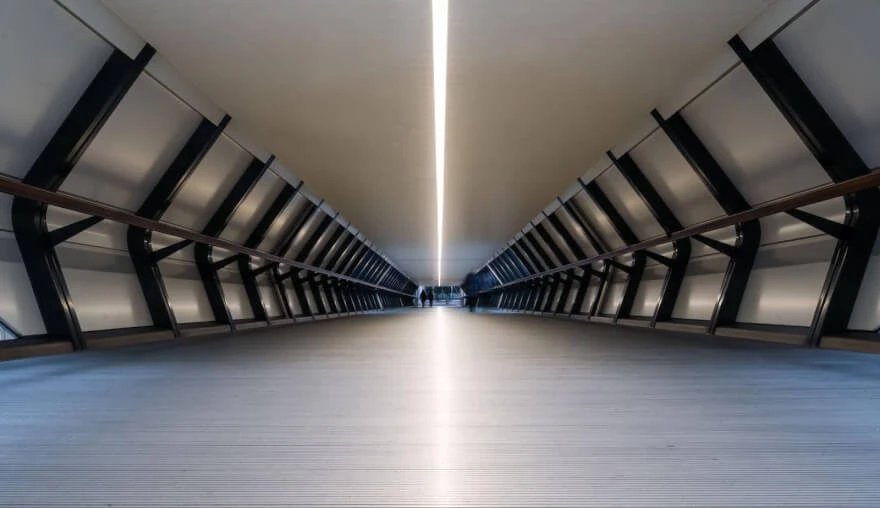
Vertical symmetry has lots of examples everywhere. Place your subject on the bridge, and you will see how the railing forms vertical symmetry if you shoot it from the right perspective. Vertical lines mean that they go from the bottom to the top of your frame or the opposite. That way looking down the road or bridge we can find that easily.

Another example is shooting trees or buildings. You can even combine all these three with threes on each side of the road and buildings appearing in the background. Thus, we have 3 leading lines on the sides and all we got to do is to place our subject in the right spot to our compositional benefit.

Co-founder of RetouchMe. In addition to business, he is passionate about travel photography and videography. His photos can be viewed on Instagram (over 1 million followers), and his films can be found on his YouTube channel.
Moreover, his profile is featured on the most popular and authoritative resource in the film industry — IMDb. He has received 51 international awards and 18 nominations at film festivals worldwide.


