How to take real estate photos: photography tips

- 1. Take a walk
- 2. Prepare property for sale
- 3. Hide personal photos and pets
- 4. Choose a lens for better sales
- 5. Set up accessories and shooting techniques
- 6. What should be captured?
- 7. Show off all advantages
- 8. When is the best time to shoot?
- 9. Solve the light problem
- 10. Compose a frame photography for real estate
- 11. Learn basic rules for a perfect frame
- 12. Create several options for a single room
- 13. Avoid objects, decreasing property value
- 14. Mind the outdoor area
- 15. Work with editing software
- 16. Experience with real estate photography tips
- 17. Sell commercial property effectively
Residential and commercial property market is a big section of advertising photo art. As for all commercial goods, there is an important role of its presentation. Modern world is full of productive and interesting tools to enjoy technological progress. The Internet allows to erase boundaries and distance between a buyer and a seller of the object in sale. Poor quality of images slows down the commercial business process.
Have you or any of your friends ever thought about selling or renting a house? Whether it is a future home, restaurant or hotel room, the secret of success is in attractive photos with the right composition. Here you will find some tips on how to shoot real estate photography. Learn how to combine images so that the final result is clear and perfectly balanced.
Let us see the short list of necessary equipment:
- DSLR-camera;
- Tripod;
- Wide-angle lens;
- Remote shutter release, if possible to prevent camera shake.
- Memory cards;
- Extra batteries for the camera.

Short list of DOs and DON'Ts:
- Details will better convey the atmosphere than a wide-angle image.
- Do not forget about the perspective of a composition. So that the image does not look "plane", you may have to rearrange some furniture.
- Shooting an object from above or below can lead to a wrong perspective.
- Keep an eye on details. Dirty and greasy spots may be unnoticed by a photographer, but a potential buyer will definitely pay attention to it.
- Use personal items without exaggerating. Of course, a picture of a happy family in a beautiful sunny room will give a sense of comfort. But this image may also overload the frame and distract the attention of a viewer.
- Pictures of a property on sale should be neat, but do not use an aseptic surgical approach.
- Do not take pictures of a country house at noon. “Catch” the light either at dawn or with the help of a dusking sky.
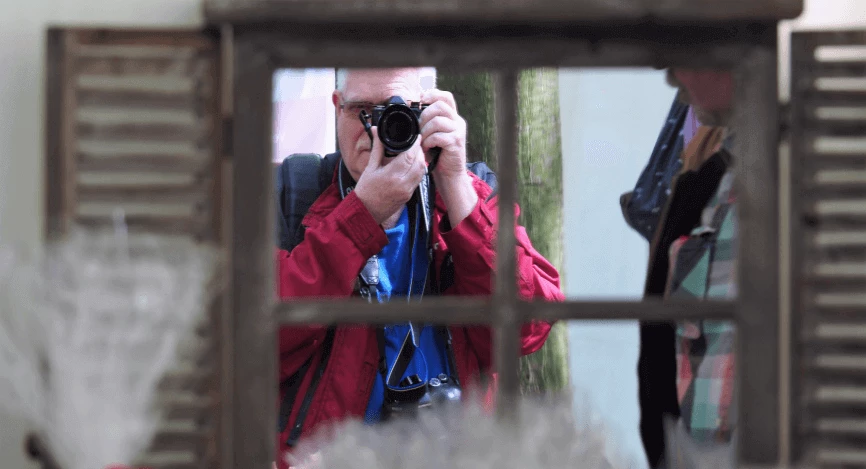
- Before taking a picture, make sure that neither you nor your equipment is reflected in mirrors or windows.
1. Take a walk

If you are invited to make pictures of someone’s home, do not be in a hurry to make hundreds of shots in 5 minutes. Take your time to walk around the place and look attentively to each detail of the interior. Accurate attention to every room will give an idea what is better to start with. Some areas may require more time for removing and replacing objects. Others may need better cleaning. Mentally it is easier to understand what is the beginning of a photogallery and which rooms are ready to be captured immediately.
2. Prepare property for sale

First of all, try to clean everything, taking care of details. Bring some flowers or a fruit chest to make this space more comfortable and attractive. Removing unnecessary objects from the floor area will look bigger. There is no need to make reconstruction or rearrangements, but sometimes it is enough to move a few items. Turn on lights which will give depth to the interior, and open curtains. When the window view is good then it is better to show it, otherwise it should be partially closed.
3. Hide personal photos and pets

Before taking a picture, it is better to remove personal albums, images from tables, shelves and walls. If you want that potential buyers feel themselves immediately as owners then avoid all the stuff, which belongs to the old owner. It is highly not recommended to photograph rooms with signs of a pet presence. First of all, a favorite fluffy cat on the sofa or dog will prevent buyers from representing themselves as owners. And secondly, the client may be allergic to animals. And looking at this picture, he will refuse from buying it, and even avoid personal visits. An exception can be made only for aquariums with fish. These items give a certain chic and elegance to the property.
4. Choose a lens for better sales

A wide-angle lens is the most appropriate because the frame has to include as much space as possible. Shooting from the corner and placing three walls in a frame gives the viewer a greater idea of the size. But not all corners are appropriate for the best view. Some creativity will give you a possibility to find interesting angles, avoiding old-fashioned advice. Think out of the box and discover your own styles, which can become your business drivers in future. Sometimes pictures from a doorway also work well if the room is small. Still, when you want to vary the collection of images with other detailed shots, every professional will recommend a tilt-shift lens. This choice is crucial for significant elements of the apartment, which contribute to its cosiness and friendly appeal.
Search the best viewing angle, which will demonstrate favorable characteristics. Try not to take pictures right at the window, choose angles.
5. Set up accessories and shooting techniques

Install cameras on a tripod and take pictures at waist level, not at eye level. Real estate verticals should be straight, and by lowering the camera, you get the best composition. Look through the viewfinder and make sure that vertical lines are straight, focusing on furniture. Remote shutter release ensures that the camera will not move while shooting. You need to take pictures quickly, and if you do not use the remote control, the camera should be fixed. In case you need more options, why not to bring a step ladder. This simple but important tool will not only help to avoid shaking, but multiply possible views and angles for shooting.
6. What should be captured?

If you know how to take real estate photos, then you can do it even using your smartphone. There are several basic rules for it, which are applied by all agents:
- do not use a flash;
- do not use zoom;
- if there are settings, then set the photo quality to the maximum;
- if possible, take your hands off and fix the device on a tripod.
7. Show off all advantages
 ö
ö
The main task is to find and show the best sides of the property, which were created by the designer. Try to answer the question of what makes that room so special. After all, even if we are talking about a typical residential building, different details and features make it unique. Maybe it is a beautiful light from the window at a certain time of day, an unusual wall pattern or floor ceramics, a modern kitchen or a balcony with a panoramic view. Try to combine different areas: kitchen with a living room or bedroom with a bathroom. Such tricks will help to create a sense of 3D tour inside the apartment. Besides the fact that such pictures look more interesting, you can also increase its cost and attractiveness with full demonstration of the interior.
Make a series of images with different frames: one with a general picture, others with close-ups of some features, which can attract attention and clients.
8. When is the best time to shoot?

If windows of a house face the sun, then the perfect time in summer is from 7 to 11 am, when it is cloudy. Every professional agent knows that it is better to avoid pictures when the sun faces the window — otherwise the picture will be overexposed, and shadows will turn out to be too contrasting (as a result there will be many white and black spots). Try to make several pictures in the evening, but think about whether your apartment is well lit. In addition, it is more difficult to get a good shot with a phone, when it is dark.
9. Solve the light problem

It is better to leave everything without changing or inventing complex solutions. Leave everything as it is and do not rearrange lamps. The way the lighting is located in everyday life already carries a certain meaning, and the realtor's task is to convey this meaning. For example, you have a reading area with a warm light — show it. Or maybe you have an aquarium with a cold LED lamp — capture it. But remember that warm and cold rays should not be mixed.
10. Compose a frame photography for real estate

As a rule, every tutorial for beginners starts with horizontal shots which are created for interiors. Vertical photography for real estate is used only in special cases. For example, when vertical lines dominate (narrow corridors and high ceilings or abstract wall design).
Try to include interesting objects in a frame: something near the lens, something in the center and other items further. Use this common photographer tip to add depth to the image. It is highly important to pay attention to colors. Interior designs sometimes play games with color blocks: for example, blue and green combination, with yellow elements or curtains.
Remember that it is necessary to keep the balance without overloading. For example, if there is a large horizontal table at the bottom, then a vertical window will look good above it. If there is a light wall on the left, then it would be a good idea to place some dark object in front of it to create silhouettes. If the sofa is visible, then a coffee table in the center of a frame, and an old clock in the corner will become essential assistants.
11. Learn basic rules for a perfect frame

Let us emphasize that the area should look natural. But it does not mean “natural” mess; rather, it should look like “artistic mess”. Sort items by groups: books with books, dishes with dishes, clothes with clothes and so on. If different objects are located side by side, make sure that they do not overlap each other.
Have you ever thought that most people negatively perceive dark rooms? At the same time colors must look natural and the room does not have to seem too yellow or else. Most cameras have ISO values which control light sensibility. Do not be lazy to understand the settings and take advantage of this feature.
12. Create several options for a single room

Photograph a room from at least two corners located diagonally. If you want to take a third shot, for example, to show the built-in wardrobe or air conditioning, feel free to press the shutter-release button. Most buyers like to look at photos that can tell more about the apartment. Do not try to hide or retouch obvious problems. Clients will notice them with a personal visit and will remain disappointed not to have seen it before. Be honest and get more business offers with correct demonstration of the area you want to sell or rent. Try to give a real idea of what you are selling.
13. Avoid objects, decreasing property value

If there are old carpets, but good floor ceramics, it is better to choose a more attractive option. The same rule works for other items with poor appearance. Dull curtains, a broken table or a favorite cat sofa are of high emotive value for the owner, but not the best choice for a client. These items have nothing to do with apartment sale, and they can create a negative impression
14. Mind the outdoor area

It does not matter if you have a small apartment or cottage house, clients are looking for a certain place to live in a peaceful and nice atmosphere. When selling an apartment, many people forget that nearby infrastructure plays an important role in the decisive process. If there is a playground, a convenient parking for cars, green parks and lakes, then it is better to include those pictures into the property selling gallery. Do not forget about the entrance, but take pictures only if it helps to increase the value.
15. Work with editing software

Do not forget that not every single shot can become the best reflection of a house. Even a perfectly chosen moment with necessary lights and details may require little editing. Post-editing work is almost a 50% success for both amateur and professional. That is why do not neglect this possibility to sell the property with the help of your images.
Shoot in RAW format to have a wider choice of tools for retouching. Other file formats will significantly reduce the quality of the image.
Do not be afraid to crop the picture. Reducing the number of unnecessary elements will contribute to the increase of real estate value.
16. Experience with real estate photography tips

There is no unique rule for every type of property. Different clients look for various features in their future homes. Make sure to capture all possible angles and sides of a house to show the area in a most attractive way. Beautiful and artistic pictures emphasize advantages and help to quickly find a buyer.
17. Sell commercial property effectively
)
Remember several important aspects to conclude a profitable contract between sellers and buyers. These elements should be included into the frame, if you need to speed up a decision making process for office space:
- total area and layout;
- appearance of a building where the office is located;
- access to road hubs and transport infrastructure;
- car parking;
- availability of public places (cafes, restaurants, parks);
- value of the object.
How to use these criteria? In fact, these elements must be taken into account when photographing a commercial real estate facility. Professionals specialized in photographing offices and industrial buildings assure that 2-3 images are not enough to sell the object, demonstrating all advantages. It is necessary to prepare 20-25 pictures, anticipating all possible questions of potential buyers.

It may seem not an easy task, but sometimes even a starting realtor can handle it. If you want to understand how it works, you need to practice as much as possible. Take pictures and see what it looks like and how it is possible to improve the final result. Examine interior magazines and companies, which work in this industry. Online catalogues and professional approach of experienced agents can help to find the only right way for every single option.
Successful sale or purchase depends on the quality of pictures, which were used for its promotion. When images fully and honestly represent the object, such an announcement will interest a greater number of potential buyers, since a person is used to perceiving much information about the world by visual means. Use this knowledge to improve photographing and commercial skills.
Co-founder of RetouchMe. In addition to business, he is passionate about travel photography and videography. His photos can be viewed on Instagram (over 1 million followers), and his films can be found on his YouTube channel.
Moreover, his profile is featured on the most popular and authoritative resource in the film industry — IMDb. He has received 51 international awards and 18 nominations at film festivals worldwide.

with RetouchMe


