

Travel Photography Gear: Equipment List
Aug 19, 2022
Nowadays, there is a huge number of online stores around the world, among which there are excellent examples of perfect visual e-commerce. When viewing a site with high-quality photos and competent content, the visitor’s interest in a store increases, and a desire to purchase something increases as well. A site where product photos are presented in good quality and from different angles is more credible than the one where one product image is shown, also, without the possibility of zoom or rotation from to see different sides.
This article is going to be useful for those who have not thought about the connection between professional photography and sales. Indeed, despite a wide variety of beautiful designs for websites, there are many online stores, which make you want to quickly escape. Perhaps some recommendations on how to take pictures of clothes to sell online and design a product page will help some brands to become better and increase conversions.

Pictures must demonstrate your products in the best way. Unfortunately, in life, it happens that sometimes clothes during storage and transportation can wrinkle and look worn. In this regard, samples make a difficult path, covering thousands of kilometers and may not be the ideal option for the presentation of goods. Preparing an outfit for the shooting is an important starting point for a quality retailer service. However, many professionals skip this step and rely on Photoshop to fix wrinkles or other noticeable defects. Do not do this! Photoshop does not possess magical properties: to masterfully correct every single mistake, it will take time and special knowledge, in addition, due to excessive editing, the quality of a picture may suffer. Try to bring the garment as close to perfect conditions as possible, and use picture editors only to apply finishing touches and color adjustments.
Steaming will help your product to look its best. Carefully inspect the item from all sides. Are there any tags, stickers, and other markings on it that need to be removed? Do it. Repair damage and other distracting details. For example, use a roller or tape to clean clothes to get rid of powder and threads.
The most spectacular option is shooting clothes on a model. When a thing is worn on a real person, it is already easier for a buyer to imagine how it will look on it. It should be noted that clothes should fit well models, and the model itself should have a nice figure and appearance. Immediately get ready to call for her makeup artist and, ideally, a stylist. The desire to buy a thing largely depends on a model, therefore, seek professional models who can pose, smile, and present anything in a good light. If you don’t have such an opportunity, it’s better just to photograph clothes on a mannequin or a hanger.

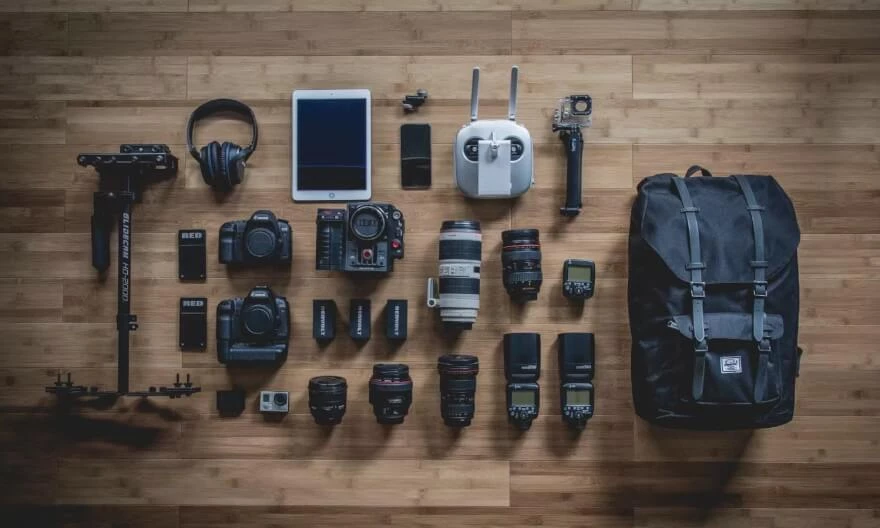
With the help of several objects, you can turn almost any room with free space into a photo studio. But for a very modest budget, use a camera, tripod, seamless white paper, duct tape, and natural light. If you can permit a bit more, then it is worth investing in a purchase of other equipment. Studio with a camera, tripod, holder, seamless paper, mannequin, and constant light equipment. Let us clear some important elements of a perfect shot.

If you use natural light, place the product near a window where even indirect light can fall on it. In case of using a constant-light above-mentioned tip, consider options for the proper placement of one light installation. Place the light source and softbox at a 45-degree angle to the product. Place one light source and a softbox or umbrella at a 45-degree angle to the product so that soft light falls on it or even the entire shooting area. The camera should be located directly opposite your subject. If you place the product too close to the background, a shadow may form. In this case, just push the object forward slightly so that the background is clean and white. Use a light source at half power.
To correctly adjust the image, most often you just need to use the camera’s light meter, which can be found by looking in the viewfinder of a device and adjust settings so that the mark is 0. This is not easy when you use a stroboscopic light source since the camera cannot fix lighting before flash. Nevertheless, a portable light meter will facilitate easy and accurate determination of its level. By synchronizing your device with a lighting system and placing it opposite the object, you can provide accurate indicators.
If you do not have a light meter, preset a shutter speed of 1/200 or a little less and opening the size of aperture f / 11 or more. After that, you need to take a few test shots and carefully adjust camera settings to achieve the desired exposure and focus. Depending on battery power, the light source may not work on time if you shoot too fast.
Choose a god hanger for correct shooting after the light is fixed. The hanger should clearly correspond to the size of a product and fit its type (after all, there are different types of hangers: for outerwear, suits, blouses, trousers). The item should hang neatly and evenly so that its shape does not distort. Only observing these rules, you will achieve a beautiful look.

The most common way to display clothing nicely is to use a mannequin. Quite often, you also come across photographs of clothes worn as if on an invisible mannequin. With this shooting option, the inside of the clothes is also visible. Photographers achieve this effect in different ways: either they buy a regular mannequin and modify it with scissors, or they remove a thing from a regular mannequin or model, they photograph the inside of a product separately, and then fragments of several photos are carefully glued together in a graphic editor. The best way to demonstrate a perfect fit of clothing on a mannequin or model is to try selling vie modern selling platforms. It also helps buyers introduce themselves to the market. Use famous platforms like eBay to obtain first results and understand the quality picture work you have carried out.
Make your product fit perfectly to avoid too much picture editing. Models breathe life into clothes, but the work of professionals is very expensive. Mannequins are an affordable alternative that is easy to work with. Take time to dress the item nicely. If clothes look too big, try fitting the mannequin with pins until it looks good. In the final post-production of a photo, you can create an effect of a real person.
If you are worried that the mannequin will distract attention from the product or give it a cheap look, you can use a technique of an invisible figure when processing photos. Take a few additional pictures of each unit. This will remove the silhouette from its images. So you can create a 3D image that shows shape and fit.

If the camera is not set up correctly, no Photoshop will make your photos look professional. Before taking pictures of your products, make sure that you know what ISO (camera photosensitivity) is, aperture setting, and white balance. Pay particular attention to ISO, aperture setting (F value), and white balance.

If you want to achieve high-quality photos, you will need a good camera. Of course, it is no secret that a professional, a person with talent will be able to take a magnificent photo, regardless of the camera of the latest model or a phone with a 2-megapixel camera. In addition to a good camera, you also need a suitable lens. Avoid wide-angle lenses that make the objects in a photo look distorted. Such lenses are great for shooting panoramas, rooms, but not suitable for shooting clothes. Point your camera at the subject and press the shutter button halfway so that it focuses on a subject, and then squeeze to the end. Change settings of the camera during shooting if you notice that there is not enough light on images or vice versa. The more you shoot, the more instinctively you will configure your camera.
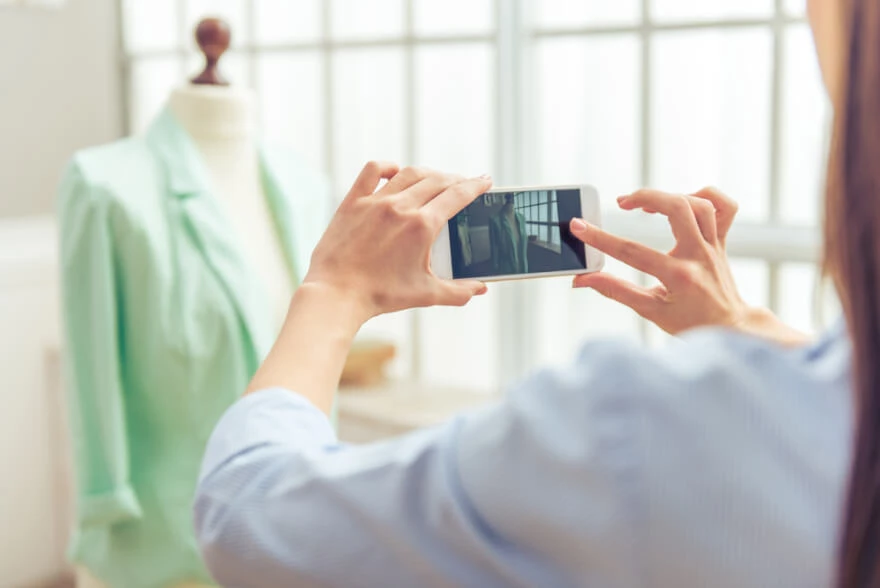
Shoot goods from all angles. Take as many pictures as possible. You may want to photograph the product from the front, back, at an angle of 45 degrees, left and right, or focus on any of its details. The more shots you get, the better. You may want a considerable number of options to choose from, besides, it is proved that the more photos of a product on the site, the better it is sold. Customers can rely on their product impressions if they are backed up by a sufficient number of photographs from different angles.

After the photographing process is completed, you need to prepare product images for the Internet and social media. The goal of post-production processing is to make pictures look as professional as possible with optimal performance. This stage is the easiest and most profitable to transfer to someone else, because digital images are easily sent, and this will save time and money. If you want to do it yourself to create the right and professional image of a product, do not forget about alignment, cropping, background removal, and color correction. Especially if you shoot without a model or mannequin. Remember the sequence of processes so that you can recreate a set of actions needed when shooting and editing.
If you do not want to photograph clothes either on a mannequin or on models, you can try the third way: flat lay or tabletop options. Photographs captured in such a way are not only a trendy way to demonstrate the item, but become a very convenient solution to the problem. The main thing is to learn how to beautifully put clothes on a table or board and organize the surrounding space. Make sure that the type of clothing and its color is not distorted. Each layer should be well planned and contribute to the overall composition. Shooting clothes on the floor is a good option to show the goods and mask defects.

It is extremely difficult to do everything yourself. You will not succeed perfectly the first time, but it’s not a problem. After all, the goal is to improve with each photo and make images of goods as best as possible. Such pictures will bring great sales, and so more people will be able to enjoy your product.
Remember this shortlist of recommendations and you will soon forget lightroom effects and options.

You can either create suitable conditions for shooting indoors (studio lighting, a solid neutral background) or solve the problem more easily - arrange photography outdoors. All you need is a suitable location and a great guide for every kind of picture to use for sales. Choose a place based on the category of clothing: if it’s a swimwear, shooting on a beach or near a pool will be appropriate. If you photograph, evening dresses, it is unlikely that an abandoned construction site and a forgotten building are suitable. Consider the pros and cons of every idea and tip and choose your own way to present fashion items offered by you.
Co-founder of RetouchMe. In addition to business, he is passionate about travel photography and videography. His photos can be viewed on Instagram (over 1 million followers), and his films can be found on his YouTube channel.
Moreover, his profile is featured on the most popular and authoritative resource in the film industry — IMDb. He has received 51 international awards and 18 nominations at film festivals worldwide.