Drones aerial photography
- Key points of aerial photography
- What are permissible weather conditions for a quadcopter?
- How to succeed using drones for aerial photography?
- Equip drones for aerial photography with filters
- Pay attention to angle and view in aerial photography with drones
- Get prepared in advance to unforgettable drones aerial photography
- Use GPS mode in aerial photography drones
- Consider advantage of the FPV system
- Choose to use a gimbal
- Make sure the settings are correct
- Find a suitable place
- Do not forget to see the weather forecast
- Balance even top aerial photography drones
- Take pictures from different angles
- Consider night shooting
- Set in advance the height and area
- Get a powerful camera
- 4 Best aerial photography drones for professionals and amateurs.
- 1. Syma X8Pro
- 2. DJI Mavic Air
- 3. Hubsan X4 FPV Brushless H501S Standard Edition
- 4. Xiro XPLORER mini
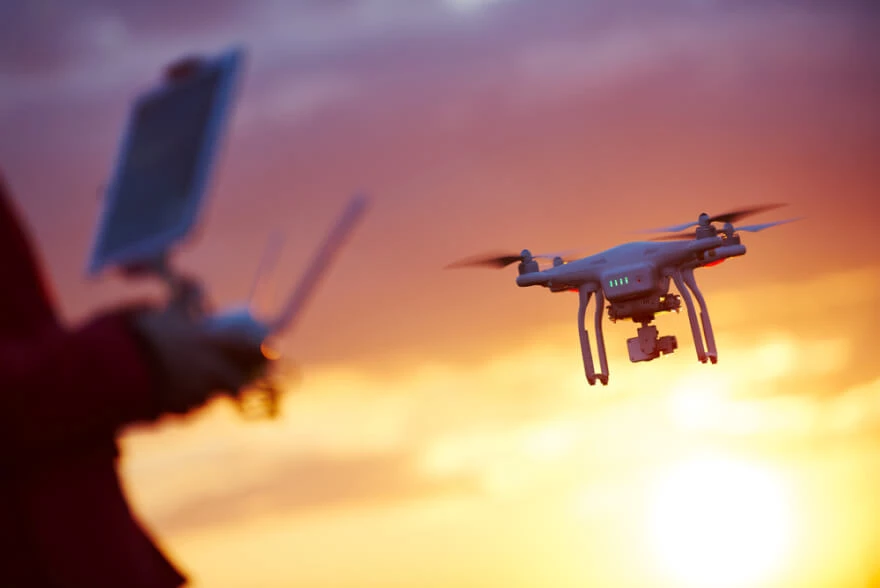
Practicing aerial photography using drones seems like a great and unusual idea. This can explain the growing popularity of aerial photography and videography using drones.
These flying devices have revolutionized the art of shooting, and this is evidenced by their key roles in film production. The most amazing landscapes in the modern world were also filmed by the quadrotor. However, just buying a drone is not enough.
Let us answer the most common questions, before getting to tips professional shooting.

Key points of aerial photography.
How far can a quadrotor fly?
The drone can fly at distances of up to 500 meters in height and up to 5 km far.
What are the benefits of shooting with a quadcopter?
The main advantage of shooting with a quadcopter is the high resolution of image and video.
Shooting is carried out in 4K quality at 25 fps, with the possibility of expanding the dynamic range for further professional editing in non-linear editing systems. It is also possible to shoot in FULL HD quality at 60 fps.
Also, a quadcopter is equipped with an image stabilization system, which allows you to make the picture very smooth. Besides, it is characterized by low noise figures, it does not create strong air currents. This allows you to use the device not only for shooting in the air but also indoors.

What are permissible weather conditions for a quadcopter?
- Air temperature from -10 to +40.
- Maximum altitude from pilot level - 500 m.
- Maximum flight speed 50 km / h.
- Wind speed up to 10 m / s.
- Moderate rain.
The camera plays an important role in the quality of captured images, and a drone supporting the UHD format is the dream of any photographer. However, these cameras are expensive and inaccessible to fans. That is why it is important to know tricks that will improve drones aerial photography.
Quadrotor surveys require some preparation and technical devices. Google Earth or another equivalent program is great for this. You can find interesting landscapes or buildings right from the house and you will know in advance where to position the quadcopter to get the best angles for a photo.

How to succeed using drones for aerial photography?
Remember the importance of shooting time. The golden hour of photography will provide wonderful light and many magnificent shots. Because at the time of shooting the camera is high in the sky, you can capture not just the beauty of sun rays, but also how they interact with the landscape.

Equip drones for aerial photography with filters.
As in the case with a conventional digital camera, using filters when shooting from a quadrotor will help improve the quality of the images. The required minimum includes a circular polarizing filter and several filters of natural density. Their use will help reduce excessive brightness, increase contrast and reduce the effects of fog or smog. So that you can capture all the details of the landscape.

Pay attention to angle and view in aerial photography with drones.
Be creative when choosing a shooting angle. Don’t just focus on the top view. In such photographs, you can use all the beauty of the light falling on landscape and play on the contrast of what is under the quadcopter, but that's not all. The quadrotor will help you get to places that are difficult for the foot photographer to reach. There will be new opportunities for creativity, limited only by the battery duration of the device! Rocks, mountains, roofs of skyscrapers, shooting over the water surface will become available.

Get prepared in advance to unforgettable drones aerial photography.
There is much in common between shooting with a regular camera and a quadrotor. You still need to adhere to the basic guide of shooting. Nevertheless, opportunities that will open are worth breaking away a conservative approach to exposure, shutter speed, and aperture. It’s not enough just to control the quadcopter and take pictures. You need to do something more to get the most out of your camera. This shooting mode is quite difficult, but it is enough to look at crucial tips that will allow you to get amazing and exciting shots.
Increase height to capture a larger surface with drones used for aerial photography.
Many aerial photographers adhere to the idea that shooting closer to the ground will allow you to take epic landscapes. It is recommended to develop the skill to shoot higher frames. The reason for this is that by flying to a great height, you can increase the field of view with the camera. This guarantees high quality and great photos.
For example, if you are trying to capture running elephants, a photo from a great height can create a spectacular representation of this action compared to the approach of shooting from a position closer to ground. Get used to flying higher, using a zoom, because capturing more landscapes is a great idea.

Use GPS mode in aerial photography drones.
The advantage of GPS is undeniably huge. First, you need to get a quadrotor that supports it. GPS mode is a great tool to help you stabilize your camera to take clear and high-quality photos.
While you are flying on your quadcopter, select the place you like, then fly to it and release the control. If GPS mode is turned on, your quadcopter will soar and stabilize itself. In this position, your camera is capable of taking photos with no vibrations.

Consider advantage of the FPV system.
The First Person View system allows you to take photos of the places you see. This is possible using the smartphone application. You must master this system, which also requires a lot of practice. FPV system allows you to take spectacular pics miles away, but this is not the best option if you want to take close-ups.
Buildings, trees, power lines and other objects that interfere with flying are guaranteed to interfere and take off. It’s best to train in the field until you learn how to get high enough quality photos and videos without risking breaking (or drowning) the device itself.

Choose to use a gimbal.
Your coolness, as an ace operator, can be as much as cosmic, but without a gimbal, you most likely will not see your brightest and most talented aerial photographs. And no one will see them. A good gimbal not only holds and stabilizes the camera but also allows you to significantly expand its field of view while maintaining focus in the frame. An inexpensive model is also suitable for the training period. But if you plan to shoot something worthwhile, then saving on the gimbal is not worth it.
Gimbal is an ideal tool for professional photography, and every professional photographer should use it. This expensive device will perfectly help you to take clear and high-quality photos, as well as video.
If you are interested in its meaning, then this is the hinge on which the camera is mounted during flight. The advantage that it provides in the air will allow you to place the camera in a specific place, which will help to easily catch the focus since the suspension compensates vibration. Gimbals are expensive equipment and therefore more suitable for professionals who will earn money. The presence of a gimbal is of paramount importance to a professional aerial photographer. It is recommended to have an appropriate quadcopter, which can comfortably support the weight during flight.

Make sure the settings are correct.
It is important to keep in mind that each quadrotor has a unique camera that comes with standard settings that must be changed to get the perfect shot. Thus, you need to understand the camera that you are using. Study various settings and ways to get the most out of it. Camera settings will differ depending on whether it is installed on the gimbal or fixed without it.
For example, if a gimbal is present, a lower resolution will be preferable along with minimal magnification. If you do not have a gimbal, it is advisable to change the settings to achieve the highest possible resolution, and it will also optimally apply a wide zoom.
It is recommended that you play with features such as frame rate, zoom, and resolution to find out how each one works before sending the quadcopter into the air.

Find a suitable place.
Choosing the most suitable location will allow you to understand the difference between an epic photo and a mediocre one. The location must meet the following parameters to be considered suitable:
- open area;
- it should not be very wooded;
- no tall buildings;
- it should also be free of birds.
These options will allow a novice aerial photographer to get great shots. These rules are mainly described for novice photographers who are still not very confident in managing their drones. A professional should not have problems with quadcopter control among buildings or forests.

Do not forget to see the weather forecast.
The light weight and power of the drone, plus a sudden breeze in the aggregate give poor shots even on a clear sunny day. But if you often don’t have to choose a technique, then nothing prevents you from looking at the forecast and paying special attention to the strength of the wind.
Natural factors cannot be changed. You cannot change their consequences, no matter how hard you try. This is true even for the best drones for aerial photography, as they are susceptible to adverse weather conditions. Windy conditions greatly affect the stability of the camera you are using, as well as rainy conditions. A clear day with calm weather will be most suitable for great photos.

Balance even top aerial photography drones.
Imbalanced screws create a significant load on the body of the drone, which is inevitably transmitted to the camera in the form of vibration. As a result, you get blurry pictures and spend a lot of time re-shooting (if at all possible).
Propellers of your quadcopter play an important role in maintaining the balance. You need to make sure propellers are balanced:
- set the screws in balance;
- place quadcopter on any elevated surface;
- find a blade that is heavier than the rest;
- bend the bottom of the blade a little;
- try re-testing the balance.
It is necessary to do the above operations until getting equilibrium. We do not recommend experimenting with expensive and very expensive machines without the necessary knowledge and qualifications. It is better to seek help from a specialist.

Take pictures from different angles.
To get a spectacular shot, it's wise to shoot from different angles. By doing this, you can find the best angle from which to take the perfect shot. You should try not just to use the FPV mode, but to shoot the FPV at an angle higher and also from the side to select the picture that stands out. Taking a series of photos, you get some results for comparison and choosing the best shot.

Consider night shooting.
Various quadcopters in the upper-middle class have many options for entertaining lighting accessories. These accessories allow you to take photos at sunset. For some drones, you can even purchase front lights that allow you to take pictures in pitch darkness. If you plan to do night aerial photography, a sensor with an LCD display is more suitable for you. The reason for this is that when you see the camera’s field of view, it’s much easier to take clear and captivating photos.

Set in advance the height and area.
Know exactly what level of detail in the frame you need. The focus is simple: the higher the drone with the camera, the larger the capture area and the lower the detail. And accordingly, on the contrary: the quadrotor is lower, the capture area is smaller - the detail is higher.
Nothing extra in the frame. This also applies to structural elements of the apparatus. It is not uncommon for aerial photographers to remove chassis so that they do not exactly hit the lens.

Get a powerful camera.
This is the case when all previous principles of shooting do not help to improve its quality. Just buy a better camera, highly recommended with a matrix of 10 megapixels and a stabilizer. Just remember to ask before buying the weight of selected model in working condition. Extra heaviness is completely useless, otherwise, you will often have to recharge batteries. The option of buying a drone with an already built-in camera is also good.
The best and easiest way to secure great photos from your drone is to equip it with a powerful camera. The drone market offers many options that are optimally suited for professional aerial photography. You can choose a camera that will offer you the highest resolution possible. In case you want to use it for video shooting, choose the one that provides shooting with a large number of frames per second. It is advisable to choose a camera with the ability to shoot in low light. The bottom line is that the better the camera, the higher the quality of photos.
Check out several options to look at in online stores and highly recommended by professionals with their pros and cons.
4 Best aerial photography drones for professionals and amateurs.

1. Syma X8Pro
An updated version of a well-known model Syma X8, aimed at those who want to try their hand at controlling a quadrotor. This is a medium-sized drone that can do a lot for an inexperienced pilot. There is a remote control in the kit, but you can control the quadcopter from a smartphone or tablet. The device can fly off to a radius of 70 m and the same height. The quadcopter has a built-in 1-megapixel camera and is capable of recording 720p video. Use a gimbal where you can attach an action camera. The main problem of this model, which the manufacturer himself does not hide, is the battery life of 9 minutes. You can’t count on a long flight. Also, some users complain about the constant malfunctioning of built-in GPS.
+ Inexpensive
+ Simple controls
- A single battery charge of 9 minutes

2. DJI Mavic Air
An advanced but still amateur-level quadcopter from industry leader DJI. The high price of the device is compensated by its characteristics, which are almost the "ceiling" for an unprofessional device. DJI Mavic Air can get up to a height of up to half a kilometer, fly at a maximum speed of 19 m / s for 21 minutes, supports both Wi-Fi and radio control. According to the latter, the drone can fly a radius of 2 km. And at such a distance, when it becomes difficult to visually see the drone, FPV is useful. The camera is set to 12 megapixels, capable of recording video in 4K. It can record in slow-motion at 120 frames per second. A huge advantage of the model is proprietary application DJI GO, which is almost a reference for controlling drones.
+ Maximum performance in its price category
+ Great built-in camera
+ Software
- Considerable price for a beginner
- Sloppiness can cost screws - they are fragile enough

3. Hubsan X4 FPV Brushless H501S Standard Edition
An amateur quadrotor of medium size and weighing a little less than half a kilo. It is controlled by radio remote control and can fly to a range of up to 300 m from the operator. But some users are faced with an unpleasant oddity - when climbing, the quadcopter can suddenly start moving away from the person controlling it. As a result, the device can fly away without responding to a command to return to the launch site. Although the Hubsan X4 has a built-in GPS. The rest is a high-quality quadcopter, able to quickly move in space for 20 minutes. This is a fairly popular model and it’s easy to find accessories for it both offline and online, including the well-known Chinese trading platform. For example, custom antennas can increase the flight radius of a quadcopter in several times. There is also a camera, but the quality of shooting is poor. FullHD video suffers from a lack of stabilization and a rolling shutter effect when the picture becomes jelly.
+ Large flight radius
+ Ability to do it yourself
- One day, a quadcopter can fly away from you

4. Xiro XPLORER mini
A small quadcopter, which is suitable as a hobby for adults and children. With a weight of 431 g, the drone can rise to a height of 50 m and fly at a speed of 8 m/s. Management here is carried out only via Wi-Fi from a smartphone or tablet and at a distance of no more than 100 m. However, many users complain about the quality of signal reception, especially in dense urban areas. Because of this, the quadrotor may be lost. To prevent this from happening, there is GPS and a function of returning to the starting place. By the way, Xiro XPLORER mini can work on a single charge for 15 minutes. The manufacturer managed to install a decent camera in an inexpensive drone. With a resolution of 13 megapixels, it can write good video in FullHD quality. The chip of the camera has image stabilization.
+ Management forgives many mistakes to a beginner
+ Software image stabilization of the built-in camera
- In dense buildings, the control radius does not exceed 30 m
Quadcopters have revolutionized aerial photography, and tips and ideas discussed in this article will allow you to shoot good photographs. So, if you are not satisfied with the photos you receive, try our new style with flying assistants.
Co-founder of RetouchMe. In addition to business, he is passionate about travel photography and videography. His photos can be viewed on Instagram (over 1 million followers), and his films can be found on his YouTube channel.
Moreover, his profile is featured on the most popular and authoritative resource in the film industry — IMDb. He has received 51 international awards and 18 nominations at film festivals worldwide.
with RetouchMe


