Darkroom photography: the guide for beginners

- 1. Troublesome process of film printing
- 2. Prepare a film
- 3. Choose your camera equipment
- 4. Use a photography darkroom magnifier
- 5. Find a guide to set a magnifier
- 6. Get a right inch paper
- 7. Buy darkroom photography chemicals
- 8. Forget the natural light shine
- 9. Start a darkroom photography process
- 10. Experiment with darkroom photography supplies for printing
- 11. Create your own experience
1. Troublesome process of film printing.
In the modern world, almost every family has a digital camera that can easily send photos to a computer or laptop. Previously, there were no such miracle devices, and usual cameras were mainly only for expert photographers.
Many modern people want to know how photographs were printed in the past. After studying some literature, and listening to various ideas, we can conclude that this process was very troublesome and difficult. The shooting process itself was also difficult. First, a cassette with a film was inserted into the camera, and pictures were taken. To take subsequent shots, it was necessary to transfer the film to the next shot using a special and very inconvenient lever. The flash had to be inserted separately, and it worked from a regular outlet. Photo parameters were adjusted manually or using an exposure meter. To start developing the photograph, it was necessary to shoot the entire film.
To make a visible image out of a black plate, it was necessary to develop it. The whole process of developing the photo took place in complete darkness. The tape was rewound from the cassette onto a reel so that all the turns were washed by specially prepared solutions. First, it was necessary to process it with a developer, which contained silver bromide in its composition. It was prepared by mixing water, metol, sodium sulfite, hydroquinone, and crystalline borax. This process took only a few minutes. After developing, the entire film had to be thoroughly rinsed with running water.

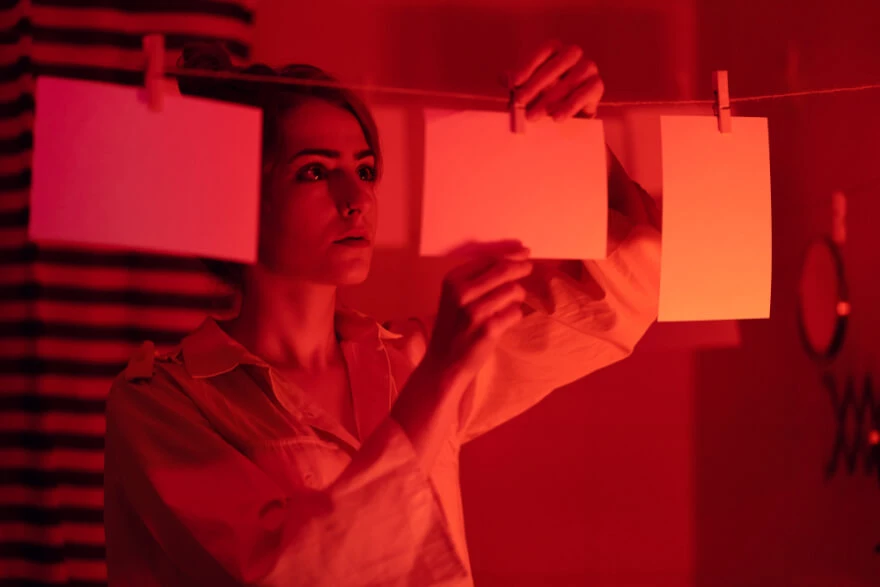
Subsequently, fixation was performed. After washing out substances from the film, which were not exposed to light, a fixer was prepared by mixing sodium thiosulfate with water, and, if necessary, the finished composition was additionally diluted with water. After this procedure, the film became insensitive to light. Such plates were called negatives, from which you could already see some of the captured frames. When all these difficult processes were left behind, a photo enlarger was connected to work. This apparatus was considered the most important in the process of developing photographs. With the help of negatives and this apparatus, the images were transferred to photographic paper, after which the resulting photographs were carefully lowered into the developer and waited for the image to appear. Then the resulting photograph had to be fixed in a fixing solution. The further fate of photography was decided by bringing it to light. If the photo turned out to be of poor quality, it was thrown away. Well, if the photo was of good quality, it was sent to a photo glitter, which dried the finished photos. Sometimes the photographs were hung on a string and the edge was fixed with a clothespin, or they were simply glued to the tile, after drying they peeled off themselves.
Let us try to understand in detail how to create real darkroom photography. Checking online you can find the answer to any development/printing question, or find a huge book on the subject, but a general idea of the process, in a nutshell, is very difficult to find. If not for my father, who explained to me a simple version of this whole process, everything would have been much more complicated.

2. Prepare a film.
To print photographs, they must first be captured. What is darkroom photography? Once upon a time (back in 1725) it was noticed that silver salts darken when exposed to sunlight. About a hundred years later, the first photographs appeared. The effect of darkening silver by sunlight is used in film today. Today's negative film is a sheet of transparent plastic coated with a photosensitive layer composed of a mixture of gelatin and silver halides. Each company has a slightly different formulation of the photosensitive layer, which leads to different effects when shooting (contrast, grain size). At first glance, digital photography has completely replaced film from the narrow format, but there are still many companies that produce 35mm black and white film.

3. Choose your camera equipment.
Someone has Zenith or other old brands, maybe even a device of the early nineties. It is better to use the technology of under 35mm film. You can also use medium format cameras, but you need to make sure that the magnifier can work with the appropriate film. Consider that shooting is not only about the camera, but accessories and tools as well. Prepare all the kit in advance, making sure that it is compatible with your device.

4. Use a photography darkroom magnifier.
The most mystical unit in the whole process is the magnifier. But if you figure out what it is and how it works, it becomes not scary at all. Usually, it consists of restricting magnifier heads, light source (such as an incandescent lamp), negative holder, lens, support tripod.
Light passing through the negative is focused on the lens and hits the photographic paper. The simplest lens, in this case, can be a pinhole (camera obscura). Such a magnifier will work, although it will not produce high-quality footage.
In reality, slightly more sophisticated magnifiers are used. Uneven light from the lamp and reflected light result in poor quality. To combat it, condensers (lenses that equalize the luminous flux) and frosted glass are used. Also, a lot of chips and trinkets can be attached to the magnifier: a built-in timer, a built-in red light, a set of light filters, etc.
Finding an enlarger is usually not a problem, at least someone you know has it usually in the garage or a closet. If there is none, then a simple enlarger can be found on the Internet. Maybe they even come with some useful printing stuff. The main thing to look at is that it does not fall apart from the touch, that all the details are there and those lenses are not cracked. If a light bulb burns out inside or the wiring is torn, you don't have to worry, it can be solved in a few seconds.

5. Find a guide to set a magnifier.
It is a good idea to get a manual for the magnifier you are using. For example, there may be tips on how to make it easier to focus negatives or how to properly position the light bulb. But in most cases, it is enough to do the following sequence of darkroom photography steps:
- Turn on the magnifier lamp, open the iris fully, turn off the ambient light.
- The magnifier should show an illuminated rectangle below it. If this rectangle is unevenly illuminated, you need to move the light bulb (usually for this, a special stick is used, which is located out from the top of the magnifier).
- Insert any negative. Instead of a white rectangle, images from the negative will now be projected onto the subject area.
- Adjust the scale of the image. This is done by lifting or lowering the head along the rails. The scale is selected based on the photo paper used.
- Now sharpness. If there is a blur, then the adjustment is carried out by moving it if there is no blur, then the sharpness adjustment is somewhere on the lens.

6. Get a right inch paper.
In its essence, photographic paper is the same negative film. But with a little difference. It uses special silver chloride as a light-sensitive component. It is sensitive only to light in the ultraviolet part of the spectrum. This allows you to print not in absolute darkness, but with a red light.
Photo paper does not last very long, so even if you dug up its stocks, it is better to buy a new one. It has many features and, as a result, there are a huge number of varieties of it. Most professional black and white photographs are printed on photo paper with a barite backing. This gives the best photo quality but significantly increases the printing complexity. The process of drying becomes more complicated, it becomes necessary to gloss it. The paper on sale is mostly multi-contrast. This means that when printing, you can use light filters to change the contrast of the resulting image. If it is on a plastic backing, then everything is simple. Take whatever you want.

7. Buy darkroom photography chemicals.
For a full cycle of printing and developing the film, you need a film developer, a paper developer, fixer, table vinegar bleach (you can do without it, but it is advised to speed up the process). Small things can often be found in the same place where you dug up the magnifier. In extreme cases, a flashlight/cuvettes/tongs can be of DIY style. The only thing that is desirable to find is a development container. Development is almost impossible without a film reservoir. The tank ensures uniform rinsing of the film with a chemical solution, and also prevents it from lightning.

8. Forget the natural light shine.
In the process of printing, in order not to do everything in the dark, you need to have light. Because photo paper is not sensitive to red color, red lights are used for printing. If you don't have a flashlight, you can paint the light bulb with red paint. Just make sure that the paint is red, not orange, and that the light bulb surface is painted tightly and does not transmit white.

9. Start a darkroom photography process.
Usually, the process is divided into 2 parts: first, inserting the film into the developing tank, then pouring the film with chemicals. To insert the film into the tank, you need a complete darkroom. Alternatively, you can hide your hands under the covers, but if you do this, then there is a chance to miss the light from some gap. And your hands will be less free. For the process you need captured film, a tray for film development.
First of all, you need to get the film from the spool. For the medium format film, this is not a problem, but for regular 35mm it can be difficult. As you remember, the film is sealed in a lightproof container. The only way to get the film out of there is to break the container. The main thing is not to accidentally tear the film. It needs to be rewound onto the spool of the tank. There is a special spiral cut in which you need to insert the film. First, you can push it there, and then, moving the coil elements that compress the film back and forth, push it inside. Practice in advance in the light on some old (or already shot and developed) film, since the entire process must be done in the dark, which is quite difficult. After the entire film has entered the spiral, put the spool in the tank, close it tightly. Now it can be brought out into the light. It has holes for filling and for draining fluids.

The second step starts by pouring reagents into it. It is better to prepare them in advance. You will need a film developer, weak vinegar solution, fixer, water. For developer and fixer, read the manual, which dilution concentrations to use in water, and how many minutes to apply. Certain time depends on the sensitivity of the film, its type, and the ambient temperature. Vinegar concentration is not very important. Table vinegar is mixed about 1 part vinegar with 9 parts water. In total, the process looks like this:
- fill in the developer.
- after pouring, shake every item couple of minutes.
- pour in low concentration vinegar or bleach.
- fills in for ten seconds.
- shake and drain a few times.
- fill with clean water.
- shake the tank for 30 seconds, drain.
- fill fixer.
- shake every few minutes.
- after draining the fixer, remove the film. The developed image is visible on it.
- now it needs to be rinsed. You can put it for 10-20 minutes under the water current.
- hang the washed film to dry.

10. Experiment with darkroom photography supplies for printing.
Dilute solutions in cuvettes. A developer for paper is poured into the first cuvette, into the second cuvette a stop bath (water and a little vinegar), into the third cuvette, pure water, into the fourth fixer. There is an enlarger on the table in front of us. A red light is on, and there are cuvettes of reagents around. Make sure that the room is really dark. To do this, take one sheet of photographic paper from the envelope, cut it into small pieces with scissors, and put pieces around the table with a magnifier for a couple of minutes. If they are darkened, then there is a light somewhere. Remember that the light from the magnifier also causes flare! The magnifier turns on only at the moment of exposure of the frame, or when all the photo paper is safely hidden in the envelope.
Secondly, we will adjust the magnifier. The sharpness and frame size have already been set. It remains to adjust the aperture and shutter speed. The exposure time is determined as follows. Find an overexposed frame on the film (usually at the very beginning of the film), insert it into the magnifier. Let's cut more photographic paper into pieces. Now we will expose each piece with a magnifier with its own time. The first 1 second, the second 2 seconds, the third 5 seconds, the fourth 10,… 15,… 20. Most likely this time will be enough. If not, continue in 10-20 second increments... All the pieces need to be developed. From them, you need to understand the moment at which the piece of paper will be completely black. This will be the time that we will take for the base exposure time. If you want a more light shot, you need to expose less, darker - more.

Now the actual printing of pictures begins. Paper is placed under the magnifier, the magnifier is switched on for the exposure time set above. The process for developing photographic paper is very similar to film but slightly different.
First, the paper is put into the developer. The time here is usually less variable than in the case of film, but it is better to look at the more accurate time for the specific developer used. This will usually be 3 minutes. Since the red light is on in the room, you will see the development process with your own eyes. After 15-20 seconds, the outlines of the photo will appear. Time must be timed with a timer. The timer should have a sound signal. After the required time, take the photograph with tongs and transfer it to the stop bath for a couple of seconds to wash the developer off the paper. It is very important to remember that the pliers that have been in the developer should not get into the fixer. Move to stop baths of water to rinse off the vinegar solution, then into a bath with a fixer. Here the time is also not strictly defined. This is usually 10-15 minutes. Thorough rinsing is required after fixing. To do this, the photograph is placed in a bath or sink with running water for an hour and a half. After washing, you need to dry wet photographs. The easiest way is to put them in newspapers.
If you have multi-contrast paper, put the appropriate color filter. Brightness varies by increasing or decreasing the shutter speed. It is quite easy to make specific picture space brighter/darker. To do this, it is enough to darken the area of interest for a short time during the exposure. For example, cover the part in the frame with your hand. This will make it lighter.

11. Create your own experience.
The process is magic and fascinating. That is why many modern photographers are happy to try this art and imagine themselves in DIY laboratories without the latest darkroom photography software and complex apps, used for editing and retouching. Be sure to think about security and ventilation in the darkroom. Fresh air must have a mode to enter the laboratory excluding the light. The place to work with film may look like a box with all the necessary equipment but should be safe and secure for people entering it. Pay attention to materials and tool models you use, especially if it was found in storage. Control everything before starting the darkroom photography experience.
He started his career as a professional photo designer and retoucher. Professional commercial photographer with 20 years of experience. He is a leading advertising photographer and has worked as a food photographer with Michelin-starred chefs. His work with models can be seen on the calendars of many leading companies in Ukraine. He was the owner of the photo studio and photo school "Happy Duck".

with RetouchMe


