


What is perspective in photography?
May 13, 2019

A photograph is a composition of a number of elements captured in a unified and harmonious image. But sometimes some of these elements may not harmonize well with each other, which leads us to think about their replacement. One of these elements can often be the background of the image. Therefore, the photo change background term has been relevant since time immemorial. Whether you just want to experiment with your photos, have fun, or make adjustments to improve the image, in this guide, we will share with you backdrop photography ideas, tell you how to replace photo backgrounds, and what tools are best to use for this.

Removing and replacing background could be a hard task, especially for beginners with no editing experience. Knowing how to replace a background in a photo in various methods may help those who are not familiar with editing in complex software. For instance, in Photoshop you can do that in many different ways starting from making a clipping path vectoring the silhouette of the object that you want to place on another background afterward. This is why there are plenty of apps available out there for such a task to make it more simple. For instance, RetouchMe has the Change background service at your disposal to do this with a couple of taps on your smartphone’s screen. If you prefer that method, our professional editors will do the rest of the routine for you, meticulously working in Photoshop and rendering your image pixel by pixel for precision and quality outcomes.
In case you still want to do it yourself, you want to consider software that has powerful tools such as Adobe Photoshop. Follow our step-by-step guide on how to replace the background of a picture further.

Let us start with preparing our photo and its new background for the replacement.
After getting this done, we are set to go for another step where we manipulate the image to replace the background.

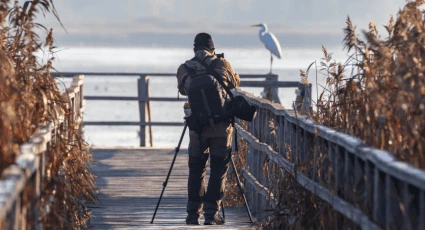
Depending on what you have depicted in a photo you may want to choose a specific background for it. This is an important step as you want the background to be part of the story so that you won’t choose a random background in this regard. Let’s say you have a product photo with food to set up on a better and more appropriate background, then you may consider Food Photography Backdrops from this dedicated article. If you have a person depicted, let’s say a runner on the road, you want a whole background image matching such perspective as well.

There are plenty of tools to select the object out of the background. Initially, working in Photoshop back in the day, you got to manually select the object by painting the selection line around it with one of the selection tools available in the tools bar, but not anymore. Nowadays technology has advanced to the point that you can simply select specific objects by clicking on them using the feature that is called ‘Quick selection tool’. This tool works great on objects of simple shapes and patterns but is not as good for selecting humans, especially hair-wise. Hair is a general problem that makes it hard to do auto-selection by using Photoshop’s tools.
If you have a photo of a woman with gorgeous hair flowing in the air, here we suggest using a specific selection method:

Your subject cut from a specific environment (background) still has some background properties to consider. In this regard, the lighting may give your subject a tint that you need to match with another background. This is why it is essential to refine the image.
Go to the ‘View mode’ and choose the ‘Black&White’ view from there instead of the ‘Onion Skin’. This will help you to analyze your selection.
Click on the ‘Zoom Tool’ on the right side of the screen, zoom in, and look at the edges. Notice that the edges are quite jagged.
Under the ‘Global Refinements’ you have control over the edges of the mask.
After finishing the refinement you can go back into the ‘Onion Skin’ mode to see what your image looks like so far, and you can double-click on the hand tool from the right side of the screen to fit the image to the screen.

Another thing that you can do before you leave this panel is make adjustments to your mask. Sometimes you will notice that this selection method may leave some imperfections as holes in the image that the algorithm considered as a part of the background, so it cut it off.
To fix that:

Go down in this workspace to find the ‘Output to’ and select the ‘Layer Mask’ and press ‘OK’.
You will see the ‘black&white’ mask right next to the original image. It will hide, not delete the background. So that, you can always bring back the hidden pixels by painting with white on the mask. This allows you to finetune the hair:
You can always select the Layer Mask (the black and white thumbnail) to paint with a brush tool using white to reveal areas of the image that were concealed by the algorithm or use black to conceal unnecessary areas (revealed).

When you set the new background you may notice that the light direction does not match the subject highlights and shadows. The background may have the light going from the left side, and then your object’s face is highlighted from the right side. In this way, you can simply flip the background, plus position your subject (Mask) in accordance with the light source.
Think about how your foreground and background images were shot. They were probably shot at different times of day with varying lighting conditions. In this regard, you need to do some color matching to get things look more realistic. Every image will have different challenges and you will need different techniques to solve those issues. But you can always start by going into the new adjustment layer icon in the layers taskbar menu to select levels.

With this adjustment layer, you can adjust the brightness and tones of the image with the slider beneath the pictogram that shows the levels in the properties menu.
We want to adjust our subject, not the background. To do so click on the icon known as a clipping mask which is located right above the Layers-Channels-Paths tabs shown as a rectangle with an arrow looking down. This creates an adjustment layer above all the layers. To make this adjustment layer only affect the layer below (as indicated with the arrow on the layer thumbnail), make sure that your subject (not the background) is placed right after the adjustment layer (beneath). Now all the adjustments affect your subject. Notice that there are RGB channels available that allow you to adjust specific tones and add redness or yellowness depending on the light conditions you want to play with this setting and the level’s slider to achieve perfect matching in levels and color.

Now you have your image finished and the background successfully replaced, it is time for the last step - saving and exporting, which is simple.
Following these very steps, you can also save the project for future working on it by saving the file in PSD format which is Photoshop’s project format to save a whole project workflow.
Co-founder of RetouchMe. In addition to business, he is passionate about travel photography and videography. His photos can be viewed on Instagram (over 1 million followers), and his films can be found on his YouTube channel.
Moreover, his profile is featured on the most popular and authoritative resource in the film industry — IMDb. He has received 51 international awards and 18 nominations at film festivals worldwide.