Food Photography Backdrops
- Best food photography backdrops
- Kitchen items
- Dedicated backdrops
- DIY food photography backdrops
- Setting up your scene
Cooking the food is an art, but making food photos is something beyond.
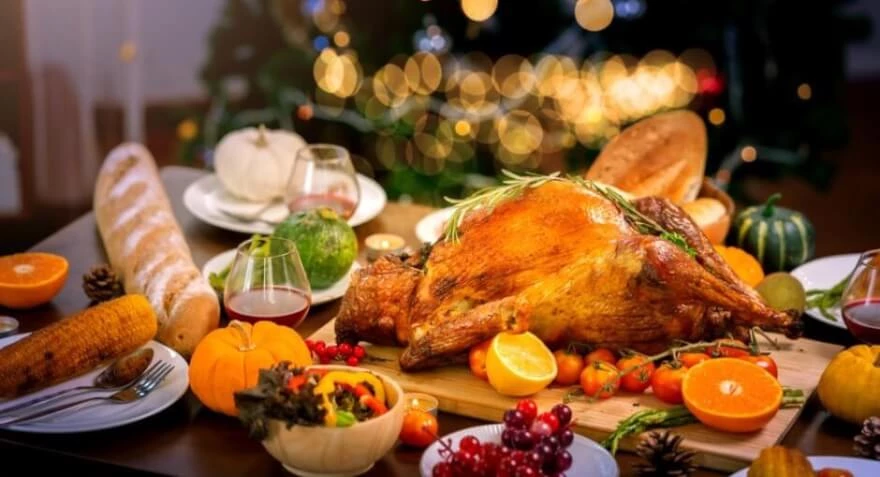
If you are going to make some awesome food images, you need some equally awesome backdrops to place that food on. If you are just getting into food photography, you probably have all these great ideas for images just swirling around in your head. After taking those shots, you may also start thinking about all the props and the backgrounds that you want for those images. The food photo backdrops for your images are almost as equally important as your food composition on them. You can set the scene with all of those colors, textures, and patterns to make them all work together. If you are an experienced restaurant customer, you may notice some key designs inside the place, it can help with building your own scene as well.
Best food photography backdrops
If you wonder how to make food photography backdrops, the majority of them can be done with a different scrap and things that you may have thought to get rid of a long time ago. So in case, we do not have a lot of tools, we are going to break down some categories including DIY backdrops for food photography.
The leading factor of using any backdrops is that it should be not distracting from observing the delicious food on it but be complementary instead. Matching color and textures between your backdrops and dish for the food is a good way to start.
Kitchen items
The first one is simple baking steel. It is probably not the biggest food backdrop in the world, but it has its lovely look of cold steel, and the food also looks awesome on it.

And everything is going to look better if you use the macro lens in addition to that.
Another one that we favor is the marble slab.

You can stack this backdrop with other backdrops to get some nice layered effect with it.
The simpler the backdrop, the more natural would be your shots on it that is probably the best recipe for food photography. Thus, we can use simple linen and fabrics like a towel to shoot on. Baker’s proofing cloth has a very good use for food photography backdrops

It looks great iron flat or crinkled up for a beautiful texture. It is especially good when all of those wooden or painted backgrounds can kind of become cliché. You can see this if you are putting all of these images sides by side into a portfolio, so some of these simpler kitchen items can provide you with that texture and the variety that you are going for.
Dedicated backdrops
Next up, if you are looking for something dedicated to shoot on, then you are going to be reaching for these boards or wood plank table tops.

At the very high-end and probably the most popular are the boards from Erickson surfaces. They are gorgeous, and it is good to have some of these in your collection. The textures on these boards are amazing, some of them are rustic, some of them look antique. The different styling of those boards looks really well with different food compositions. And the company itself works with photographers to get these custom boards out. The major downside of these boards is that they are really heavy, not the best choice to travel with for a long distance to shoot. The good news from that manufacturer is that they are going to make lighter versions of these boards eventually. Thus, make sure to get one for your food photo backdrops.
DIY food photography backdrops
If the previous case is an expensive solution for you, then you can try some DIY for that matter. Following tips may cost you around 20 to 30 dollars, so let us get to it.
The basic concept of this is that you get some sort of board, and you use the joint compound, which is constructional material used for dry walling. You apply it to the board, and then you paint it. Some people would advise using a foam core instead of a board, but it does not seem to do a good job. The foam core after drying starts bending and is hard to use as a flat form.As we get all our items set, let us put some joint compounds onto the surface of the board. There are different ways to scoop the compound on a surface, but probably the most organic way to make it is by following the wood lines. You do not have to be precise or accurate, you can leave some texture on the board using the compound. But make sure that all your dishes with food can eventually stay on them without falling off.

After getting the job done, leave it to dry for a night or probably for 24 hours straight.
The next comes is the paint. Picking the paint, make sure it has a matte finish. Because we do not want any additional glare going into the frame during our photography. It is recommended to not use highly saturated colours, but that is still maybe your own vision of art. By all means, muted tones and more white tints like olive colour have a better use. Matte colours: bittersweet (Brown), Castle Rock (Beige), and some very light blue. You can use some additional colours to elevate the scene, but make sure they are not that much distracting.
Overall, to make a good painting, we use three different types:
- Oil-based spray paint (brown)
- Chalky finish acrylic paint (gray)
- Metallic paint (for dusting)
Start with oil-based paint and cover the entire board with that. This would be our peek-through layer, so you do not have to be very precise with it.

Our predominant paint would be the chalky finish acrylic paint. Put it all over the place, getting the nice blending effect with our peek-through 1-st layer with circular and stippling motions.

If you spoil the peek-through effect of your bottom layer with too much chalky finish on it, you can use the sponge with some water in it and the acrylic layer will get easily off to the needed condition to uncover more dark colour.
The third spray we use to add some more dynamic to our colour composition to get some fine mist spots is going on the board. To not overuse and to not make high-concentrated spots, make sure to keep the distance between the spray tip and the surface. For the more interesting effect, you can spray the 1st two layers already sitting on a surface with just water and then spray your metallic paint on top of that, that will make an interesting pattern as water spots will not allow the paint to get to the surface. Then just dry the water off to get the nice pattern overlay.

Try some shots on it and see how it looks!
Setting up your scene

Shooting food as many other types of photography, you need to think about the camera angles. The most common way is to shoot flat lay when your camera is set on a tripod above your scene from the 90-degree position. If you are using a 50 mm lens, then you need to make sure that the frame is at least covering 2 feet by 3 feet of your backdrop for a flat lay, but more is always better.
When shooting a flat lay, you also need to follow the rule of thirds, which says that the point of interest should be placed where the grid lines are crossing. Set up your flatware with spoons and knives, bowls, glass mugs, and plates in the right order, trying to match the rule when you create your composition.
The other angle to shoot is a 45-degree angle, which is naturally a good angle to observe with a human eye. For that angle, you need to work with the lights more because it will emphasize certain parts of your scene depending on the tints and shadows being made with the light sources. Using daylight is preferable because it will make your image look more natural.
Hope we helped you find the best backdrops for food photography, and now you can be creative with camera angles and set everything in order for your scene to get your perfect and outstanding shots!
Co-founder of RetouchMe. In addition to business, he is passionate about travel photography and videography. His photos can be viewed on Instagram (over 1 million followers), and his films can be found on his YouTube channel.
Moreover, his profile is featured on the most popular and authoritative resource in the film industry — IMDb. He has received 51 international awards and 18 nominations at film festivals worldwide.

with RetouchMe


