Dark and moody photography

- How to take moody photos
- How weather conditions effect on dark and moody photo
- Technical issue of dark portrait photography
Dramatic, dark and atmospheric is the best way to describe the model of dark and moody photography. The trend towards seductive photos with their deep shadows and vibrant color accents has become an integral part of the photography scene in recent years and continues to be the same. But in order to make such photos qualitatively, one needs to study in more detail what actually determines the style of dark and moody and how to implement it yourself in your photography. Dark and moody is a style that has developed a lot in the field of photography in the last few years. Photos are relatively dark, with deep shadows and mostly strong contrasts. Their atmospheric, often rustic look and vibrant color accents are reminiscent of paintings by the old masters of the Renaissance. As seductive as the photos are, this style does not suit all subjects. Because moody photography directly affects how the viewer and what message is conveyed to him perceive it.
How to take moody photos
In order to master this style in more detail, it is necessary to look deeper in several practical examples of dark and moody photography. It is best to use only one light source for dark and moody photos. For example, one window. Shade all other light sources with blinds or curtains. This creates a more dramatic lighting atmosphere and more intense shadows. For seductive photos with crisp outlines, sharp edges and beautiful highlights, it is recommended to illuminate the subject from behind or from the side. By the way, this applies not only to dark and moody photographs in particular, but to photography in general. This lighting enhances edges, structures and textures and makes the motif more three-dimensional because it stands out more against the background. For dark and moody photography, it is very important to control the light to achieve the desired mood. For example, if the sun is shining too much through a window, a diffuser (or thin white curtain) should be used to soften the light. On the opposite side of the light source, you can also - instead of the usual light cardboard - place dark, black cardboard or something similar. This absorbs light and thus enhances the shadows. It is also important to protect the light in specific areas of your subject that should be darker in your later photograph with cardboard or something similar. Maybe there is only one thin tunnel of light in the photo that appears to be pouring onto the main subject.

For dark and moody shots, it is preferable to choose a dark background. For example, dark wood, old baking sheets, or other dark brown, blue, or gray tones. The selection of props should also be primarily dark and matte. In practice, everything that is bright in the pictures taken will later grab the viewer's attention. The subject should be the brightest element of the photo, because it grabs the viewer's attention through the dark environment. For example, if you don't want a white plate in the background to distract attention from the subject, you should use dark-colored dishes in this case. On the other hand, if you want to highlight certain areas in the image, you should deliberately use lighter elements here. One can also create beautiful contrasts in a dark image. By the way, one should be careful with pure white elements and materials with high reflectivity. They can make it difficult to get an even exposure photo.
Considerable attention should be paid to editing photos in the style of dark and moody. Essentially, dark and moody shots need to be well exposed first. Thus, there are no blurry highlights or clipped black tones. To do this, from time to time you need to look at your histogram and work with a tripod. Then, while processing the photo, shadows are enhanced and individual colors are emphasized. It is a vital thing while processing dark portrait photos. Here you can increase or decrease the exposure of specific areas using targeted local adjustments, as well as set the contrast of brightness and colors. For example, for local adjustments, you can use the Photo Editor's Adjustment Brush. Or change the brightness and intensity of individual colors using tools. It is important that the photos are taken in RAW format, not just JPG format. A small but lovely vignette (accessible through the effects in the editing tools in the photo editor) also gave every dark and moody photo a bit of mysticism. It also prevents the viewer's gaze from jumping out of the frame, but instead directs it back to the center.

How weather conditions effect on dark and moody photo
So, after making the first analysis, one can describe the photos in the style of dark and moody, as those taken in low light. That means that there are no bright lights, cloudless skies and clear weather around. Accordingly, the inspiration for creating the perfect photo of dark and moody can be bad weather and various atmospheric phenomena. However, the rate of photo travel can be significantly reduced due to rain or any other bad weather. Whatever the weather, you need to benefit from any situation to learn better how to make moody edits.
Regardless of whether it's freezing or raining, before deciding on a photo shoot in bad weather, it is important to remember to dress well and protect your photography equipment. Taking dark and moody photography is not about ruining your photo camera in the rain or getting pneumonia for a photo, no matter how beautiful it is, there is nothing more unpleasant than a photo trip from which you can return frozen and drenched. When it comes to photography equipment, especially in case of heavy rain, special protection will be required. Although a large number of photo cameras are considered to be tropical or moisture resistant, for most of them this remains purely theoretical. In fact, it is possible to hide under an umbrella while creating photos, but this is far from practical. Otherwise, you can choose a protective plastic case, or make one using a plastic bag through which the lens is pierced and an elastic band to secure it.

Now that the elements are not scary, one still needs to find something to photograph. If overcast, gray and rainy skies make most people as gloomy as the weather, for a photographer this weather can be a source of inspiration and poetry to create dark and moody photo. It remains to learn to appreciate the dark and bad weather and anticipate possible compositions in order to be able to play with the elements.
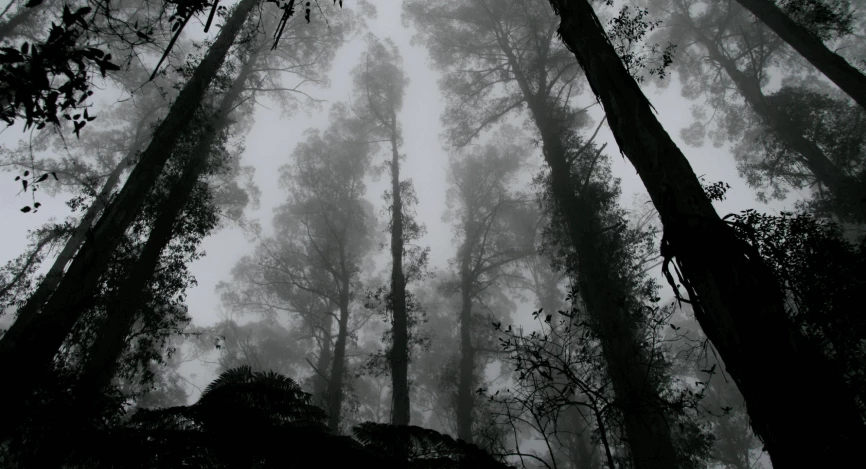
When it comes to dark and bad weather, thoughts of rain immediately come. If this is far from the only subject for photographing, then it is it that makes people talk the most. Another amazing motive for dark and moody photography is fog. A poetic act in itself, the fog should be an excuse to go out and take a photo when it appears. It certainly creates an appropriate mood and transforms the atmosphere of the scene into something mysterious, where there is no longer a difference between heaven and earth, where silhouettes appear and disappear with distance. It is allegedly one of the best elements to make dark landscape photography. Probably the best in bad weather. A sky filled with more or less dark heavy clouds can give a photo a dramatic look, while the same scene with a light piercing through the clouds can give a little optimism. In the same way, the sky, loaded with a stormy sea, will mix one into the other, creating only the impression of chaos and that is another great motive for moody photography. Sometimes, many elements of bad weather are not visible in the photo, because the cold without snow is not visible, because the blowing wind is not strong enough to bend the trees, because the rain is too light. The best way to convey this moody spirit and feeling of coldness, wind noise or moisture is still there - through people. This is the photo of a man who fights with his umbrella blown in the wind, this other who jumps into a huge puddle of water so as not to get his feet wet, this old woman with her head hidden in a hat blowing on her hands to warm them. To achieve this moody spirit there is no need to directly photograph bad weather, sometimes it is much more obvious than it seems.
Technical issue of dark portrait photography

As always in photography, theory and technique are not necessarily enough to create a successful and therefore striking photograph. Basically, anyone can take a photo of a person walking in the rain with an umbrella, the most difficult thing is to find something that will identify the photographer. That little something could be a framing technique, an original photographic technique such as post-processing, which is inspiring at this moment.
The lack of general light in winter increases the sensitivity compared to summer photography. Otherwise, you will have to choose a slower shutter speed in order not to increase the ISO too much. Also, bad weather can be an opportunity to play with the shutter speed and go even slower. In moody landscape photography, using a tripod, you can make the clouds and waves of a stormy sea fluffy, blur the treetops that dance to the rhythm of the rising wind that in its turn emphasizes moody spirit. Either way, playing with a slow exposure while making photography helps to heighten the sense of necessity and power of the element.
In the middle of the day, with sufficient light, it seems like photography is child's play even in automatic mode, you just shoot and have fun. On the other hand, as soon as the lights go out, bad photos are taken very quickly, even when using the photo camera's automatic mode, which almost always activates the camera's internal flash for rather unsatisfactory rendering. Accordingly, the question arises of how to still make successful moody portrait photos under the conditions of low light. This is what you can learn from photographers who have a lot of practice in dark portrait photography.

It's all about the light. It should be remembered that in photography everything is connected with light. In low light conditions, such as indoor photography, there are two options: create missing light or adjust the photo camera to capture as much light as possible, no matter how weak it is. In such a situation, you need to use a fast lens with a large aperture (for example, f / 1.8). There is an opinion that any camera plus lens can create a good photo in a lot of light, but it is when shooting conditions are more difficult, in very low light, that hardware photography (not necessarily expensive) becomes important. For photography in low light conditions, it is best to use a fast lens. When it comes to a bright lens, talk goes about its ability to capture a lot of light thanks to the very large aperture of the lens.
Among the brightest lenses available, the 50mm f / 1.8 should be highlighted, which combines all the advantages: high quality, lightweight, inexpensive and versatile, especially for 24 x 36 or full-frame photo cameras. In APS-C format, it is the ideal lens for close-up moody portraits. The maximum aperture at f / 1.8 of this lens will be very useful for portraits in low light. Speaking about compact photo cameras where the lens is not removable, it is worth taking a closer look at zoom hole at wide angle, as well as when zooming. It is necessary to properly adjust the photo device in order to capture more light. Now that one have the right lens for low-light photography, one can direct more light onto the camera's sensor. The goal is to get a well-exposed photo despite the limited ambient light.

The first thing to do when doing dark moody photography is to choose the widest aperture for your lens. An aperture is a hole formed by the lens aperture that allows more or less light to pass through. The larger the hole, the larger it is and therefore the more light passes through it. Therefore, you will need to pay attention to the focus of the photo, even if that means checking the screen by magnifying the portrait to see if the subject is in focus.
Do not trust the rear screen of the photo camera to judge the success of the photo, as the rear screen is always very bright (especially in low ambient light), and the photo on the screen always looks sharper than in real life. It is preferable to zoom in on the photo to see the details, and look at the histogram to make sure the photo is well exposed. Its better also be careful while shooting a portrait of several people: if they are not in the same plane, some people may be blurred. Make sure they are at the same distance as the photographer. If not, a smaller aperture will be required to increase the depth of field. But doing this reduces the amount of light hitting the sensor, so one has to change the settings or add more light, for this it is possible to use an external flash. In low light conditions, the lens may also slide to focus as there is not enough light to surround the scene. However, it is better to control other camera settings, or even switch to manual mode to be able to force the speed and ISO to suit the portrait, this action for sure significantly improves dark portrait photography.

Another parameter to consider when doing dark portrait photography is shutter speed. The slower the shutter speed, the more light hits the sensor and therefore the brighter the photo will be. Therefore, in low light conditions, one needs to use a slower shutter speed to properly expose photo. On the other hand, by slowing down the shutter speed, the risk of blur increases. Therefore, for shooting portraits in low light, it is preferable to photograph a subject that moves little, if not at all, and it is good to stabilize the camera when the shutter is released. If there is a photograph of a building outdoors, this is fine, but for a portrait, it is best to use a fast enough speed. Of course, this rule is not fundamental, and if the camera has optical or sensor stabilization, a lower speed can be chosen. And if there is photo shooting of a moody portrait of a moving person in low light, one will need to choose a higher speed growth, even if it means an increase in ISO.
In summary, it is important to highlight the main aspects of the process of dark and moody photography. Thus, preparing for photography in this style and determining the image or motive plays perhaps the most important role. Never forget about the importance of light. Choosing the right equipment with the right settings for working with dark objects and exposures will affect the convenience and speed of work. In addition, it is necessary to remember about the final processing of the photo, which will give perfection at the final stage of creating a dark and moody photo.
Co-founder of RetouchMe. In addition to business, he is passionate about travel photography and videography. His photos can be viewed on Instagram (over 1 million followers), and his films can be found on his YouTube channel.
Moreover, his profile is featured on the most popular and authoritative resource in the film industry — IMDb. He has received 51 international awards and 18 nominations at film festivals worldwide.

with RetouchMe


