


What is composition in photography?
Dec 7, 2020
Often, people acquire digital SLR cameras searching image quality, but they have no idea about the technical aspects of shooting. Such problems usually appear when after automatic modes and extremely compact cameras, they take in hand a new brand DSLR and get surprised by numerous functions it includes. Though modern digital devices do not need to be professional to control general picture settings, there is still an advantage between a simple gadget and appropriate SLR.
As a result, someone is completely frustrated, while others are patient and try to master the wisdom of photo art. This is the best way to unlock full potential, studying tutorials and examining online examples.

Initially, everything starts with basic features. Sometimes it is enough to go outdoors and start capturing everything around. In case you enjoy theory before practice, then exposure, aperture definition and what is ISO in photography are the key parameters to begin with. Only after thorough examination of these aspects, lens and flashes can be purchased for further upgrade.
Let us say a few words about the importance of exposure, which is mainly determined by three crucial parameters:

Changing this parameter allows you to regulate the daylight you need for a perfect shot. In case the sun is too bright, which can easily damage the digital “eye”, you need to set low sensitivity. And when the light source is not powerful enough to offer a perfect quality and there is no possibility to use a regular flash, then you need to increase the sensitivity.
Detailed description of each element permits us to avoid mistakes, working on interesting plot. Nevertheless, shoot as much as possible. It is essential to memorize these, so that hands remember where and what to turn on or switch off, while your eyes are looking for interesting scenes and compositions.
If we draw a parallel between these aspects and our everyday life, we will be able to find simple examples. Let us suppose we have an empty glass, which has to be filled with water from a tap. This action can be realized in two ways: turning on water pressure and filling the glass in 1 second, or using a thin stream of water in a minute. This example compares a glass to a camera matrix, water to a luminous flux, and tap to a diaphragm (the wider the hole, the stronger the flow). But if we fail to fill the glass in the set time, the only way out will be to reduce the size of a glass. When the size is 2 times smaller it is going to be filled 2 times faster. Thus, the size of a glass is the example of photosensitivity. If the glass is filled faster then the photo can be captured with a shorter shutter speed.

Generally speaking, it is not a mandatory element of each digital camera. Its value is inversely proportional to the amount of transmitted light and is known as a fraction 1/k, where “k” is a classic coefficient. In practice, only a fraction is usually indicated.
To understand better its role in successful shots, there is a need to take a look at a diagram, easily showing how it works and what it means.
An ISO in a digital camera generally indicates sensitivity level of pixels. We will pay more attention to the numbers after these three letters. The value of these figures corresponds to sensitivity and makes the difference affecting resulting pictures.
Increasing the value, we force the electronic unit to amplify the signal obtained from each pixel.
Increasing sensitivity level, photography will contain more noise. Thus, if you do not pay attention to this important issue, we need less light to get a photo with the correct exposure. You should always take pictures at minimum ISO values to avoid unnecessary noise in the picture.

Imagine you are shooting a sports event in a gym. You cannot adjust appropriate settings of a shutter speed longer than 1/250 second, because you need to capture a moving object. But there is not much light in the hall and with a fully open aperture, photography is captured at f/2.8. These shutter speed and aperture settings are just enough for a normal exposure of a frame. Everything seems to be ok, until you zoom to see the subject closer.
This is exactly the case when you need to adjust the automatic value of the sensitivity indicator. By changing this value, we change the shutter speed (and/or aperture) that are missing for normal exposure. ISO is usually set to minimum, which is absolutely not appropriate for a good shot. There are several reasons why exposure can be only adjusted by regulating sensitivity values:

If you continue to increase the sensitivity there is a good possibility to take pictures with a shorter shutter speed. Otherwise close the aperture to increase the depth of a field (DOF).
DOF is the range of distances where objects are perceived as sharp. Such definition refers only to perception of the image by a human eye. Looking at every picture, we can easily notice that there are no clear boundaries between sharp and not sharp images. Sharpness smoothly turns into a blur, and each observer can draw a line between sharp and not sharp in the frame, depending on own perception.
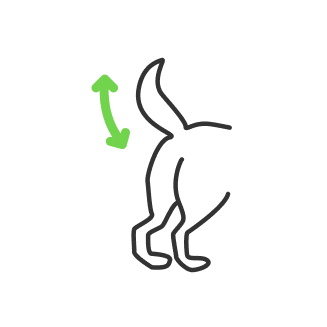
Talking about the example of capturing fast moving objects, there is no way to keep this value low. This will cause a blurred effect without any sharp details. Thus, we came to the conclusion: the more mobile items we need to photograph, the shorter the shutter speed and the higher ISO value is needed.

Let us talk clear about every possibility your camera can give in achieving stunning results with minimum efforts. Various levels of sensitivity are used for various kinds of frames and plots.
Here is a brief reminder to understand ISO meaning, camera settings and other hacks, which will also help to define aperture in photography:

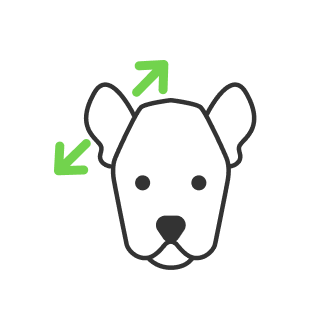
Modern devices focus on objects by themselves. In poor lighting conditions, autofocus does not work in a proper way. So there is a need to focus manually, losing interesting shots. Trying this mode for the first time, it may seem harder, but it provides more control over the image and other settings. When shooting a portrait, it is better to focus on the model's eyes.
This is a general guide you can find all over the web. Your personal passions and styles can be considered as well. There is a need to develop every skill with experience and practice. Sometimes it takes several months, in other situations it takes years. But it is worth noting that most professionals have their own understanding of ISO definition, photography plot and exposure. Stop searching identical approaches and copying famous styles. Try something new and achieve good results, creating your own aperture definition, photography concepts and successful settings.
He started his career as a professional photo designer and retoucher. Professional commercial photographer with 20 years of experience. He is a leading advertising photographer and has worked as a food photographer with Michelin-starred chefs. His work with models can be seen on the calendars of many leading companies in Ukraine. He was the owner of the photo studio and photo school "Happy Duck".


