


Northern Light Photography - How to Photograph Aurora Borealis
Aug 19, 2022
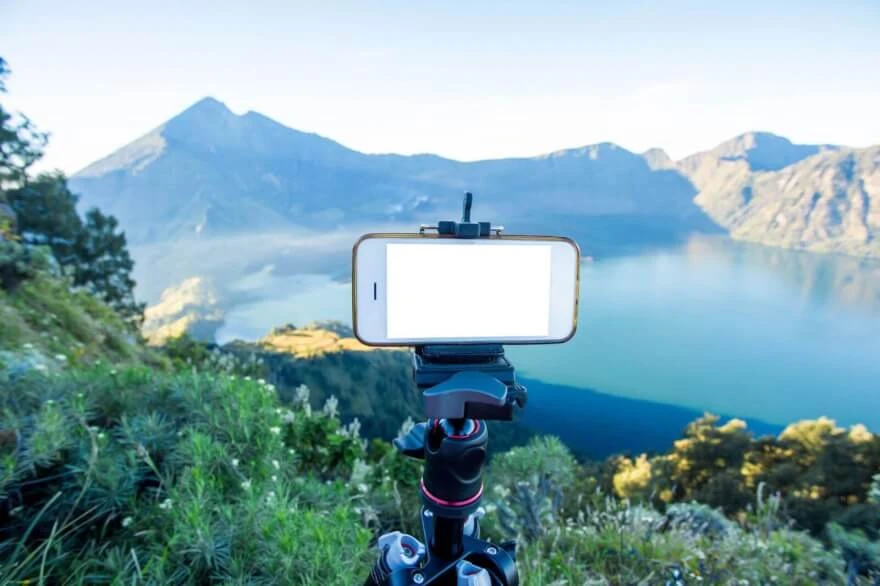
Before we talk about the best travel tripods, we need to understand what are travel tripods' main features and differences. Whether you are a professional or just an amateur who travels with your camera, you would probably like to have a tripod in your camera bag in addition to other photo equipment. Travel tripods provide a stable structure for your camera, and also allow you to work independently and at an immediate distance from your camera.
A tripod should be solid so that you do not have to worry about your camera being blown away by the wind at the very least. What could be more annoying than someone's comments about your photographs have not enough sharpness on social media, right? Tripods are very commonly used for long-exposure photography, double-exposure, and HDR photography and most often in combination with remote shutter control. Tripods allow you to stay hands-free, the extra hand is never excessive in photography, while you are building your photo composition, whether it is a commercial production or just an amateur nature shoot. Some pictures come out better if you first take the time to think about the shot, and set the light and settings - it should be on the instinct level of the photographer. Today we are going to talk about the best tripods, their differences in functionality for certain tasks, and how to travel with tripods in general.

Before going deep into travel tripods review, let us list the main features needed for that. If we think about traveling in general, what is the first thing to come to our mind while traveling? Of course, it is overall luggage weight. We do not want to have some piece of equipment that produces more weight than efficiency. Therefore, it is very important that the device is solid but also lightweight at the same time.

We are lucky to live in the 21st century and this is not rocket science anymore to get solid devices without weight compensation. However, we will not look for tripods made of titanium, that will be overkill, but carbon fiber travel tripods are more than a reasonable and affordable solution in this case for most people. Carbon fiber provides a solid structure with a moderate weight and that is what we are looking for.

The second feature we are looking for is the size of the tripod. Tripods come in different sizes and shapes; we need to understand what features help to accomplish our photography tasks. When we travel we want to travel light, that is why the second feature that comes after weight is the size of our equipment. We look at how do travel photographers carry tripods and often see that they mostly have them attached to their backpacks. This is not the best solution so far. Compact tripods for travel allow you to get your equipment gathered together and not stick out from the backpack obstructing your navigation while you move.

We want our tripod to be solid, compact, and lightweight but flexible at the same time. The last thing you would like to think about is moving all this construction back and forth after deployment just to be able to adjust your camera’s angle. To serve that claim we will also mention some best ball head travel tripods in this article.
And last but not the least feature is the price. You may be surprised, but some cheap travel tripods can fairly compete with probably the most popular Peak Design tripods while providing the same efficiency. Here is when you can say that production advertisement comes into play.
So we have gotten the list of features we are looking for, so let us review actual products now!

Let us take a tripod from Peak Design as an example to discuss the pros and cons, and draw a conclusion. Peak Design is a company situated in San Francisco. The manufacturer is known for its interesting solutions for photography, in particular the clip which is put on the strap of the backpack. This company decided to release a product presented as a travel tripod. As stated, it is made according to the wishes of photographers. The company collected feedback and went on Kickstarter to fund it and succeeded in this. That is how a great carbon tripod came out, the pros and cons of which we would like to tell you based on the experience of using it by professional photographers.
It is a tripod with a built-in ball head and five-section legs of 150 centimeters in size available in two material variations: carbon fiber and aluminum. The head pad can also use the aforementioned backpack clip as a substrate for your camera. The ball head also extends from its base up high for about 20 centimeters.

First, it is very different from conventional tripods due to it is very compact when assembled. Its dimensions are compared to a water bottle size. One of the features of this tripod is its quick installation: we just slide the latches at the bottom of the tripod legs (flip-lock) and deploy five-section legs to the required size and then assemble it back the same way with no effort. You can also unscrew the central axle and set the tripod very low for low ground shots which makes it a good choice if you are looking for small tripods for travel with. It is also possible to replace the top head with something you got used to. The leg tips can also be attached with spikes to increase stability when shooting landscapes in nature. You can remove four sections and leave only one main leg section for additional weight loss. It comes with a carrying case, but this case is too tight and you can spend a lot of time unpacking and carrying it, so most photographers prefer to put it in a backpack, it fits great in there. Overall, this tripod is enjoyable to carry around in hands due to its small size so you won’t have any issues with it. The tripod also comes with an Allen wrench that could be attached to the tripod leg. With this key, you can perform all operations of assembly, disassembly, and replacement of tripod parts. But according to what photographers say, it is not secure enough and the key is often lost, so many people prefer to keep it separately from the tripod and put it in the backpack. And here we move smoothly to the disadvantages of this tripod.

As we mentioned earlier there are some slight flaws in this tripod’s design that are bearable. But there are some major flaws. The manufacturer claims that the main mount is compatible with different platforms. It is really compatible with Peak Design platforms that go in a suit, but not the case with multiple other manufacturers and platform types. Many other L-plates and small plates are not compatible with Peak Design’s mount drive. The ball-head is immobilized when shrunk away, that is a price you have to pay for a compact design but it gets its mobility features if extended even slightly. The other flaw with the ball-head mount is it only allows you to do portrait shots by inclining the cam on one side but not the other which was already mentioned online and will probably get a fix in the future.

Peak Design travel tripod comes in two variations, carbon-fiber, and aluminum. The carbon fiber version weighs about 1.27 KG, and the Aluminum version is 1.56 KG which is already quite heavy. If you chose a carbon version then the price comes into play which is $ 349.95 for the aluminum version and $599.95 for carbon fiber. So if you are looking at what are the lightest weight travel tripods to choose from, this might be the case if 1.2 KG weight fits the affordable price. If you can afford this tripod, you will not be disappointed, because this is not just a tool but a gadget considering its overall utility. But if you are looking for some jack of all trades tripod, then you better look for a piece of more professional equipment because of Peak Design’s compatibility issues in the first place. There are a lot of alternatives on the market to choose from which are less in price and have no compatibility issues. So let us take a look.

Doing market research for cheaper alternatives featured similar to Peak Design’s carbon fiber tripod we found one good tripod manufactured by Ulanzi & Coman. At first glance, this tripod is inspired by Peak Designs products but made even better in almost every single way.


To resume all the said above Ulanzi wins PD by a lot of features and overall is better in practical usage. And the cherry on the cake is the price. Ulanzi costs $370 vs $500 + the requirement to buy spikes for the feet. There may be cheaper options on the market but both of these tripods are top-notch and as we can see one is just a better version of another in this case.
As we mentioned earlier, if you are doing long exposure, double exposure, and HDR photography then you just need to put the camera on a tripod. There is a hook on the bottom of the tripod where you can add weight for extra stability or hang a backpack, just make sure it does not wiggle and rests on the ground for extra weight instead of doing the opposite. If you are shooting in landscapes then plant your tripod deep into the ground using the cleats to recess it.
To make things even more stable lock the mirror in your DSLR using the Mirror lockup option in your camera settings. Even changing the position of the mirror in your camera can create a slight vibration that is enough to blur the frame at slow shutter speeds. Now everything seems pretty stable but take your time, you still need a shutter remote. Even a small press on the camera creates jitter which can show up in your shot. If you do not have a remote shutter control, just use a timer so you do not touch the camera at all costs. Now when all the settings are done, the light is set and you are happy with the composition in the frame, you can start taking pictures and enjoy sharp and blur-free images!
A not-so-obvious feature of some tripods is that they can be used as a selfie stick or vice versa for taking pictures below eye level. You can attach the camera to the tripod from above and below to take pictures and adjust it to a low ground level without having to bend over and get your clothes dirty. Or, you can simply extend the legs of your tripod for the below-eye level shots, but you will be limited with construction features in terms of lowered height. The ability to raise the camera up will allow you to take shots from interesting angles without the fear of falling out the window or having to put a chair under your feet to gain extra height, no matter how ridiculous it may sound this still has a good use.
If you really want to pick a top-notch tripod we would recommend choosing between those two. Ulanzi and Peak Design’s travel tripods are both featured with a lot of useful tools thus any person can find use. Both tripods have a lot of similarities but at the same time are very different in construction and especially in ball-head parts where Ulanzi has a significant advantage. Peak Design is more popular and beloved, however being popular does not mean the best so far. Therefore, it is better to have a comparison to see the design features difference and the price equation.
We hope that this article helps you to choose from the best lightweight tripods for travel.
If you are looking for more travel photography gear or travel photography ideas you may check for the articles dedicated to that in our Blog.
We recommend reading about the best camera backpacks in this article it may be a good consecutive market research if you are really up for traveling and being equipped for the best.
Co-founder of RetouchMe. In addition to business, he is passionate about travel photography and videography. His photos can be viewed on Instagram (over 1 million followers), and his films can be found on his YouTube channel.
Moreover, his profile is featured on the most popular and authoritative resource in the film industry — IMDb. He has received 51 international awards and 18 nominations at film festivals worldwide.


