


How to make a professional bikini photoshoot of a model
Jan 23, 2024
Light obviously helps us see the world around us. Waves of light reflecting off different surfaces create colors, shapes, and shadows. Knowing how to set up light correctly is the basic principle that gives rise to any type of photography, be it portrait, subject, or any other type of photography. In our today's article, we will look at the most popular types of photography lighting techniques for different purposes which will give lighting ideas. We will also break down conceptually what types of lighting are available. We will discuss color temperatures, contrasts, and shadows, as well as what effects can be achieved with any given lighting setup.
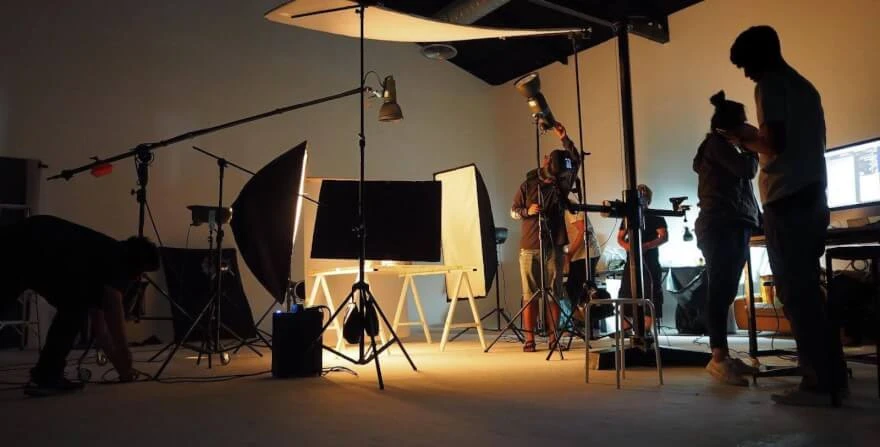
When professional photographers work in a studio they have certain terms for different lights and lighting setups. The most commonly used technique is 3 point lighting setup. Here we have key or main light, fill light, and hair light. By understanding what role each type of these light plays in a setup we can achieve different dramatic effects for the image we shoot.
Let us make definitions for each light source in this setup
Learning traditional three-point lighting will give you a solid foundation for portrait illumination. You can achieve everything from flat lighting scenarios to deep shadow lighting.
You need three lights stands and if you have a boom for the hair slash background light that would be preferred.
Establish where your subject and camera are going to be. To capture flattering portraits a guideline is that your camera should be positioned six to twelve inches above the subject’s face. The lens you choose to use will determine the distance from the subject you will be shooting. Once you know approximately where you are going to be positioned and your subject will be, you can start setting up your lights.
Starting with your main or key light place it on a 15 to 45-degree angle from your camera. If you are using a long lens set your lights as if you are standing within 10 to 15 feet (4.57 meters) of your subject. Raise the light higher than the camera level so that the light is coming down on your subject at approximately a 45-degree angle. This light should be your strongest light. If you are in a dark room, and you are using constant fluorescent light, you will be able to see the light spread and the intensity. Before turning any additional lights, measure the light using a light meter from the point of the subject.
Your second light is your fill light. This light should be placed on the opposite side of the camera at nearly the height of your subject. The placement should not be symmetrical with your key light. This light fills in the balance of your image. Meter your fill light. The fill light controls the creativity of your lighting pattern. Turn off your key light and again use the light meter to establish how much light your fill is casting.

The creativity comes in with the variations between key and fill ratios that come from the light meter measurements between key and fill light. Ratios are measured in F-stops which essentially is a value for aperture settings. To understand how that is applicable to the light we need to understand how the aperture works. The aperture is the setting responsible for how wide open your diaphragm is going to be. The more it opens, the more light is coming through and the opposite. So when we do different light ratios we can lean on the aperture F-stops as the equivalent.
If you want flat lighting or a one-to-one ratio, match your fill light source to the same level as your key light. This light pattern is unflattering but is commonly used for ID photography, larger groups, families, and sometimes engagement portraits.
Your fill light will be 1 F-stop smaller than your key light. For example, if your key light is metered at F/11 your fill light should meter at F/8. This lighting scenario is typically used in basic press portraits, full-length fashion images, and general portraiture.
Your fill light will be two stops dimmer than your key light. Your key light is at F/11 and your fill light is at F/5.6. This lighting is beautiful for portraits and is commonly used for all portrait scenarios.
F.11 to F4/2.8. These ratios are getting into harsh shadow lighting and are extremely dramatic. These light patterns work particularly well on men. The five-to-one ratio will bring almost no detail on the fill side whatsoever. If you put egg crates or barn doors on your key light in this scenario you can create what is called thin lighting. Maternity photographers often use this for the first family shoot after the baby is born.
The third light rounding out your 3-point lighting scenario is your hair light. The hair light cast light between your subject and the background to create separation. This light achieves separation by creating a sharp outline on the back of the subject and accenting the hair from the top spilling down onto the shoulders from the back to front.
This light is easiest to use on a boom so that you can direct the light from directly above or from a slight angle. Typically, this light is a spotlight or snooted light. But if looking for a broader light source that will also illuminate your backdrop a small softbox or light with a barn door can be used.
If you want to create a definition between the background and the subject cast your light so that the back of the hair is on the top of the crown is being lit. The rest of the light will fall on your background.

To create rim lighting which is a clean white line of light dividing your subject from the background, your hair light will have to be strong enough to create a clean halo of light around your subject from behind or one side. You will not have to meter this light, to achieve this pull your boom away from the center to the same side of you as the key light. You will only need to be about 15 degrees off from the center to accomplish backside rim lighting. The further away from the Center, the harsher and wider the rim light will become. It is important not to pull the hair backlight in front of your subject’s ear or side center point. If this happens, a greater amount of light will be hitting the key side of your subject thus offsetting the ratios.
Now that you have your three-point lighting setup, it is time to start working with your subject and capture beautifully lit images.

Most digital cameras work best with 1:1, 2:1, or 3:1 ratios. The larger the ratio the more banding you will see in the transition from the light to the shadow. Banding looks like ripples of water in images. This is due to the camera sensor’s short dynamic range. Some cameras do have a longer dynamic range built-in, so you will want to experiment to see the limits of your sensor. If you plan on smoothing in Photoshop it is advisable to shoot the higher ratios in RAW, which will allow the shadow highlights afterwards.

One of the important features of light is its ability to transmit different ranges of color temperature. This temperature is measured in kelvins. To better understand this, let's look at some examples. Daylight, for example, will be an order of magnitude cooler than most artificial light sources with a temperature of 5500-5600 K. A normal room lamp will produce 3000 to 3500 K on average. So if we have customizable photography light bulbs we can simulate room light or enhance vivid natural light thereby setting a different atmosphere in the frame. We can also mix different sources and their temperatures to achieve the right balance. For example, tungsten lamps have a temperature of 3100-3300 Kelvin, which together with a halogen lamp broadcasting on the coldest ranges will average the overall temperature giving a soft light. You can also achieve cool or warm lighting photography by adding specifically coated reflectors or color filters onto your light sources. So here we have 4 options to control the light temperature
Images of incandescent light bulbs to get warmer temperatures in the frame

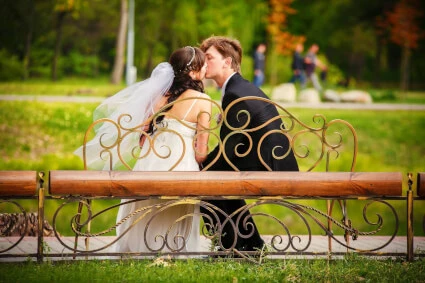
A natural example of getting warm temperatures called a golden hour in photography

This is commonly used in romantic photography. When it is dawn we call it golden hour as we get these warm images.

Halogen light photography uses bulbs that produce pure white and coldest temperatures.

This is how nature produces cold temperatures usually met in fall or mostly visible in winter due to the light additionally reflecting from the white surface of the snow.

Continuing our lighting guides it is important to mention such features as light softness. We can distribute or deliver the light on the subject could be in different ways. If we use just a naked bulb which will project a direct ray of light onto the subject we will get hard light that will produce more reflections, glares, and contrasts between shadows and light. If you do not have such a specific task to get a distinctive contrast there are ways how to make the light softer. In studios, they use diffusers for that purpose. Diffuser is basically a semi-translucent matter such as cloth placed between the subject and the light source. That allows the light to go through but spread and scattered on a wider range avoiding direct impact on the surface or subject. That way we get rid of hard transitions between shadows and light and the image will look smoother. With the soft light, we get more harmonic colors as well, as the diffused light will reflect less and the shadows are going to be less defined by the same reason. There are different materials to use for diffusers. Larger sources are usually covered with silk, softboxes use cloth or diffusion paper. There are also natural light diffusion factors such as clouds, trees, leaves, and fog that could be used if you photograph outdoors.

Besides diffusers, there is another way of mitigating light intensity. Neutral-density gels can be attached or applied to the light source such as windows or glass in general to reduce sunlight. Light projectors often have flags that can also block unwanted light and direct it to certain areas. Barn doors and egg crates are adjustable flaps on the light source that serve a similar function.
A distinctive shadow contrast is commonly used in spotlight photography where we highlight a specific part of our subject, let it be the face or anything else to light the location to improve the result of the image. Everything else besides the highlighted part oftentimes stays in shadow or is much less emphasized. For that type of photoshoot, we use only key light to cast the highlight. But we can also use background lighting to get the silhouette of our subject to stand out, but that requires playing with the light on a professional level to not spoil the overall image. As the key light, we use a strobe with a replaceable mount where you can put different filters to focus the light in different shapes and forms. The main purpose of that light is to make it able of focusing the light on a spot that we want to highlight. We mentioned earlier the spotlight tech, while we were talking about the three-point lighting setup, and the spotlight, plays the role of hair light and sets between the subject and foreground to highlight shoulders and overall silhouette.
If we are backlighting our subject or the model we achieve a silhouette effect. With such effect, we do not see foreground details of our subject because the backlight overexposes the image from behind making up for the contrast in the foreground. Thus, on certain ISO settings, we can easily get silhouette shots for creative images where our model can emphasize her body features with choreography positions.

Rembrandt Haarmens van Rijn – Dutch painter, engraver, and a great master of light and shade, the largest representative of the Golden Age of Dutch painting. He was able to embody in his works the whole spectrum of human experience with such emotional intensity, which before him did not know the fine arts. The way he depicts light in his artworks got a response in modern photography.
On most of Rembrandt’s portrait artworks, we can see a distinctive light triangle spilling on the part of the face that stays in the shadow when the other side is lit. The light separation is a fundamental part here that gives us a hint on how we can imitate the lighting, but the most crucial is the way we achieve that light triangle. So let us do it step by step.

So, how do we achieve this light triangle? Let us start with setting up the hard light source on the right side of our subject and above. If we turn off other lights in the room we will see that half of our subject's face stays lit while the right side stays in complete darkness or shadow. That way we just split light, but that is not Rembrandt yet. To get the triangle we need to move our light a bit towards the camera position. And now you will start to see a small amount of light cross over the right side of the face. We still have shadows cast by the nose which forms only a small light triangle area beneath the eye level on the cheek. The height of the light source matters because when we move it up or down it makes up for the triangle depth casting either deep shadow or shallow.

We can also use diffusers and reflectors here to soften the light and make cast shadows less harsh. All it matters is to have the right angle of the light going onto the subject's face, and the nose does the trick with the right angle.
Co-founder of RetouchMe. In addition to business, he is passionate about travel photography and videography. His photos can be viewed on Instagram (over 1 million followers), and his films can be found on his YouTube channel.
Moreover, his profile is featured on the most popular and authoritative resource in the film industry — IMDb. He has received 51 international awards and 18 nominations at film festivals worldwide.