


TOP-12 Best Creative Macro Photography Ideas
Dec 17, 2018
It is difficult for a beginner to choose a photo niche and understand which path is the right one. Weddings and festive events are always in fashion, but there are so many experts working in this industry, that it may be really tough to succeed there. Serious subject photography for advertising and promotion of products and services requires special knowledge and equipment. It turns out that food photos can become the fastest way to monetize your hobby. Sure, there is an online stock of pictures available, but not all brands use this option. And you may become the one who fills this stock with your works. Why not to start negotiating looking for cooperation with local restaurants and cafes. Everything you need is just a few food photography tips to start.

The biggest advantage of this amazing art is that making minimal investment you get a perfect result.
The list of tools needed is the following:

Now, when you have learned the list of necessary props, it is a due time to get it all together and start working. In fact, there is no universal rule for a successful shot. It happens that males and females see the final result in different ways. For example, guys are more likely to choose minimalist style and girls will enjoy adding new details to the frame. Anyway, every good trick is useful and may work in various situations.

Take away everything that makes a mess. There should not be objects that distract attention from the key product. Only one plate, a single dish is needed. If the item does not look good, capture just a certain part of it. Soup puree in reality does not always look appetizing. Try playing with different shooting angles, cropping, or using additional props. And also try to follow the rule “less is better” by including only a part of the object and shifting the emphasis to something else.

No one has yet canceled the rule of the golden section and diagonals, and here you can apply these rules as much as possible. The main object should be placed on the crosslines. Do not forget about the rule of triangles. Have you ever wondered why, looking through Instagram kitchen plates, you just skip some of them, when others make you stare at them for a while? Most likely, objects form many triangles, and this forces our eyes to focus on it. Main objects should form a triangle.

If the surface of the product is cracked, cut, or damaged, put it aside and use another item for your work. In case, there are no other options, use a different angle so that the damaged part is not visible. It sounds obvious, though sometimes it is not noticed. When you are making professional reviews and close-ups, every defect is clearly visible. Carefully consider products you purchase.

Backlight is essential to underline the pattern. It will help to make your object more appetizing. Try to use steam for backgrounds to add volume to the dish. Perception of the product changes dramatically with various lighting options. Salads and fruits seem crispy and fresh with brighter backgrounds and necessary settings.
At the same time it has to seem natural. Such an effect can give a window sunlight, which is more advantageous, especially for a cloudy day.

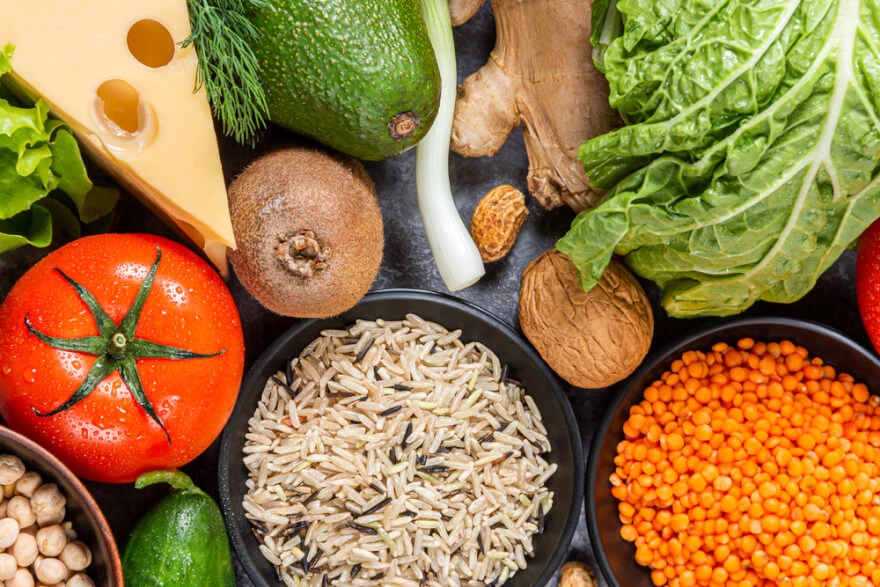
Simple plates, cutlery and decorations can be a good accessory. It is convenient when there is a wide choice of various dishes, but just do not overdo it with multiple objects in the frame. Try not to use plates with patterns and drawings of different colors. If you have nothing but the food itself, then do not complicate your life, just take pictures of it.
If you do not have props, use non-cooked products for entourage.

Demonstrating the cooking process, including cutting, boiling, etc., you help people understand the final result. Show one frame before, and one frame after your dish is ready or take step-by-step photos. This works well with elements, which happen to become poorly distinguishable after cooking. Among common examples are creamy soups, chopped salads, complex cakes or other desserts.

Considering the above mentioned recommendations, sometimes it is more profitable to show not the final result, but the process of cooking. A nice looking chef or lady in a frame, can help you to achieve a tasty photo result, which satisfies every member of the target audience.
A hand stirring a soup, or holding a plate, helps the viewer understand the dimensions of your subject and adds credibility.

Eating with eyes has a big difference from eating with your mouth. When meat and vegetables are ready, the form and dark color makes it often look less appetizing. Therefore, when you want to achieve a juicy result, food pictures have to be captured before the dish is ready to be eaten. Take it off the fire some time before, make a few photos and only after that you may continue the cooking process.

Digital devices with various modes of shooting permit to notice not only sandwich or candy details, but also a tiny dirty spot. This is obvious, but it is better to remember that plates and other dishes, which are used for shooting should be 100% clean, without flaws. When you use a macro lens or a close-up, each flaw will be visible, and the result will be destroyed.

Experiment with everything. Use various tools and ingredients not only for cooking, but for shooting as well. There are so many different interesting angles. New approach is always more interesting for a viewer, and a huge variety of lens types can help to achieve desirable results. A slight tilt and diagonal lines can contribute to a successful snapshot. Create your own style, looking for the best lens for food photography.

Ice cream is that kind of a “model”, which results to be the most complicated, because it melts, and does not leave any chance to make more attempts to get the best picture. Professionals use a trick, adding dry ice. Several cubes are more than enough to achieve desired effect. If you have no possibility to find this assistant, just use the refrigerator between shots. It will significantly slow down the melting.

When photographing something you eat or drink, thoroughly check all camera settings and adjustments. Do not neglect the opportunity to make it easy with a good tripod. This is a must have for a perfect image. Calm and attentive approach will minimize post-processing hours of work. If you work indoors with your or laptop, just connect it to the camera with USB. This trick will save your time and DSLR memory card from an overwhelming number of shots. Use reflectors, shaders, lightboxes and other devices.

This is the best photo school for every expert. The rule that works for every industry and activity is getting as much experience as possible. Professional skills come when you shoot a lot, experiment, and thoughtfully analyze your work. Make more images, find your own technique, which will guarantee best shots.

Do not complicate the process, using expensive details for shooting. All you need is a beautiful picnic set and wise menu. Summer table can be decorated by adding simple and bright accessories, reflecting necessary emotions in textiles, vases, candles, trays, napkins and herbs.

It is enough to use pastel-colored floral prints, complemented with a kind of Chinese umbrella, and here you are! A fashionable frame. Vintage style is characterised by natural elements. Herbs and flowers can be used as a background.
If you are able to complete the scene with some antique elements, such as bowls, silver cutlery or porcelain with a complex floral pattern, you will definitely get an amazing picture.
The most popular vintage elements are the following:

Photo art has made a huge way from simple frames in an old barn decorated with natural elements to modern well-equipped studios. Still rustic elements are widely used by both amateurs and professionals to add charm to simple ideas and avoid typical cookie pictures. Everyone who has a camera can try himself in this industry with the help of low-cost elements and props. There is nothing difficult in creating a picture guide for food fans. Rustic table with black metal details is well combined with wooden boards and creates a romantic atmosphere. Old look is highly important in this case. It is probably the only situation, when deep cleaning is not needed, because it can destroy the plot.

To sum up a brief article which answers the question: how to photograph food, it is important to mention the following moments:
Co-founder of RetouchMe. In addition to business, he is passionate about travel photography and videography. His photos can be viewed on Instagram (over 1 million followers), and his films can be found on his YouTube channel.
Moreover, his profile is featured on the most popular and authoritative resource in the film industry — IMDb. He has received 51 international awards and 18 nominations at film festivals worldwide.