


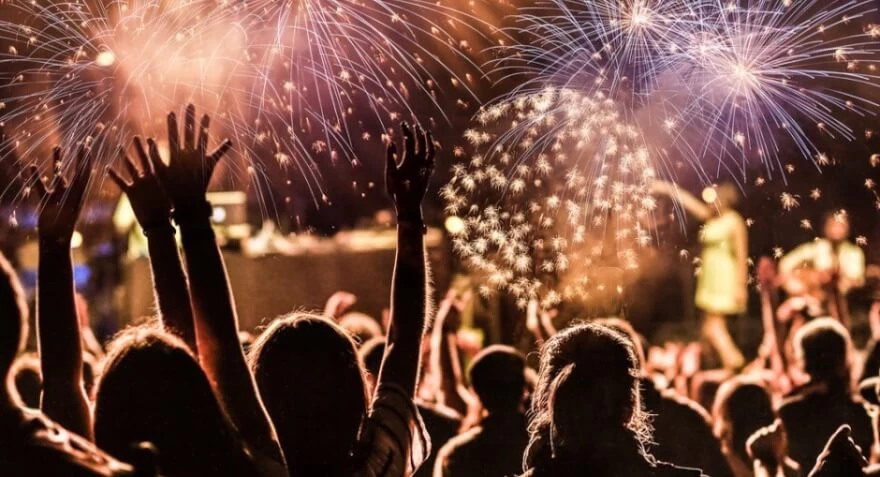
New Year Photography Ideas and Tips
Dec 17, 2020
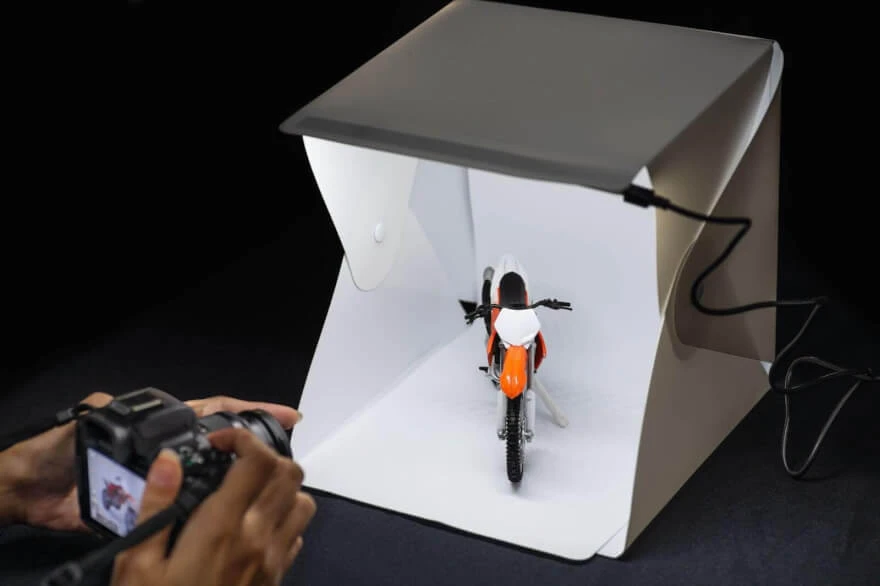
First and foremost for those who are not familiar with such a term as Lightbox let us put it as simply as possible. Most people have an understanding of what a photo studio looks like. They have all these gear, reflectors diffusers, backdrops, lighting setups, and so on. All this need to correctly expose whatever you are shooting. For the most part, big studios need to work with models, with actual people. If you are interested in photography you can make your own mini-studio for small items or products that you want to photograph in a good studio-like environment.
For that matter photographers use light boxes. Lightboxes serve to isolate smaller items of the environment to properly expose them. You can do food photographs or shoot still life in it. So it is like a small studio for product photography with the same light, diffusers, and backdrop. But all this is set into a box with one side cut open, so you can have a viewpoint to photograph the product.
Professional light boxes may cost a lot, and it depends on the materials they are made of and the brand that manufactured them. If you can not afford one of those, do not worry, because in this article we are going to show you how to make a photography lightbox by yourself for less than fifteen dollars.

We consider that you already have a lamppost or any other source of light and a table. So now we need to take a look at how Lightbox works and what it actually does before crafting it. From the name, we understand that this is a box with one side open to place the subject inside and to take the shot through it. However, there are also a couple of crucial parts that we want to bring into this setup. We need to make a diffuser material which light is going to be able to go through. The material should diffuse the light to make it softer which prevents it from having a glare on the surface avoiding direct light impact as it has been diffused through the material.
Another crucial part is to have a backdrop. It will be a background for our subject and it is good to have at least 2–3 backdrops of a different color. Usually, there are black ones and white ones for the most purposes, but you can also have gray or any other color to your taste.
To make all of that into structure let us do a short recap on tools and materials we are going to need for the DIY.

Now that we have everything set, let's start crafting our light box step by step!
So the 1st thing we are going to do is set aside three of the foam board pieces and then take the other two pieces and cut them. We need to cut each of those two pieces 20 inches long (51 cm x 51 cm).
Use the line or ruler or straight edge with a marker to draw the lines on these two pieces 20 by 20 inches and cut the unnecessary parts.

Now as we have them ready we need to be able to shine light in there to photograph things. We need to cut openings in these side pieces in order to allow light to pass into our lightbox. To do that you are going to take these pieces and by using a ruler or tape measure set marks for 2 inches off the edge from each corner. When you are done both should have markings that look like drawn squares inside the square of the overall material piece.

And now we cut all of this centerpiece out by using our utility knife. Make sure that the knife is sharp enough to not spoil the pieces and thus be able to cut through the material precisely. And be careful when you finish cutting because taking the centerpiece out may break the structure if you will be inaccurate as the centerpiece leftover has more weight in it in comparison.


Now we have our 2 side panels here with windows for the light. We need these windows to put there the diffusion material that will make the light do less direct impact and prevent us from getting glare and reflections going over the subject as the light become smooth. That is why we require table cloth.

Now we need to cut our tablecloth to match the side panel dimensions that we prepared. Once you are done cutting the clothes out duct-tape the on the panels. Attach the cloth pieces on top of the panes with the tape. If you have any overlap just fold the tape and press it down, it is not a big deal.

The paint sticks we have for increasing the structural integrity of our panels. You may not need that if you are going to make a lightbox of a smaller scale, but for this scale it is recommended to use them still. Take your paint stick and just tape it right to the edge on two sides that will be holding panels vertically.
Now we are ready to assemble all the parts. This might be tricky because we need to make joints on the edges using tape. What is recommended to do is to start from the bottom piece and tape one edge at a time leaving the room on the tape to attack another piece on it equally. As you tape one edge make sure that the sticky tape side is not going to stick to the table, then add the vertical piece on it and wrap the tape around its edge. Repeat the same action from the other side.

Now we can add our side panels to join the rest of the structure using the same method by taping the joints from each intersection. Then we put the top on the same way.
Now we have our homemade light box pretty much ready, all we are left to do is to place our backdrop inside.

The lightbox we made has sharp and distinctive edges inside. So if we start photographing our product these edges will be seen on the photo, and we do not want that to happen. That is why we need a backdrop. The backdrop should be flexible enough to bend over that edge going from the top to the bottom forming the bend on the bottom intersection. That way when we are going to photograph we will not see the intersection inside and this makes up for the background infinity effect. As we bend our backdrop we can fixate it going outside the box with anything, so it does not slide off. You can tape it to the edge, or use binder clips or any weight to pull it down strong enough, so it stays bent and does not slide down at the same time.

If you want to make it clean with the backdrop attachment you can cut two holes on the top back edge of your lightbox to allow the binder clips to go through and hold the backdrop from the top side.

In this case, you can use pretty much any lamp you have. But keep in mind that most of the lights are not pure white. In most cases, they will be glowing a bit yellow through the sides, so it is better to use a pure white strobe or even your phone flashlight. Now set up your light from each side to light your subject equally. Take a couple of shots to see how all this works.

Co-founder of RetouchMe. In addition to business, he is passionate about travel photography and videography. His photos can be viewed on Instagram (over 1 million followers), and his films can be found on his YouTube channel.
Moreover, his profile is featured on the most popular and authoritative resource in the film industry — IMDb. He has received 51 international awards and 18 nominations at film festivals worldwide.


