How to add a realistic film grain texture in Photoshop?

- Noise grain filter in Photoshop tutorial
- Noise filter with Gaussian blur
- Film Grain filter
- Camera RAW filter
- Blur Gallery
- Real Grain vintage film texture
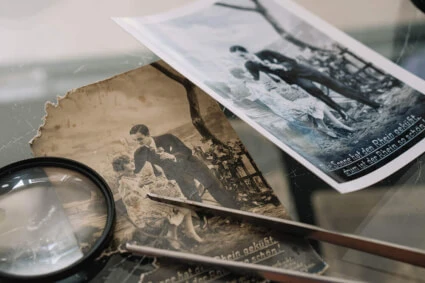
Surely you've seen old movies captured on a 35mm film or photos of the same kind and noticed the various flaws in the image that literally indicate how long ago it was made. In the digital age of photography, the noise from high ISO sensitivity is an undesirable addition to the image. ISO ruins the picture by taking away the details with ugly pixel-sized blotches of RGB colors. In contrast, the sensitivity of film adds a kind of film texture to the image as grain. Despite the fact that this degrades the quality of the image, such old film texture clings to nostalgia due to the aesthetic of analogue photography. So you may be wondering how you can achieve a similar effect in your photo. That's what our topic today is about.
Today, we are going to learn how to easily create film grain texture in Adobe Photoshop, which can help give your photo and artwork more of an aged and tactile appearance.
Noise grain filter in Photoshop tutorial
Most people’s go-to filter to add noise or grain to an image is the basic Filter > Noise > Add Noise effect. If you check the Monochromatic option, it takes away the ugly ISO-like dots, but it does not look very convincing.

It is basically just a scattering of perfectly formed pixels, so let us look for some other options.
Noise filter with Gaussian blur
The Noise filter does not actually look too bad when you combine it with some additional steps to help fix some of the problems of using that filter alone. One of those problems is that it is applied destructively to the image, meaning you can not then go back and alter or remove the effect. Add a new layer above the image set as background and go to Edit > Fill. Choose 50% Gray from the dropdown, then change this layer’s blending mode to Overlay. Right-click on the layer and choose Convert To Smart Object. This will allow you to go back and tweak the filter settings. Add the Filter > Noise > Add Noise effect and choose a suitable figure depending on how subtle you want your grain effect to be. The result is exactly the same as before, but one additional step to make it a little more realistic is to add a tiny amount of Gaussian to take that hard edge off the grain pixels. Something between 0.5 to 1px works great.

The great thing about this method compared to the original is you can go back and edit those values to fine-tune the effect.
Film Grain filter
We all know about the Noise filter in Adobe Photoshop, but did you know there is actually a Film Grain effect built right in too? Convert your image to a Smart Object, so it will not be destructively edited. Then look at the top of the project window, go to Filter -> Filter Gallery. You can quickly find the Film Grain effect from the list. This option has a few extra settings than the basic Noise Filter, but it still lacks some realism of the actual film scratch texture.

Camera RAW filter
One of the best methods of adding realistic film grain is via the Camera RAW filter. This toolset is great for processing your image in general, but there is a certain set of effects that are reserved just for adding film grain. Convert your image to a Smart Object, then go to > Filter > Camera Raw Filter. You will find the grain settings in particular under the FX tab. Here you will find some handy settings for the Grain Amount, Size, and Roughness. This allows you to fine-tune to generate the perfect grain effect for images of all sizes, which is often a problem when working on a high resolution image where those previous pixels’ basic noise effects can often get lost in the overall image size.
The unique texturing of the Camera Raw Filter grain effect is one of the closest replications of authentic film grain. Being applied to a Smart Object means you also have the option to fine-tune or remove the effect altogether.

Blur Gallery
Another filter that generates a more realistic grain effect is any of the Blur Gallery options. In order to apply this, you first need to add a 50% gray layer above your artwork, otherwise, the actual blur effect would affect your image. Add 50% gray layer and set blending mode to overlay, then convert your image to Smart Object, all these steps are the same as we did for noise filter with Gaussian blur. Since the blurring is being applied to an empty gray layer, it has no effect, but the additional settings under the Noise tab will be visible against your original photograph. Here you also have the Amount, Size, and Roughness sliders to play with, which can also be balanced against the Blur amount.

Real Grain vintage film texture
Then there is one more technique you can employ to add realistic film grain effects to your images, and that is to overlay an actual film grain texture. Here is the link to this set of Free Film Grain Textures from Arkady Ulitsky. It contains a range of realistic grain effect textures, ranging from subtle noise to some bright color burns. The addition of film dust texture and speckles really adds to the authenticity to give your images a great nostalgic appearance. Once you have downloaded the pack, choose one of the textures and open it in Photoshop. Press CMD/CTRL+A to select All, followed by CMD/CTRL+C to Copy and CMD/CTRL+V to Paste it into your main document. Scale the texture to size if necessary with the CMD/CTRL+T shortcut for Transform. To allow the grain of the texture to be applied to your artwork, change the blending mode to ‘Screen’ for the darker textures, or Multiply for the lighter textures. If the effect is too prominent, you can tone it down by simply adjusting the opacity slider to choose between a subtle grain effect or a heavily distressed print.
To save your project, look at the top of the window menu, go to File > Save As… Here you can choose the format between PSD , JPG, and others. PSD saves the project as a whole for future adjustments. JPG (Save as copy) or any other format like PNG would render the image into the desired file format to use for any purpose (sharing, uploading media, use as a separate file).
He started his career as a professional photo designer and retoucher. Professional commercial photographer with 20 years of experience. He is a leading advertising photographer and has worked as a food photographer with Michelin-starred chefs. His work with models can be seen on the calendars of many leading companies in Ukraine. He was the owner of the photo studio and photo school "Happy Duck".

with RetouchMe


