


TOP-29 Self Portrait Ideas
Jul 29, 2019
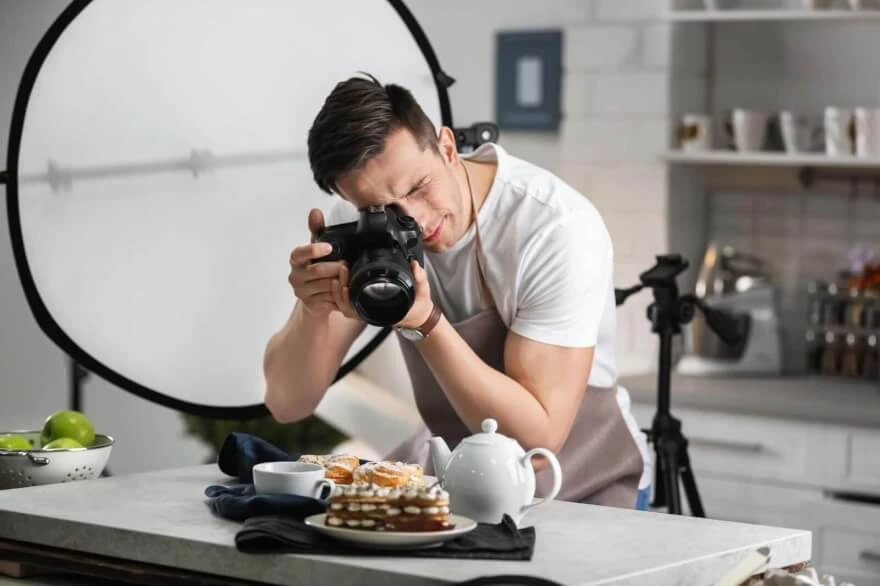
If you are a successful photographer or just starting out, and you have chosen production photography, then the industry of food photography can bring you good profits with the right skills. People always want to eat, so food is not going anywhere. But in order to get people interested in a particular establishment or cuisine, you need to be able to present that using food photography tricks with full dedication as a photographer. In our today’s article, we will give you tips on how to do the best food photography and break it down in detail.
There are fundamental principles that you can use as a guide to product photography in general and also apply to food photography.
So let us discuss these 5 general tips in detail first then we go for gear and some extra tips below.

Choosing the light, we recommend using natural light sources for food. Natural light is always pleasing to the eye, but there are some things to consider because we can not always work in ideal conditions. Using a natural light source we will most often take pictures by the window. There is one drawback, and that is that only the side of your composition that gets light from the window will be illuminated. This problem can be solved with the reflector. White matter located on the side of the shadow will reflect the light from the window and project it onto your composition reducing the shadow contrast or getting rid of the shadow completely.
The type of light will affect the type of atmosphere you will give to your images.
The weather outside matters. If we have overcast then the light will be soft but may appear cold producing a bluish tint which does not always suit the frame depending on the exterior. Here you need to experiment and train your eye in order to find the best match in that.
We also will not shoot by the window all the time, we may do shots in the depths of the restaurant using their artificial lighting as is in the current place. Lights in restaurants are usually dimmed to not hit the eye and distract diners from their meals. Thus, we can get moody shots. The lack of light produces fewer colors and as a result, we have to saturate our image objects to counterbalance the dark atmosphere and make our food pop a little more. This is typically done in a post-processing editing routine. Another way of exposing your image better is to use a wide aperture and a slower shutter speed. This allows your camera to capture more light in the frame. But this way you are not able to do these shots handheld because slower shutter speeds make your camera very sensitive to any jitters. Use a tripod to compensate for this and get your perfect food image!

The difference between product packshots where we just shoot a subject in a lightbox and food photographs in place is very convenient. Photography tells something because we have a lot of stuff going on in the frame. Doing food photography we have to create the scene and know how to accessorize the main subject. You have to decorate your dish with ingredients, and kitchen utensils and tell the story with it. And here is a real debate about it. For cooks, it is nonsense to have ingredients that are not part of the dish to be illustrated. Which makes total sense. But as a photographer, you do not have to be a logical person in that matter. We are going to think more in terms of composition, and it is not just about the geometrical organization of the elements in the image. When you are trying to create to embellish a scene starting from the dish or the basic elements, you have to think about the colors, size, shape, and texture of it. You have to understand the region where the dish comes from, the period it is eaten, what are the emotions associated.
For example, imagine that you are photographing and advertising some Italian restaurant. If you make a composition of green salad, white cheese, and red tomatoes this may give a hint to an actual Italian local or a tourist about how deep was your thought process doing this composition to match the Italian flag.

The angle of view is also important. In food photography, there are two main angles that we will use most of the time. First, at 90 degrees, which will give a view from above, a zenith angle. It gives an overall view and a better understanding of the scene, and it also gives a 2D aspect to your image due to flat-lay. As you lose the notion of depth, you have to try to make sure that the elements are at a similar height.
Then between 30 and 45 degrees, you have a shooting angle that gives a much more immersive feeling, since it is the vision that we commonly have when we eat. It is the angle that most of the photographers prefer to work with.

Of course, nothing forces you with these two angles, there are other possibilities, like totally frontal to the food angle or others. It is up to you to test and have fun!
An important tip for a 90-degree angle is depending on the production purposes you may leave an empty space in your scene instead of filling the frame with a whole food composition. This free space may be used by the brand in order to place their logo. This nuance may be noted by you in your negotiation with the brand and make you look more professional if you mention it in advance.

If you choose between 90 or 30/45-degree angles you need to take into consideration that some food and dish will look better at one of the angles and worse at another. For instance, if we have a big plate or a platter filled with different kinds of fruits, then it would be better to pick a 90-degree angle to show the assortment. Whereas shooting more complex or tall food such as burgers or tacos they would have a better look from a side. So the principle here is simple, if your composition is flat, then we use 90 degrees as our main angle. If there is a variety in height, then use a more acute angle.
When we are looking at food photography most of them look nice, but you can always improve that. Try to add the human element, a hand taking the food from the plate or preparing it. This will produce a more immersive effect on the viewer and make the food desirable and alive.

Close-ups are a good way to highlight details of food, but why don’t we do the opposite to show the interiors of the restaurant presenting the place that the customer is going to visit?
For instance, a beautiful wooden table with food on it by the brick wall may do a very authentic look for the shot.
At the end of your photo shoot, when you took enough pictures in the place where you were sure of the lighting and so your photoshoot was secured, you can walk around with the product to test different environments and create different stories with it. This will bring you more experiences, and you may find something unusual that you have never done before, and it will serve as a great idea for your future photoshoots.
Do not hesitate to break the rules. Food photography can also quickly become a bit boring. Try to use techniques from other photography genres and apply it. For instance, try to shoot through the glass, food that is on display or not yet laid out but in glassware with a lid. This can add variety to your portfolio and become your trademark.

When we shoot gourmet food we need to be more sophisticated. This type of food is not just tasty but also looks different. People who are the same sophisticated in their taste would like to see such food in detail and from a variety of angles, that is why close-ups work best here. Choose an appropriate angle following the angles of view tip and make an outstanding shot, so the customer wants to eat that photo immediately!

Desserts are also recommended to be photographed up close, emphasizing the texture and details of the product. For desserts, it is not necessary to emphasize the interior of the restaurant itself, instead, we can use props and a variety of colored food photography backdrops that will fit the picture for our particular dessert. For instance, if we are photographing brownies, which are most likely preferred by women, we can use a pink background to accentuate.

Food photography is still life. A restaurant is a place of moving life, and you have to take that into account. Photographing it, representing the atmosphere, the people, the positive emotions and the communion that food represents is as important as photographing the food itself. This also brings a storytelling par into your images as the place where people are going to get the best meal of their life.

Professional food photography requires professional gear with it. If you are set and prepared with all your equipment then it will ease your workflow in all circumstances. We may shoot in different conditions so for comfort, we recommend having these particular pieces of equipment in your arrangement:

It is really something to do if you live in a big city with restaurants around every corner. You have a huge pool of potential clients, and it is really easy to get in touch with them, just with Instagram for example. Using all the general tips we presented in this article you already can create a good portfolio on social media and use that as your visit card. Social media can help you to skyrocket and succeed in your business in no time if you do outstanding shots.
We hope this article will help you to improve and provide you with a beautiful food photography experience!
Co-founder of RetouchMe. In addition to business, he is passionate about travel photography and videography. His photos can be viewed on Instagram (over 1 million followers), and his films can be found on his YouTube channel.
Moreover, his profile is featured on the most popular and authoritative resource in the film industry — IMDb. He has received 51 international awards and 18 nominations at film festivals worldwide.


