10 Food Photography Ideas for Professionals

10 Food Photography Ideas for Professionals

Updated: May 7, 2024
Created: Apr 25, 2024
Time to read: 12 min

Whether you're an established photographer or a novice entering the field, delving into food photography can prove to be lucrative, provided you possess the requisite skills. Given that the desire for food is a constant in people's lives, the subject of your photography isn't disappearing anytime soon. However, captivating potential patrons' interest in a specific venue or type of food demands a photographer's complete commitment to mastering and applying various food photography techniques. In this article, we aim to offer valuable advice on achieving excellence in food photography, exploring the topic thoroughly with 10 food photography tips.

Food Photoshoot Ideas from Basic Principles

Product photography has some fundamental principles, catering to which you significantly improve the outcome. In this guide, we base our tips on the following points:

  1. Equipment
  2. Lighting
  3. Composition
  4. Storytelling
  5. Backdrops

Before delving into photography ideas for food, we need to prepare and make sure our equipment responds to our professional needs, so let us start with equipment.

Equipment for Food Photography

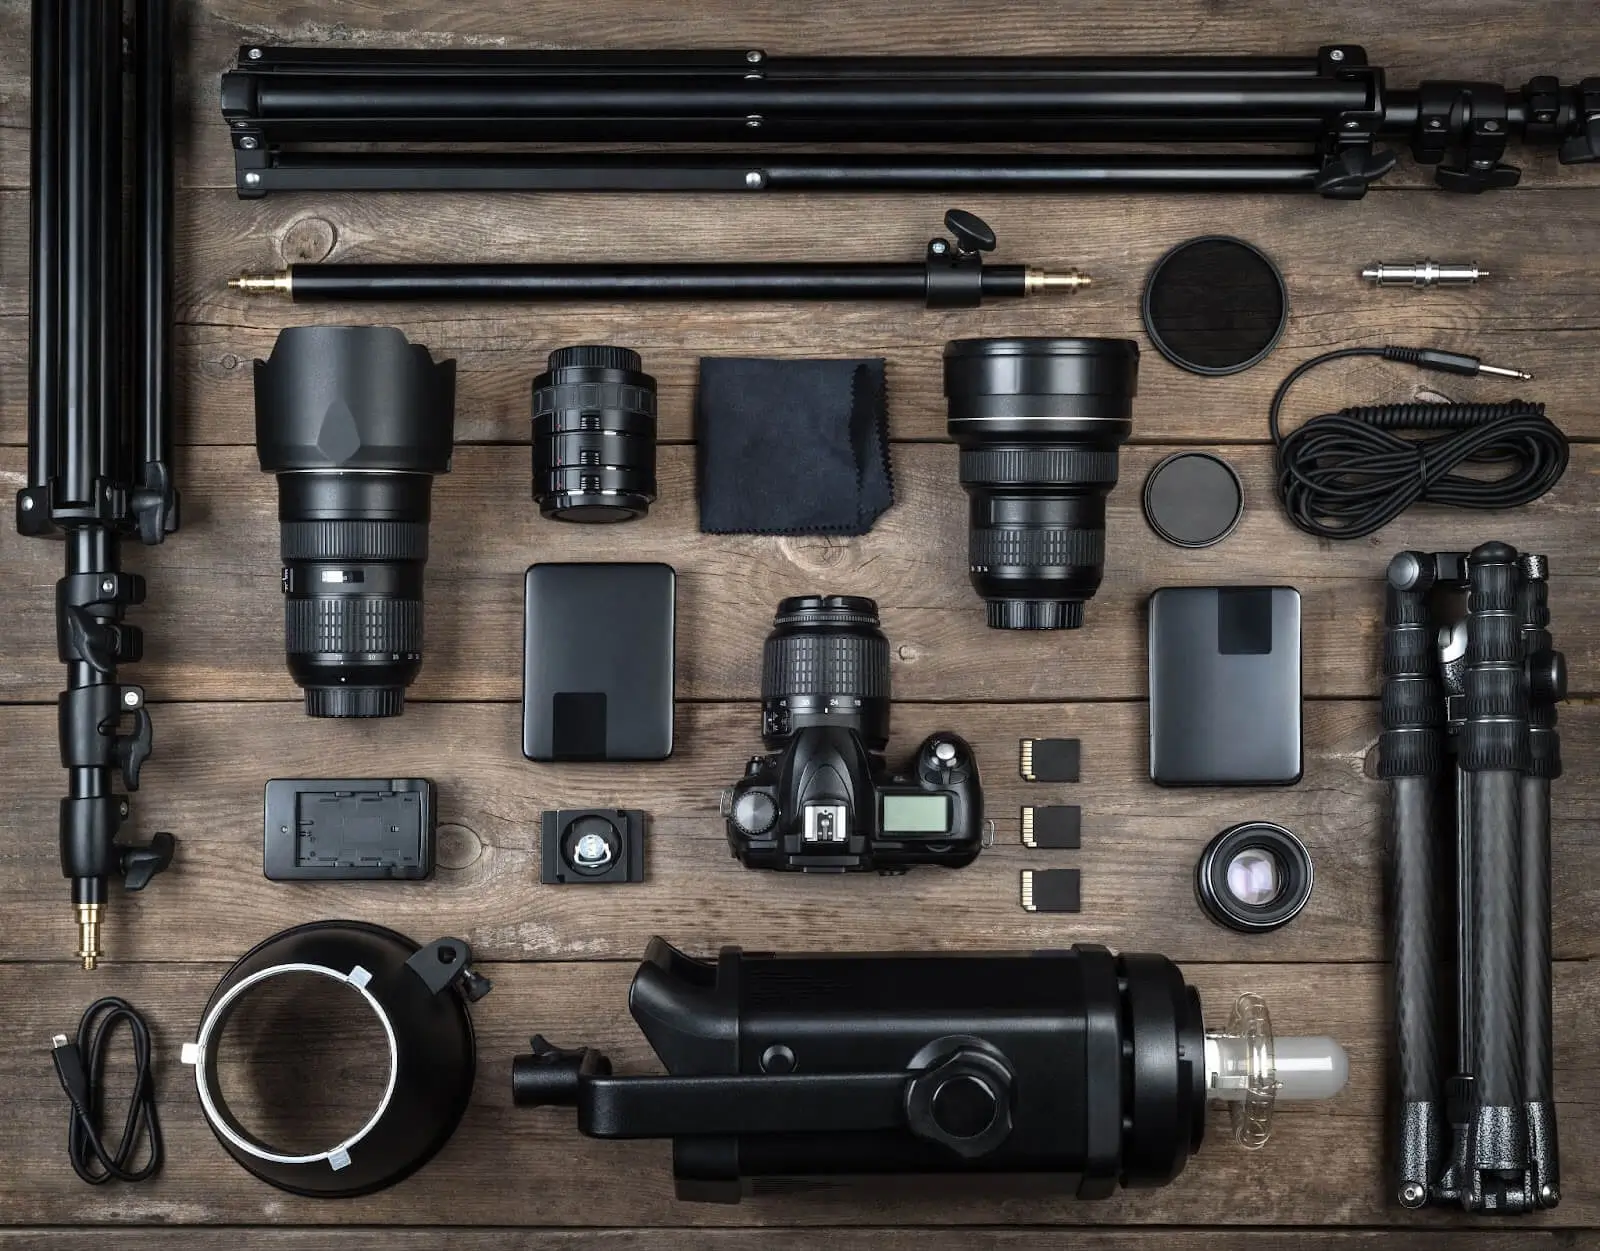
Professional food photography necessitates a suite of specialized equipment, which, once fully assembled, significantly streamlines your creative process regardless of the shooting conditions you find yourself in. To ensure comfort and efficiency during shoots that might vary in environment and requirement, consider incorporating the following essential tools into your photography arsenal:

  • Tether Pro Cable: By connecting your camera directly to a computer, this cable not only facilitates the composition of your photographs on a larger screen for enhanced detail visibility but also simplifies the workflow, allowing for immediate real-time feedback and speedy adjustments. Moreover, it supports swift post-processing, assuming you have preset adjustments available in your photo editing software. Moreover, having a big display showcases the outcome in more detail making sure you will not miss any imperfections to fix.
  • Lenses: Amass a diverse collection of lenses, with focal lengths spanning from 24mm to 85mm, to ensure you're well-prepared for any shot requirement. The variety allows for creative flexibility, from capturing wide-angle settings that encompass the ambiance of a dining experience to zoomed-in details that highlight the textures and colors of the food. Prime lenses (like a 50mm f/1.8 or a 100mm f/2.8 macro) are popular for their ability to capture sharp images with beautiful background blur (bokeh), making the food stand out.
  • Key Light: While leveraging natural light can yield beautiful, soft-lit photos, having the option to introduce additional lighting sources, such as the portable and versatile Apurture F7, can elevate your photography by providing consistent illumination regardless of the time of day or indoor conditions.
  • Reflector and Diffuser: Mastery of your lighting environment is crucial in food photography. Utilizing reflectors and diffusers helps soften shadows and distribute light evenly, ensuring your subject is perfectly illuminated. These tools are key in manipulating light to showcase the textures and colors of the food, making it appear as tantalizing as possible.
  • C-Stand: This is indispensable for achieving precise overhead shots at a 90-degree angle, providing the stability and flexibility needed for top-down culinary imagery.

Incorporating these specific pieces of equipment into your food photography setup not only enhances the quality of your work but also brings ease to the creative process, allowing you to focus more on the artistry and less on the technical challenges.

What camera suits food photography the best?

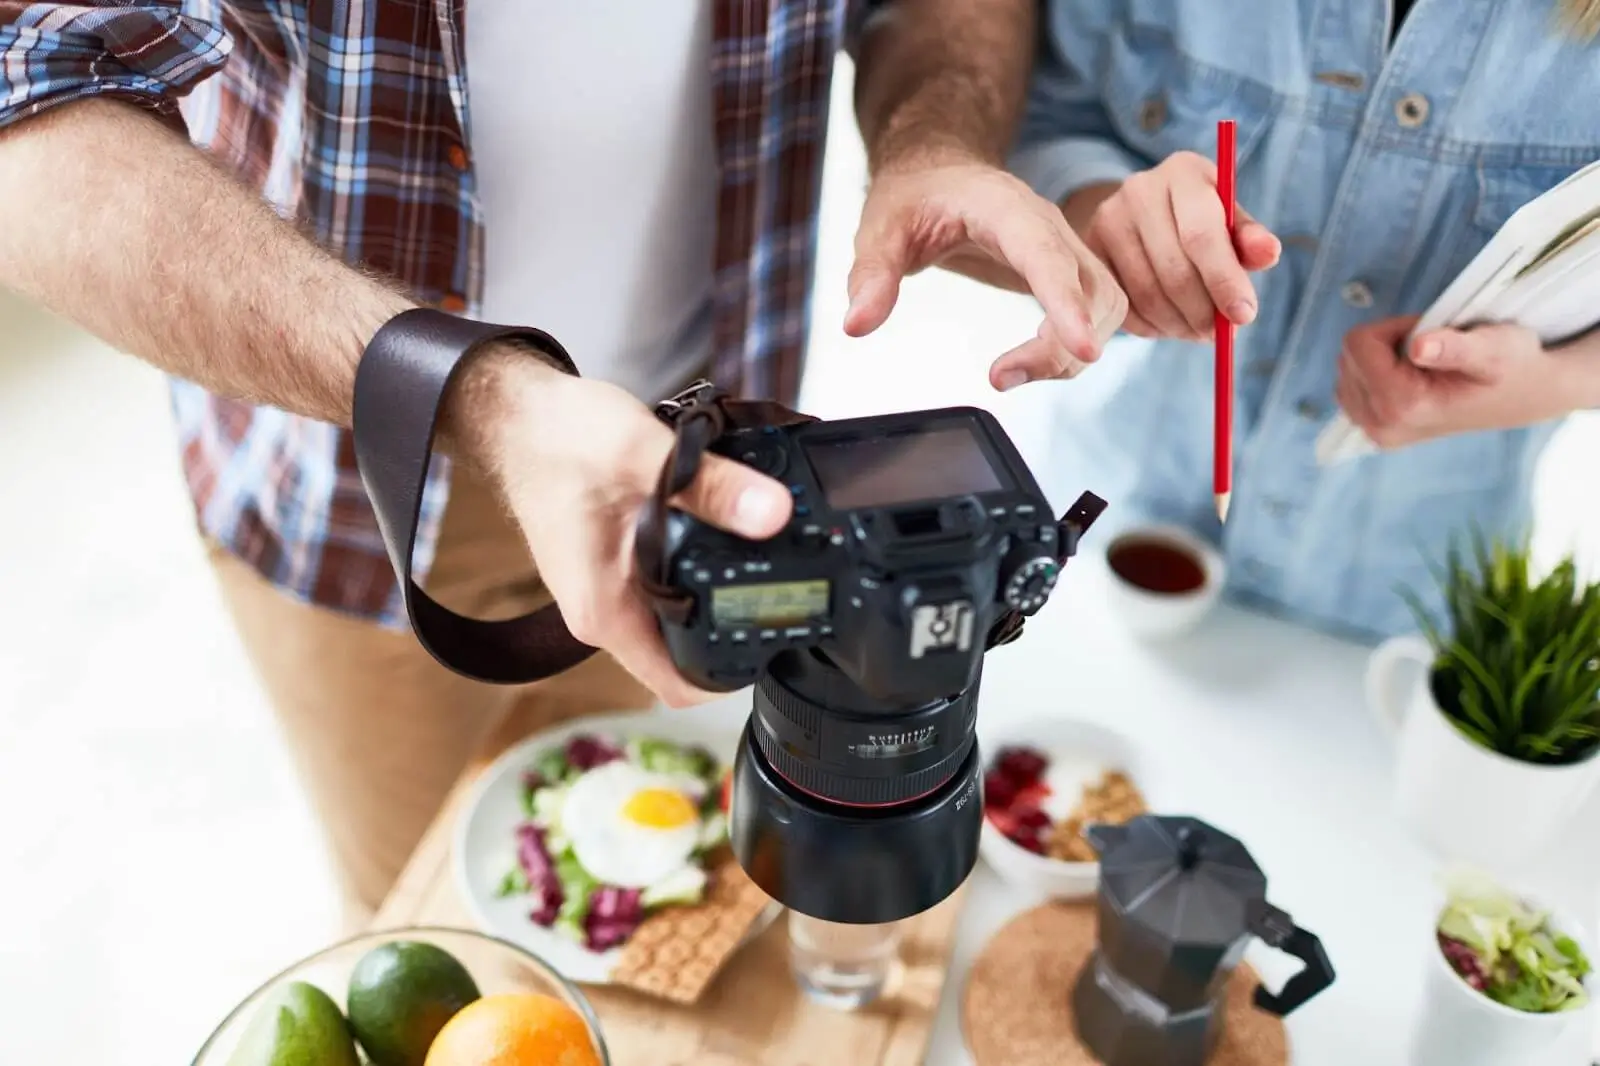
We dedicate a specific paragraph for the camera choice because there is a huge variety and it fully depends on your budget and needs. In this regard, cameras range from entry-level to high-end professional cameras with a certain middle ground. Here is the list of top recommendations with a short elaboration to get a better idea

Entry-level DSLRs and Mirrorless Cameras

  • Canon EOS Rebel Series (T7i or T8i): Offers great image quality and ease of use for those new to DSLR cameras. Its APS-C sensor is sufficient for detailed food photography.
  • Nikon D3500: Another excellent entry-level DSLR with good image quality, a user-friendly interface, and a robust build.
  • Fujifilm X-T30: A mirrorless option that's compact, with excellent image quality and color reproduction, which is vital for making food look appealing.

Mid-Range Cameras

  • Canon EOS 90D: A step up in the Canon APS-C lineup, offering higher resolution and faster shooting speeds, beneficial for capturing the perfect drip or splash in food photography.
  • Sony A7 III: If you're leaning towards full-frame sensors, the A7 III is a versatile mirrorless camera known for its impressive low-light performance and dynamic range.
  • Nikon Z5: A full-frame mirrorless option from Nikon, offering excellent image quality and the benefits of Nikon's Z-mount lenses.

High-End Professional Cameras

  • Canon EOS R5: A high-resolution full-frame mirrorless camera that's excellent for capturing the finest details in food photography. Its autofocus system is top-notch, ensuring sharp focus on the most important parts of the dish.
  • Sony A7R IV: Known for its staggering resolution, this camera is ideal for food photographers who need to capture immense detail or crop into their images without losing quality.
  • Nikon Z7 II: Offers high resolution, excellent dynamic range, and color accuracy, all of which are crucial for high-end food photography.

Medium Format Cameras

  • Fujifilm GFX 50S II: For those requiring the ultimate in image quality and detail, medium format cameras like the GFX 50S II offer larger sensors than full-frame cameras, resulting in superior dynamic range, depth of field, and detail—ideal for food photography that might be used in large prints or high-end publications.

Lighting the Food Photo Ideas

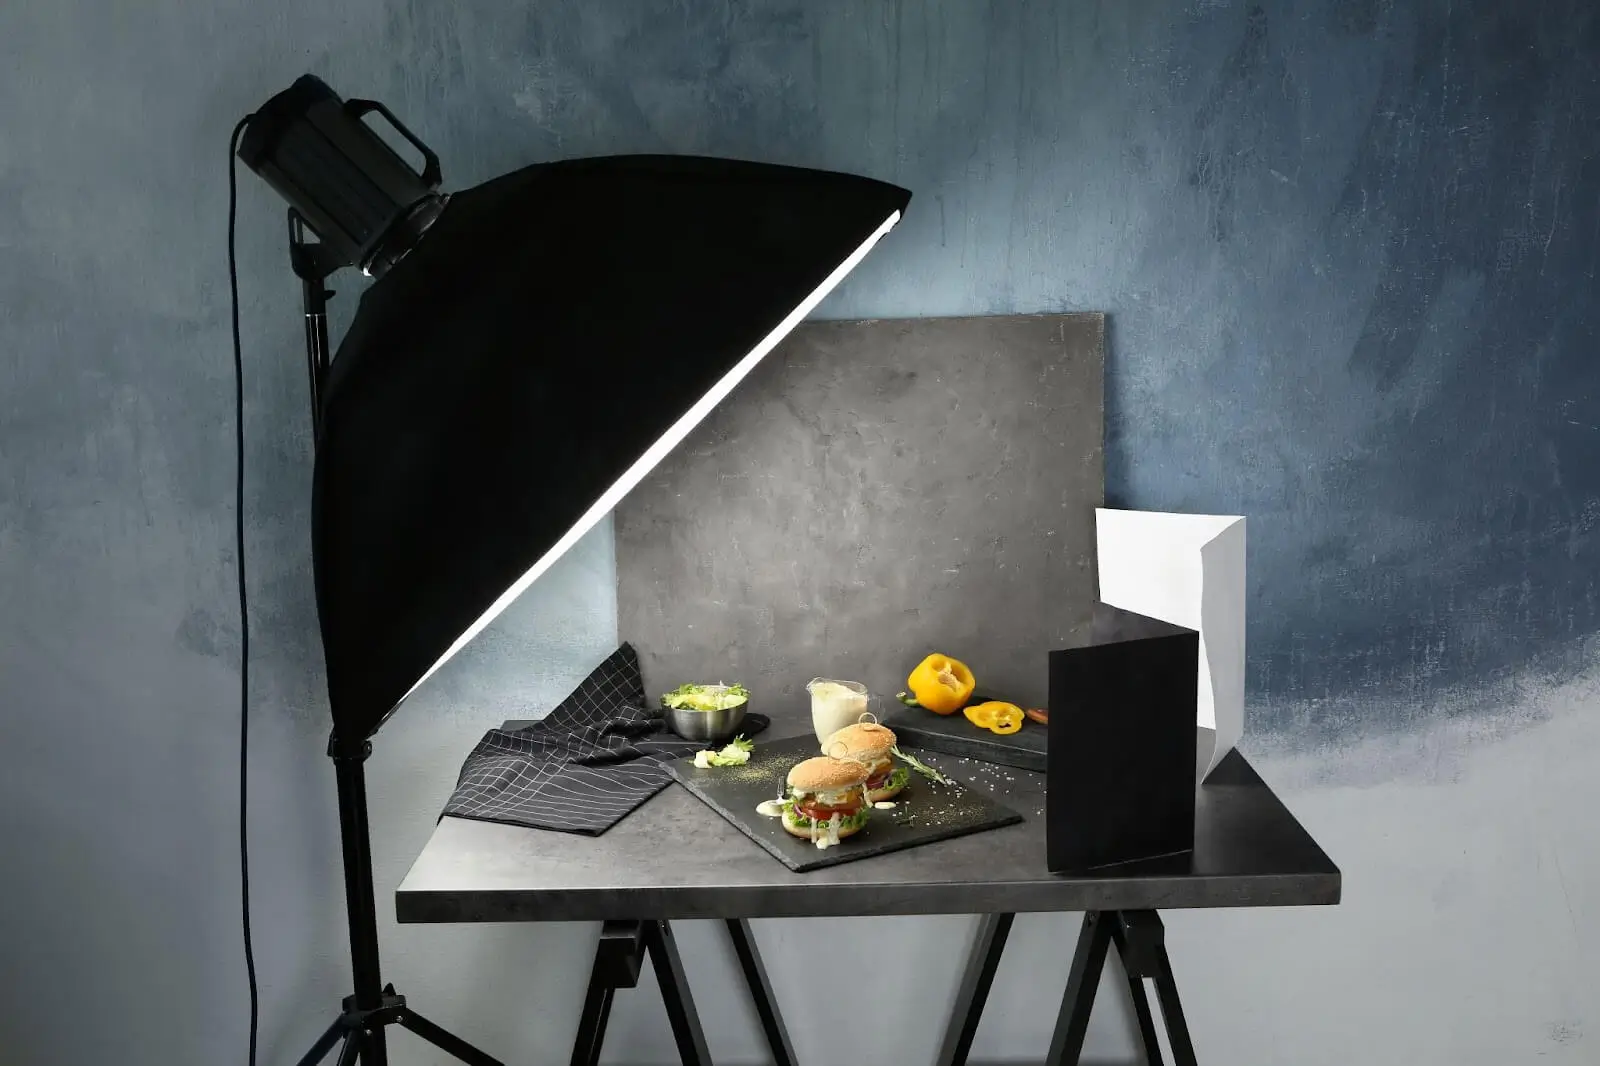
When selecting lighting for food photography, we advocate for the use of natural light whenever possible, as it tends to be most flattering to the subject. However, it's important to note that natural light comes with its set of challenges, given that ideal conditions aren't always at our disposal. Typically, photos are taken near a window to utilize this light source, but this often results in only one side of the food being adequately illuminated. This issue can be effectively addressed by employing a reflector. Placing a piece of white material on the shadowed side can bounce the window light back onto the subject, thus evening out the lighting and potentially eliminating shadows altogether.

Light Temperature and Atmosphere

An overcast day provides soft lighting but might cast a cool, bluish hue over the food, which might not always complement the scene. This necessitates a keen eye for detail and a willingness to experiment to discover the most harmonious lighting for your subject.

Adapting to Conditional Lighting

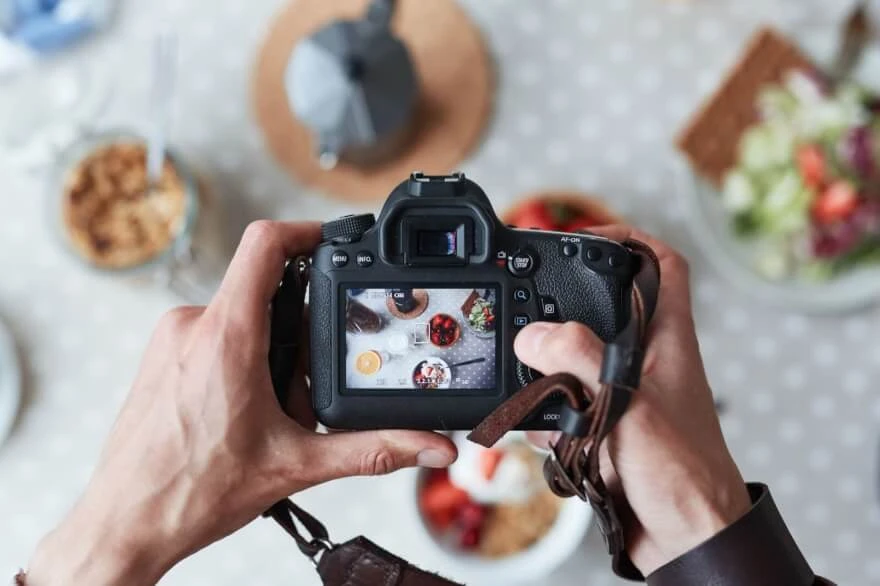
Realistically, not all photography will occur beside a window with natural lighting. Interior shots, especially within the confines of a restaurant, often require working with available artificial lighting. Restaurant lighting is typically designed to be subdued to enhance the dining experience, which can result in moodier, more atmospheric shots. This reduction in light can diminish the vibrancy of your subject, necessitating adjustments in post-processing to enhance saturation and make the colors of the food stand out. To adequately capture light under these conditions, employing a wide aperture and slower shutter speed can be beneficial, allowing more light into the camera. However, this approach demands the use of a tripod to prevent blur caused by camera shake, ensuring sharp, appealing food photographs.

Compositional Food Shoot Ideas

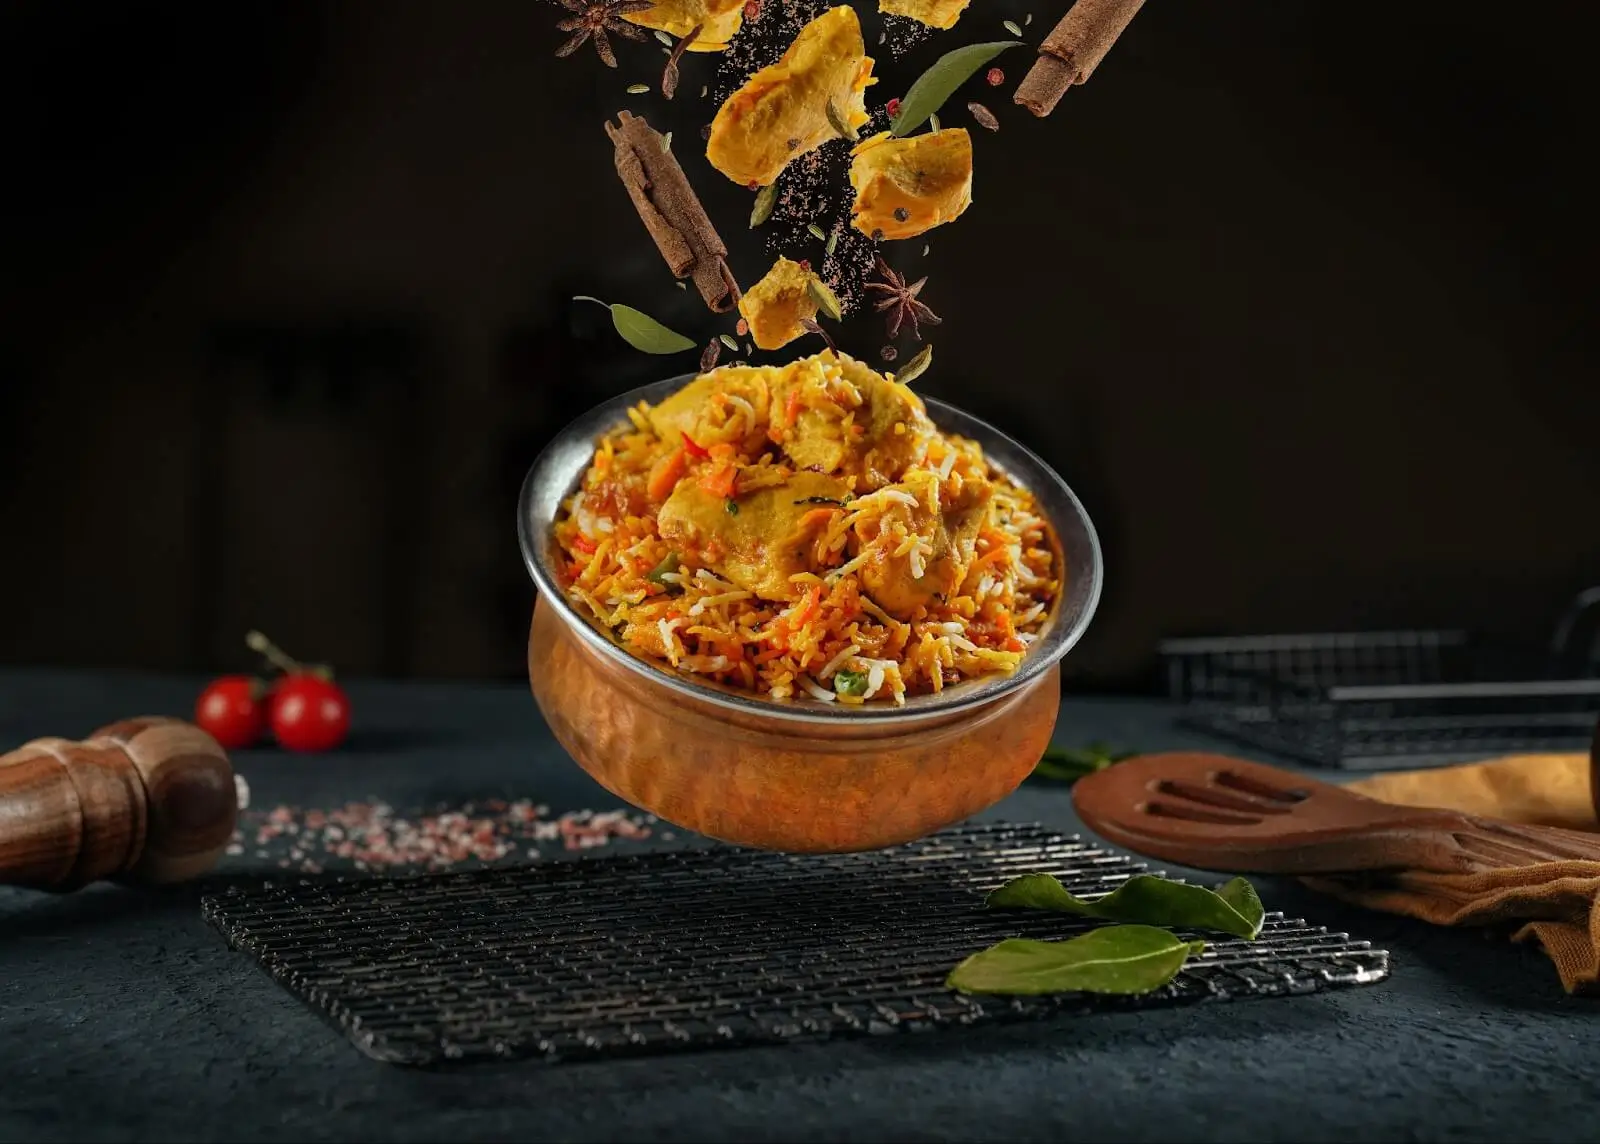
In the realm of photography, the transition from straightforward product packshots within a lightbox to the dynamic environment of food photography represents a significant shift. Unlike product photography, where the subject stands alone, food photography is narrative-rich, demanding a crafted scene around the main subject. This involves not just capturing the dish but also carefully selecting and arranging accessories such as ingredients and kitchen utensils to weave a story.

The Debate on Authenticity

A point of contention often arises between culinary professionals and photographers regarding the composition. Chefs argue that only ingredients actually used in the dish should be featured in the photograph, emphasizing authenticity. This perspective is perfectly logical from a culinary standpoint. However, from a photographer's perspective, the approach to composition transcends mere logic. Photographers are encouraged to think beyond the strict confines of geometric placement within the frame.

Beyond Geometry: Color, Size, Shape, and Texture

When setting the stage for a food photograph, it's crucial to consider various elements like color, size, shape, and texture. These components are vital in creating a visually appealing scene that not only highlights the dish but also resonates with the cultural and emotional essence of the cuisine being represented.

Some creative food photography ideas

Considering the above, a couple of creative food photography ideas come to mind.

  1. Authenticity: Consider a scenario where you're photographing a dish for an Italian restaurant campaign. By choosing to include elements such as green salad, white cheese, and red tomatoes, you're not just presenting the dish but also subtly referencing the Italian flag. This thoughtful composition not only adds depth to the photograph but also creates a connection with the viewer, potentially invoking the warmth and passion associated with Italian culture.
  1. Fill up the composition: Food photography is often considered a form of still-life art. However, when capturing images within a restaurant setting, it's crucial to recognize the dynamic nature of the environment. Beyond simply photographing the food, it's essential to convey the bustling atmosphere, the presence of people, and the myriad positive emotions associated with dining out. In doing so, you imbue your photographs with a narrative element, inviting viewers to envision themselves immersed in the experience of enjoying a memorable meal at the depicted establishment.
  1. Do close-ups: When capturing gourmet cuisine, a heightened level of sophistication matters. Gourmet food isn't just flavorful; it's visually distinct as well. To cater to the refined tastes of your audience, do close-ups. By focusing on intricate details and experimenting with various angles, you can create captivating images that entice viewers to indulge immediately. Remember to apply the angles of view tip to select the most appropriate angle for showcasing the food's allure and craftsmanship.
  1. Show the venue: While close-up shots emphasize food details, showcasing the restaurant's interior offers customers a glimpse of the dining atmosphere they'll enjoy. For instance, capturing a rustic wooden table against a brick wall creates an inviting scene, enticing customers to envision themselves dining there.
  1. Experiment: After completing your primary photo shoot in a well-lit and secure environment, take the opportunity to explore different settings with the product in hand. Experimenting in varied environments allows for the creation of diverse narratives, enriching your experience and potentially uncovering innovative concepts for future shoots. These unexpected discoveries can inspire fresh ideas and elevate the quality of your future photography endeavors.

Angles to shoot Food

The angle of the shot significantly impacts how the whole scene is perceived by the audience, and two angles dominate:

  • 90 Degrees (Zenith Angle): Offers a top-down view, presenting a comprehensive overview of the scene with a distinct 2D appearance due to its flat-lay perspective. When using this angle, maintaining a uniform height among elements is key to compensate for the lost sense of depth.
  • 30 to 45 Degrees: This range creates a more engaging, immersive experience, mirroring the natural viewpoint we have when sitting down to eat. It’s a favorite among photographers for its ability to draw viewers into the dining experience.

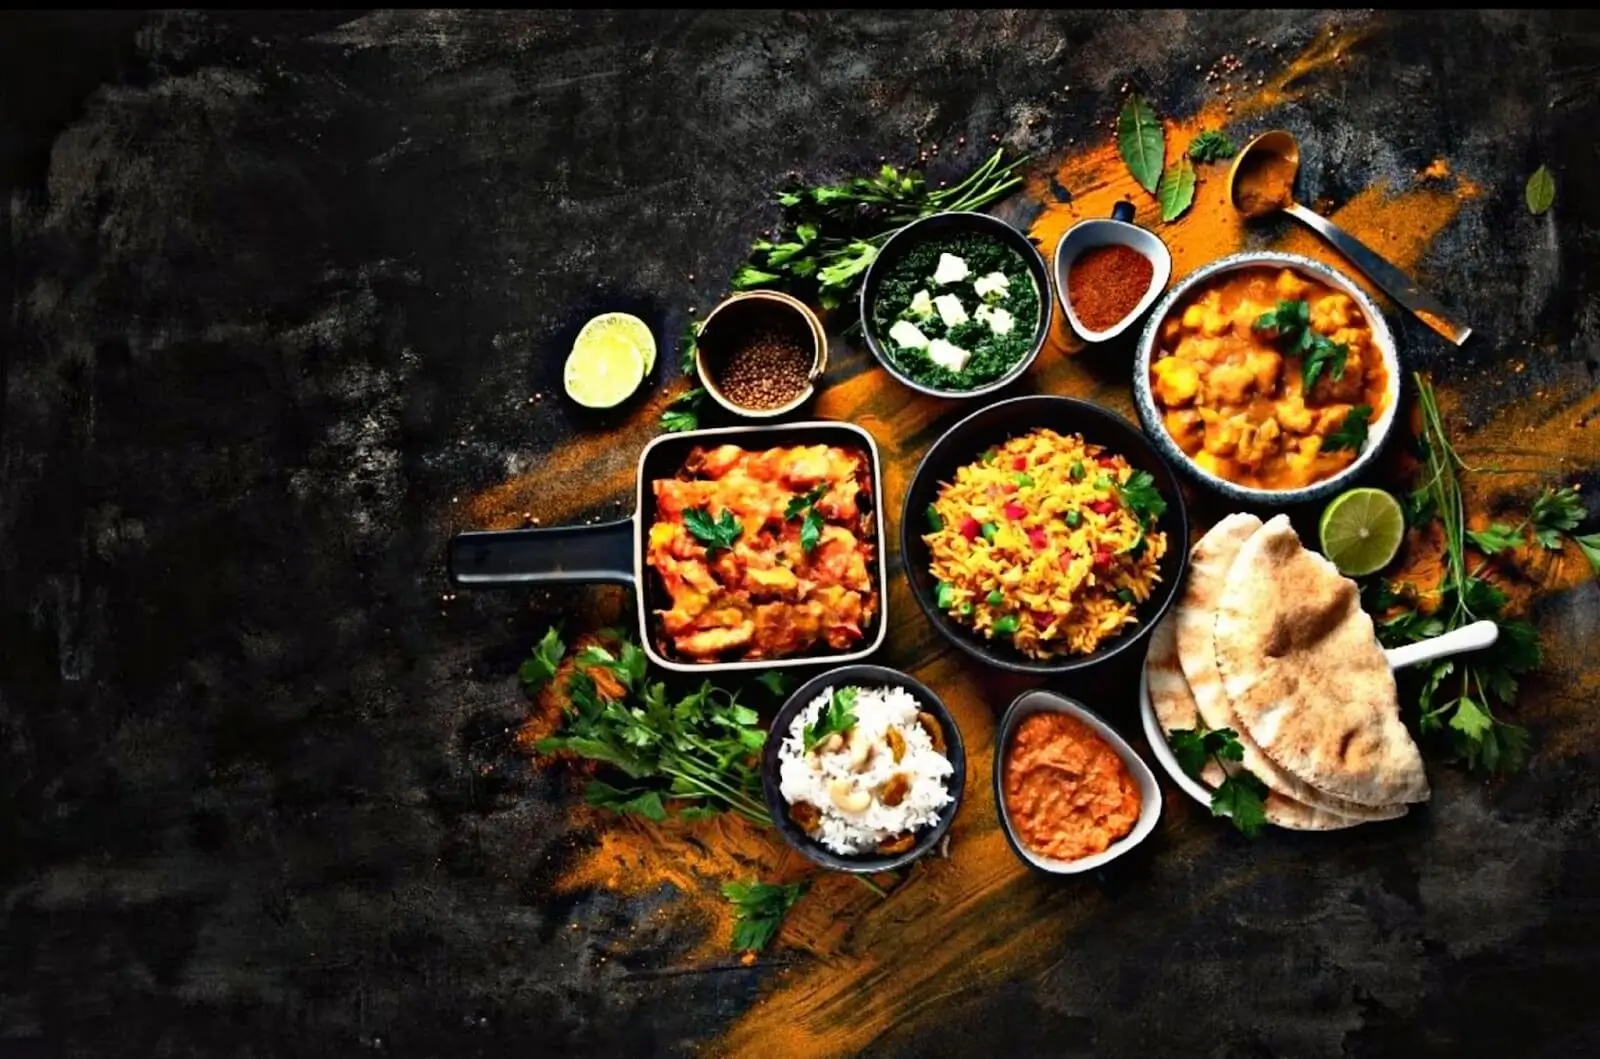
Selecting the optimal angle, whether 90 degrees or somewhere between 30 and 45 degrees, requires assessing how different foods and dishes are best visually represented. For example, a broad platter brimming with an array of fruits demands a 90-degree overhead angle to fully capture its diversity. In contrast, items with height and complexity, like burgers or tacos, are more appealing when photographed from the side. The rule of thumb is straightforward: opt for a 90-degree angle for flat layouts, while more varied heights benefit from an angled perspective.

Here is a creative tip for the angles. When shooting from above (90 degrees), consider intentionally leaving space in your composition. This can be particularly useful for commercial purposes, allowing room for a brand to insert its logo or other marketing elements. Proactively suggesting this to clients can showcase your professionalism and foresight in meeting their advertising needs.

Dessert Photography Ideas

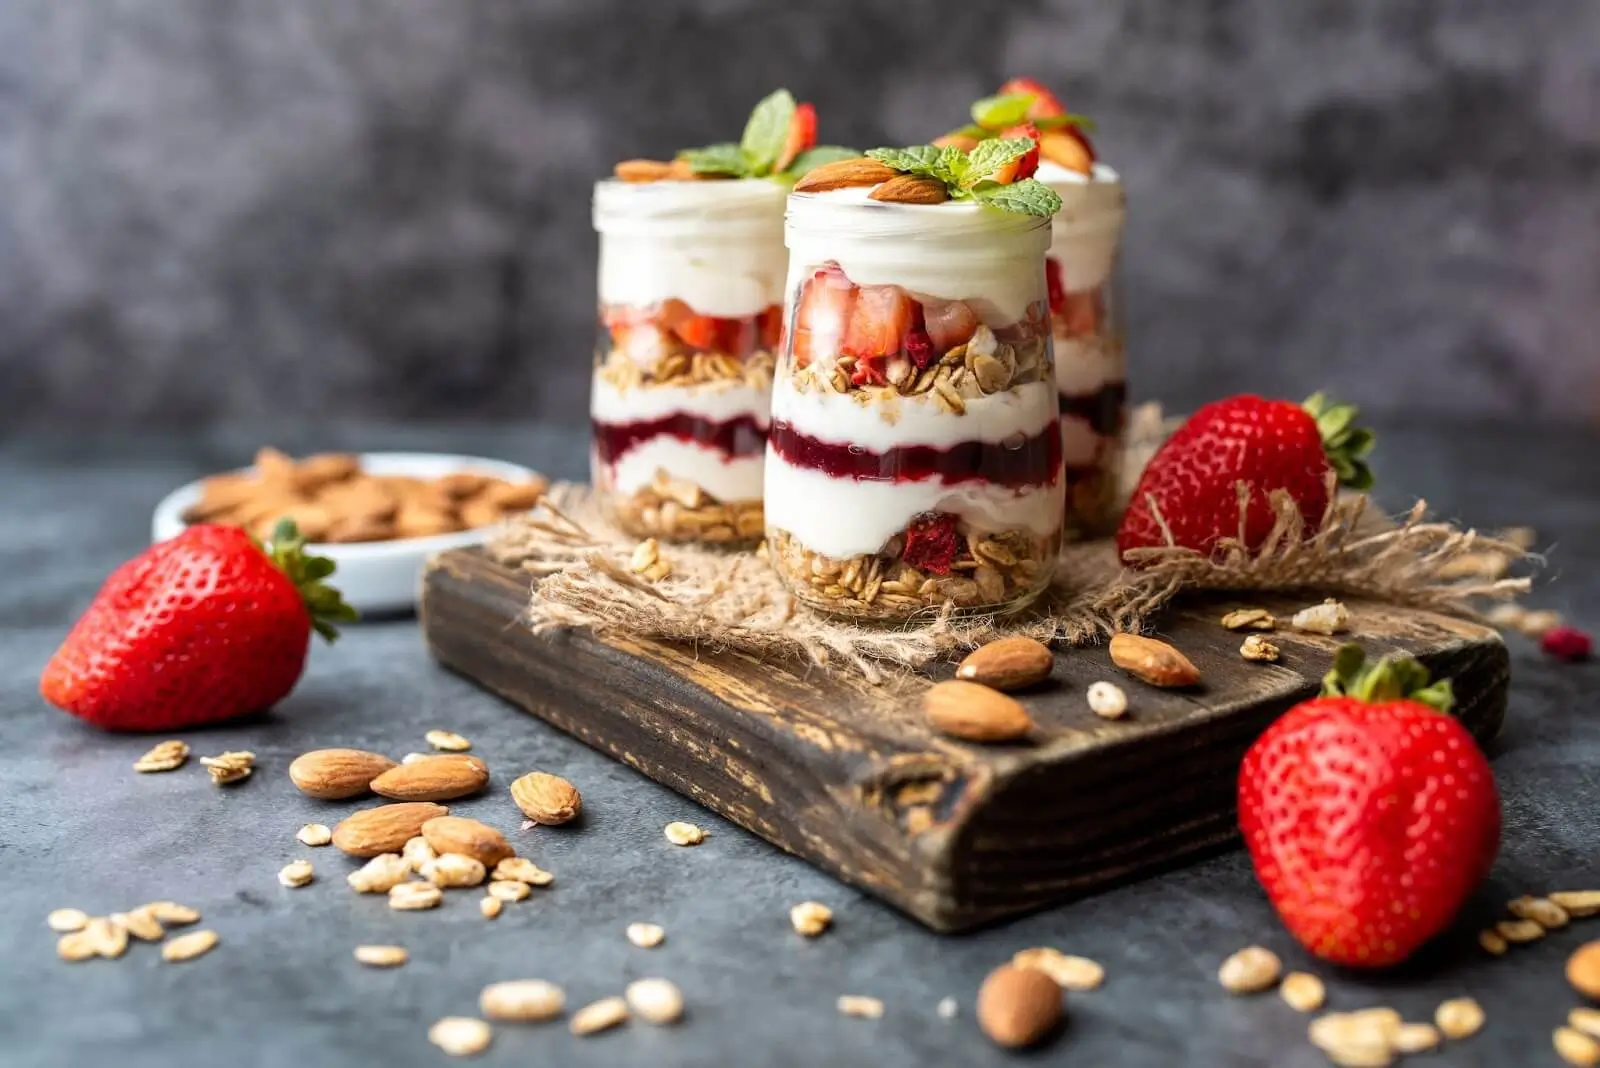
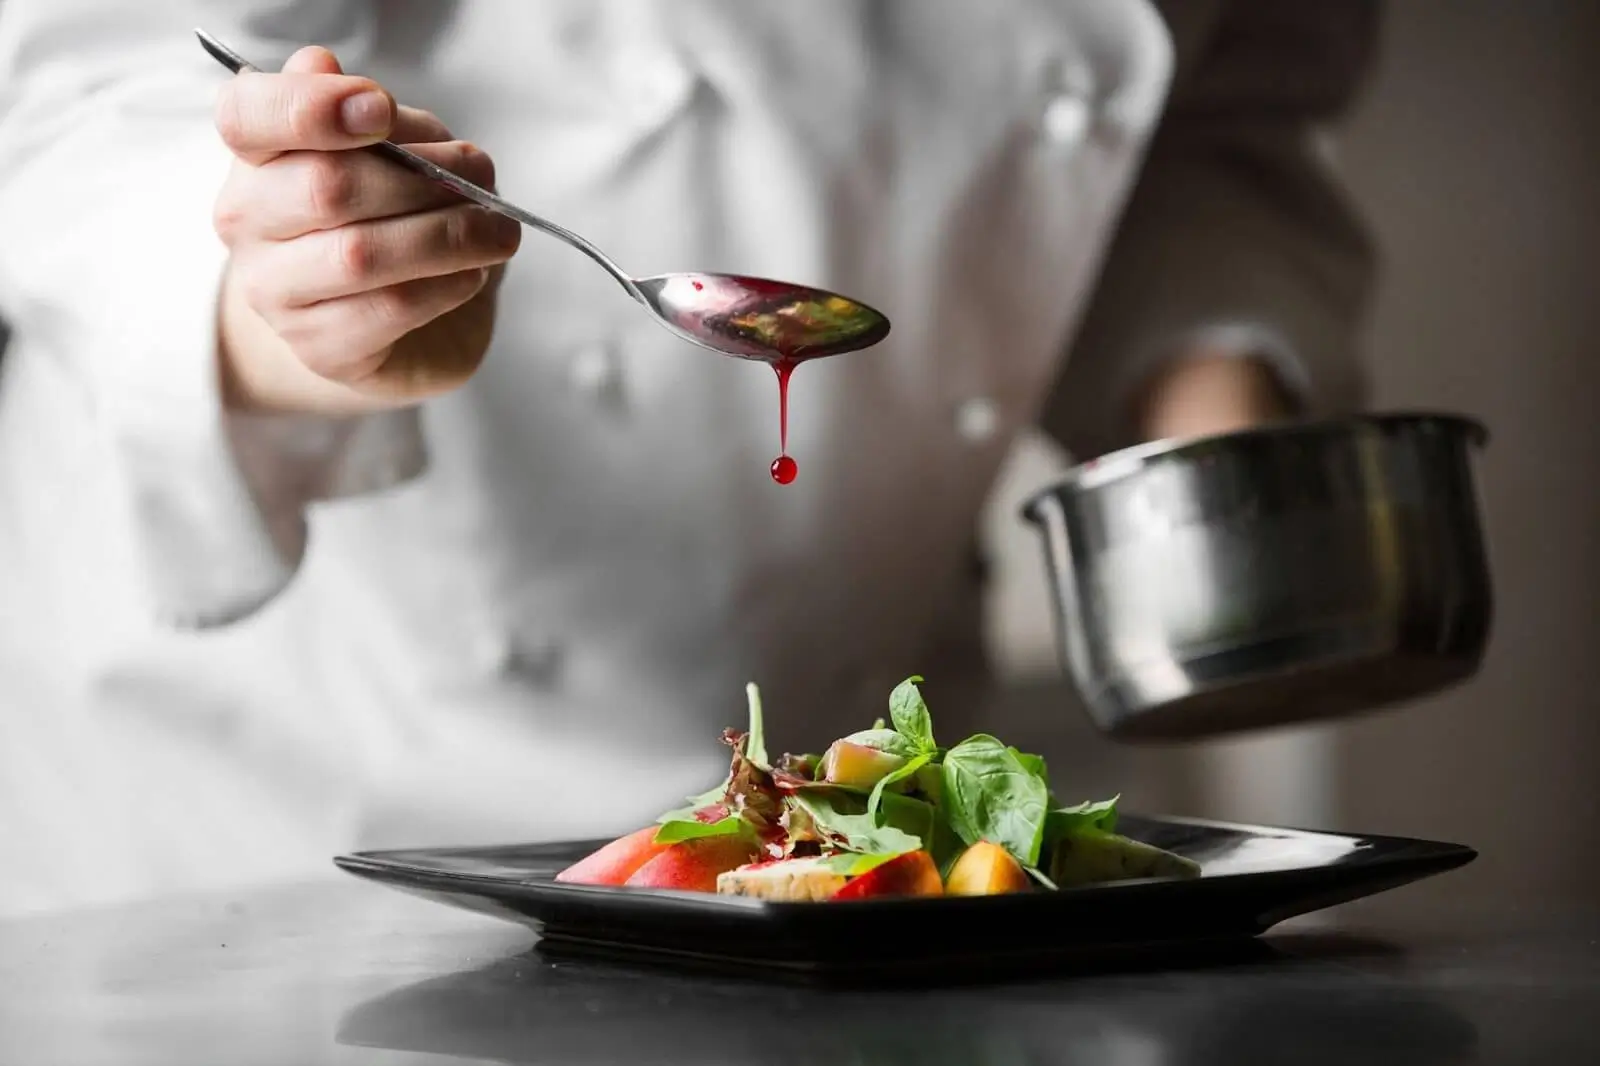
When photographing desserts, it's advisable to focus on close-up shots to highlight their texture and intricate details. Unlike capturing the restaurant's interior, props and colored backdrops can be utilized to enhance the dessert's visual appeal. For example, when shooting brownies, which are often favored by women, a pink background can be employed to complement and accentuate the dessert's aesthetic.

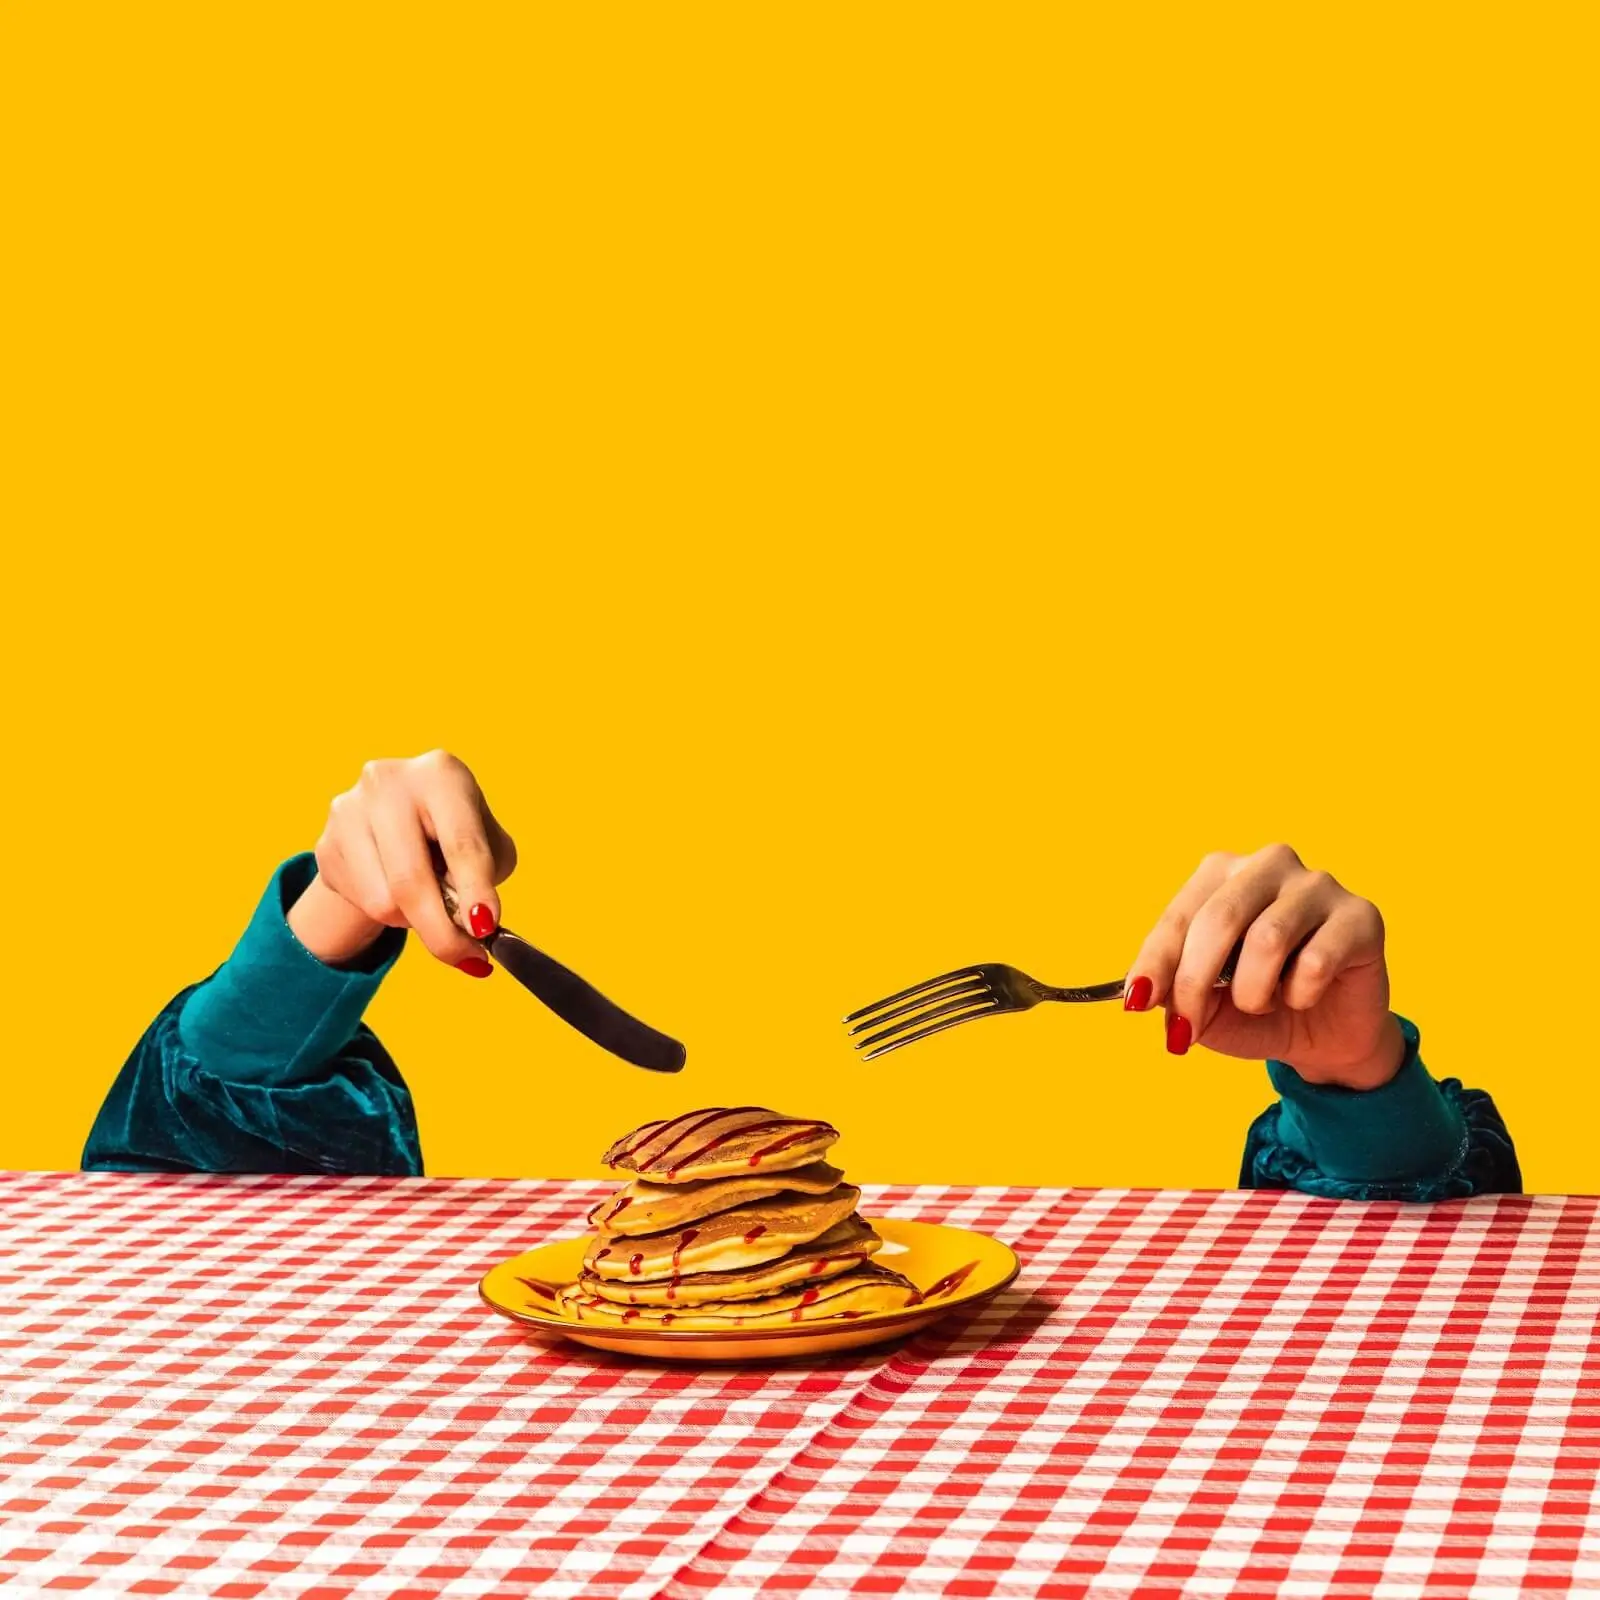
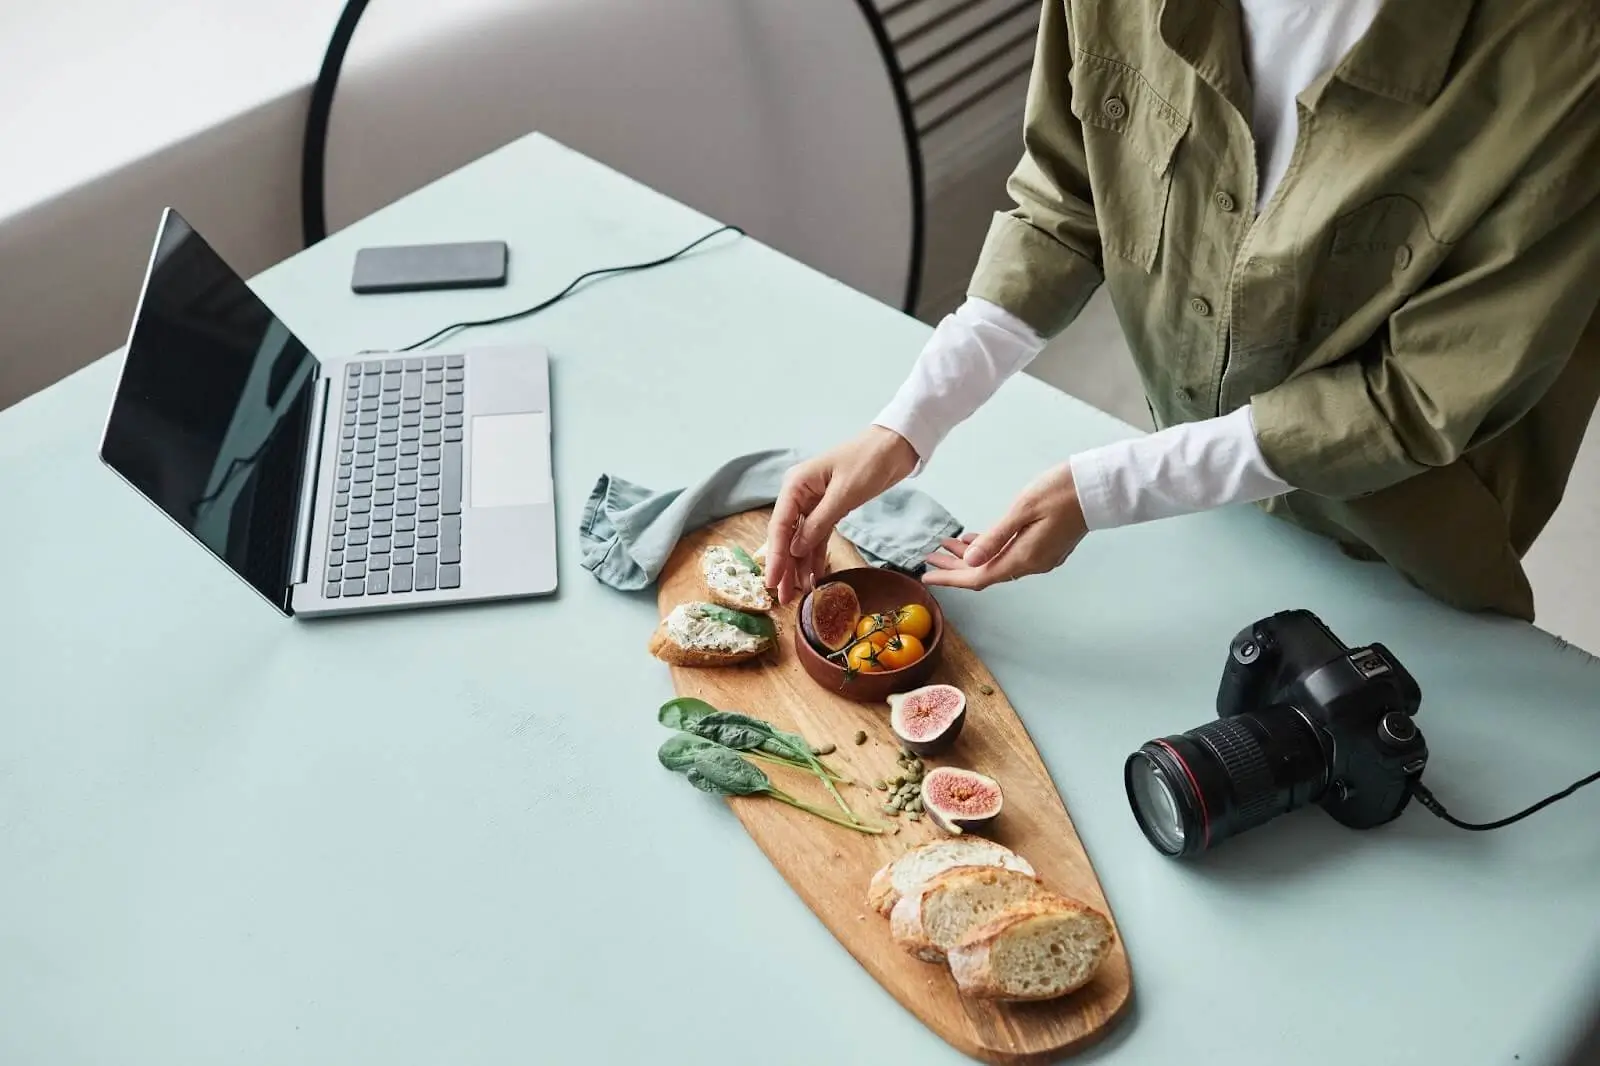
Implement a desire by incorporating a hand reaching out to a dessert. This addition not only makes the scene more immersive but also renders the food more enticing and vibrant to viewers.

Fruit Photography Ideas

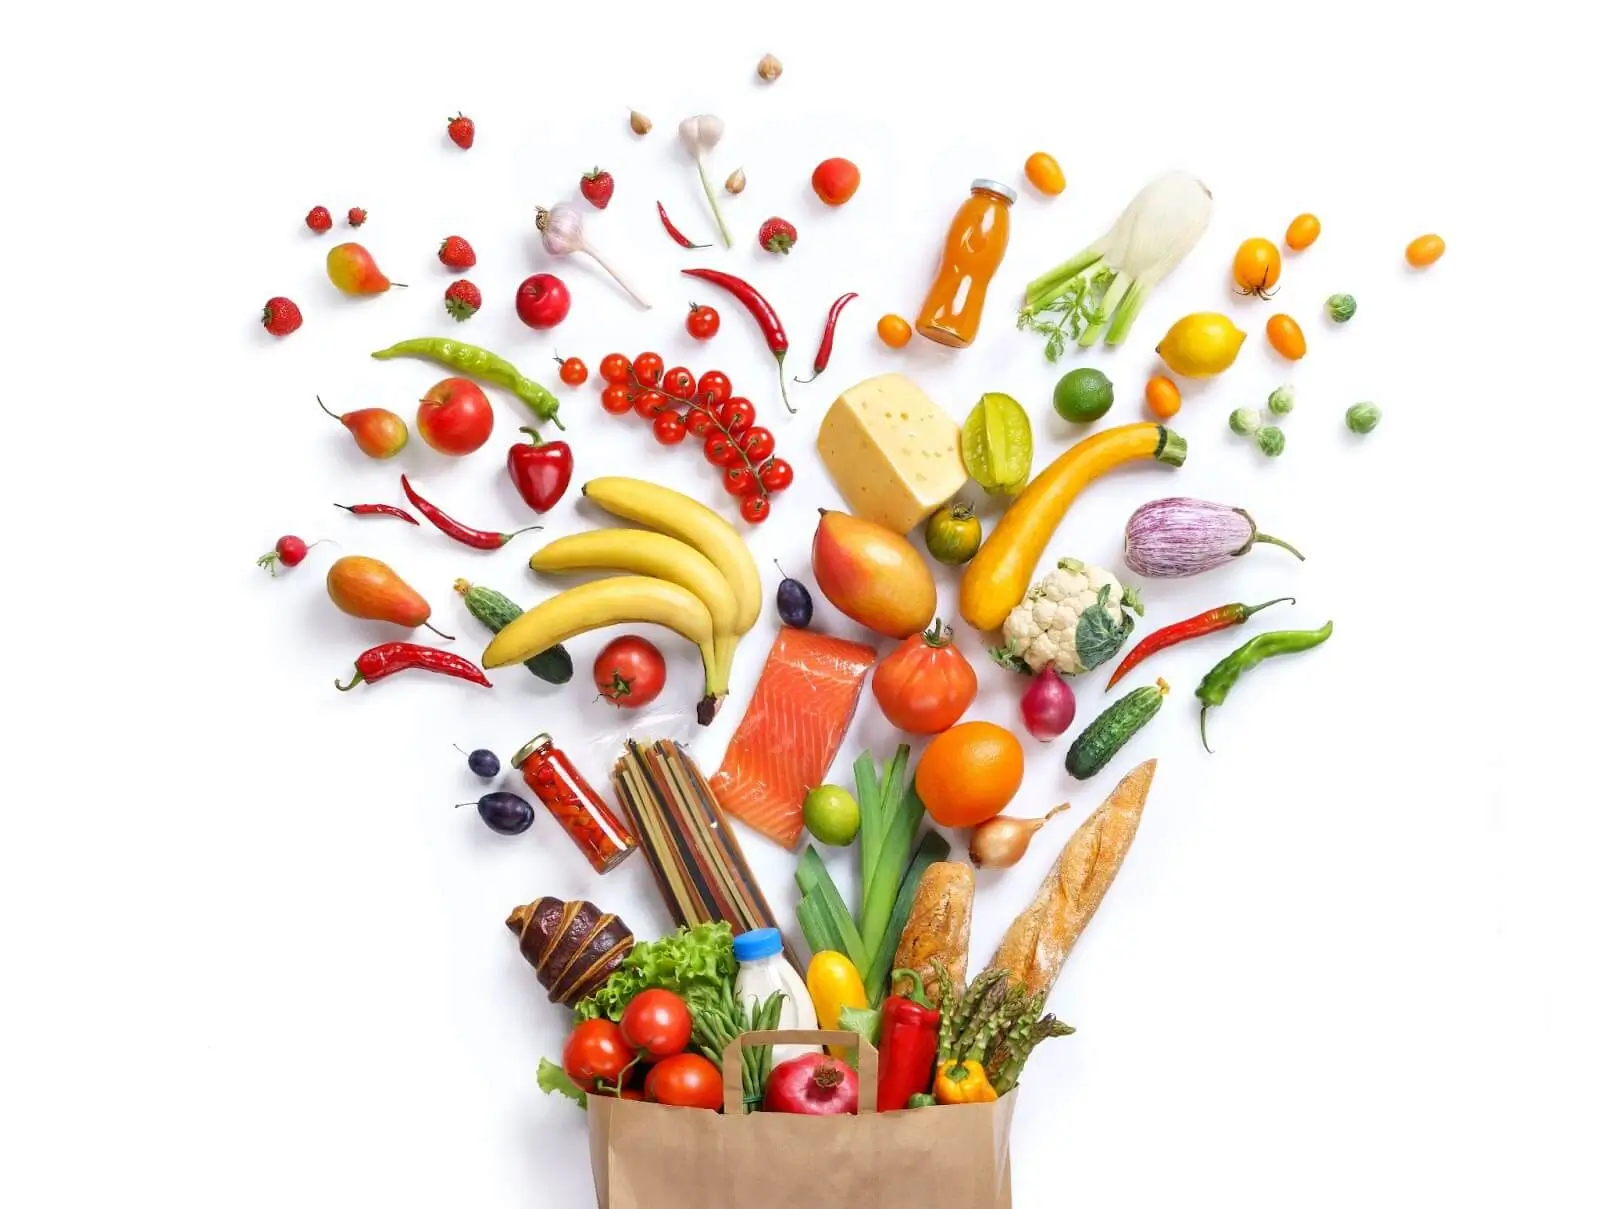
Arrange a variety of colorful fruits in a visually striking composition. Experiment with contrasting hues and play with patterns to create an eye-catching display.

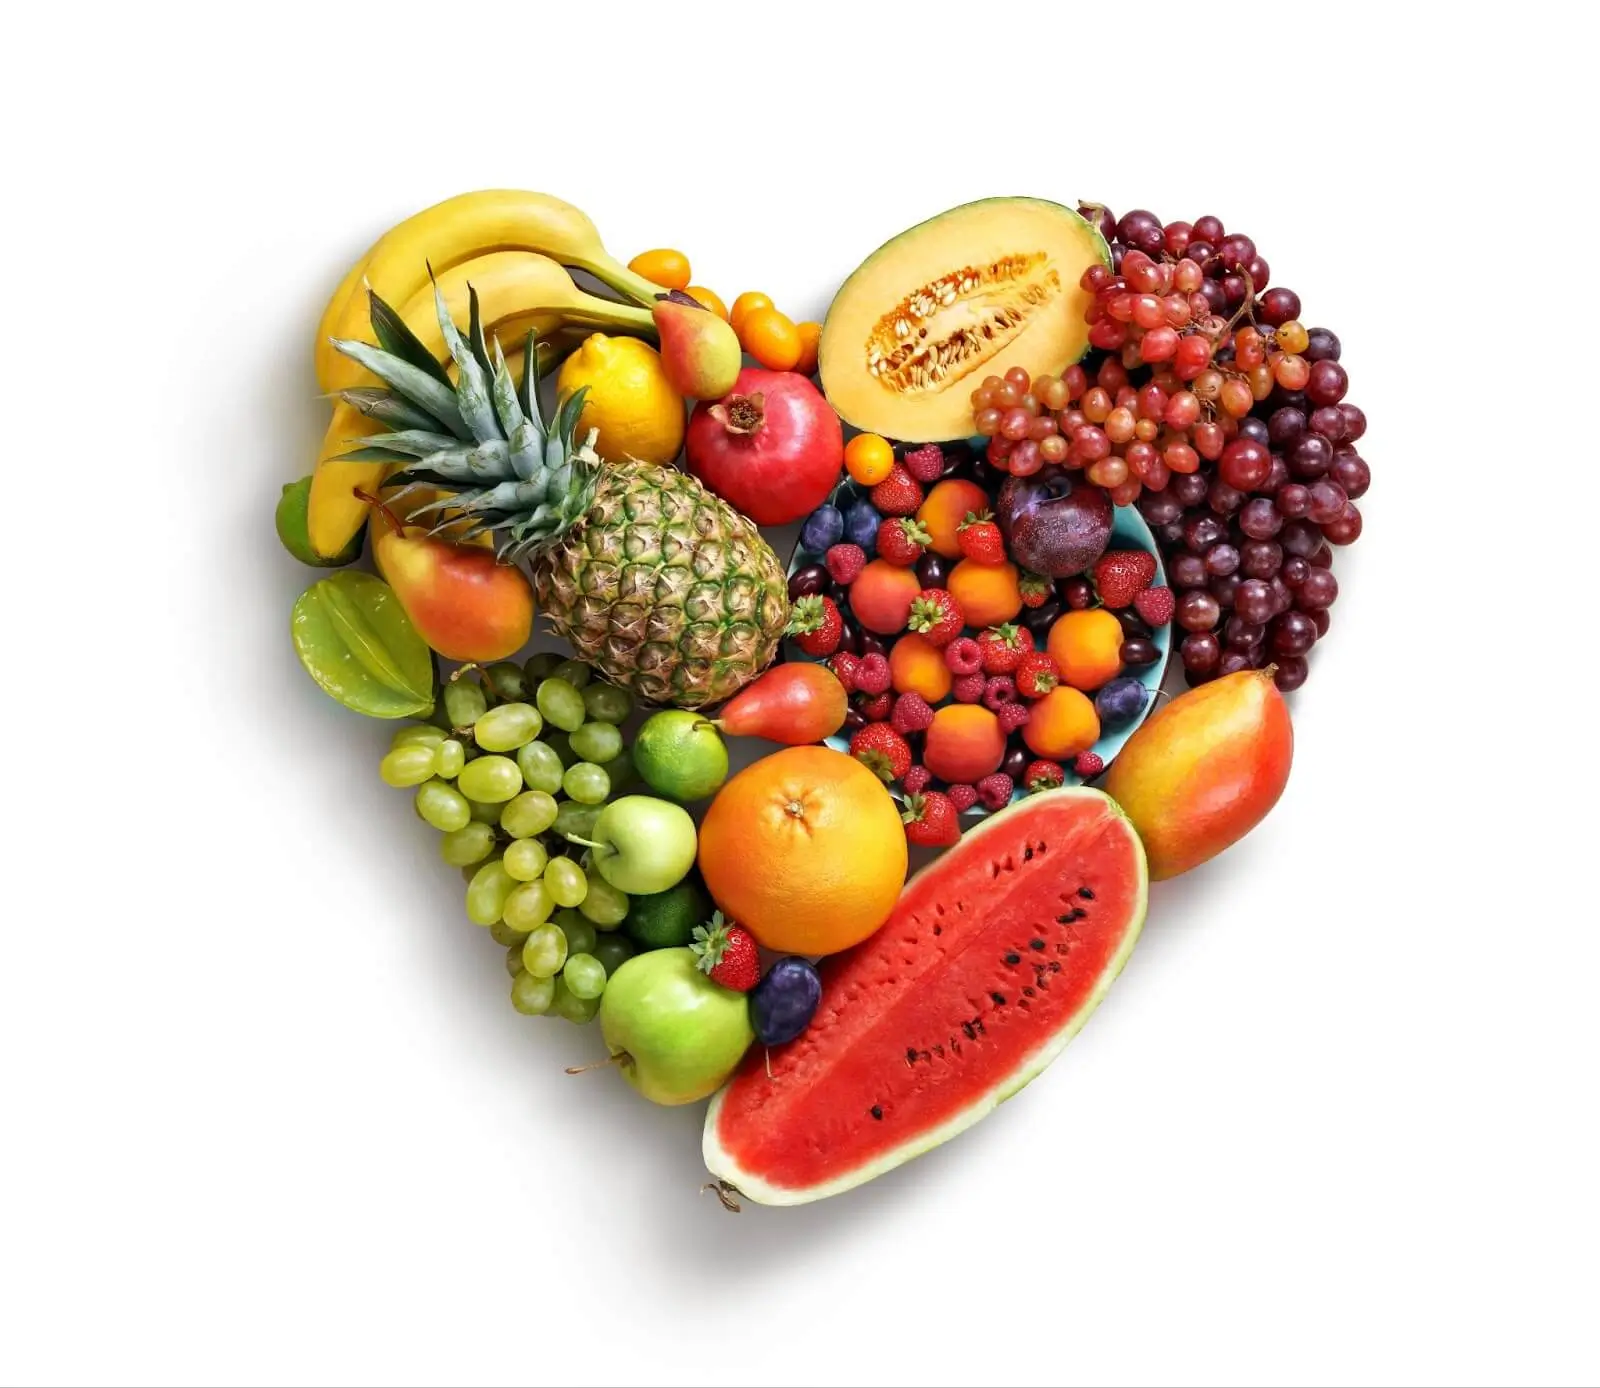
Get artistic with fruit arrangements by sculpting them into unique shapes or patterns. Play with symmetry, asymmetry, and negative space to create visually appealing compositions.

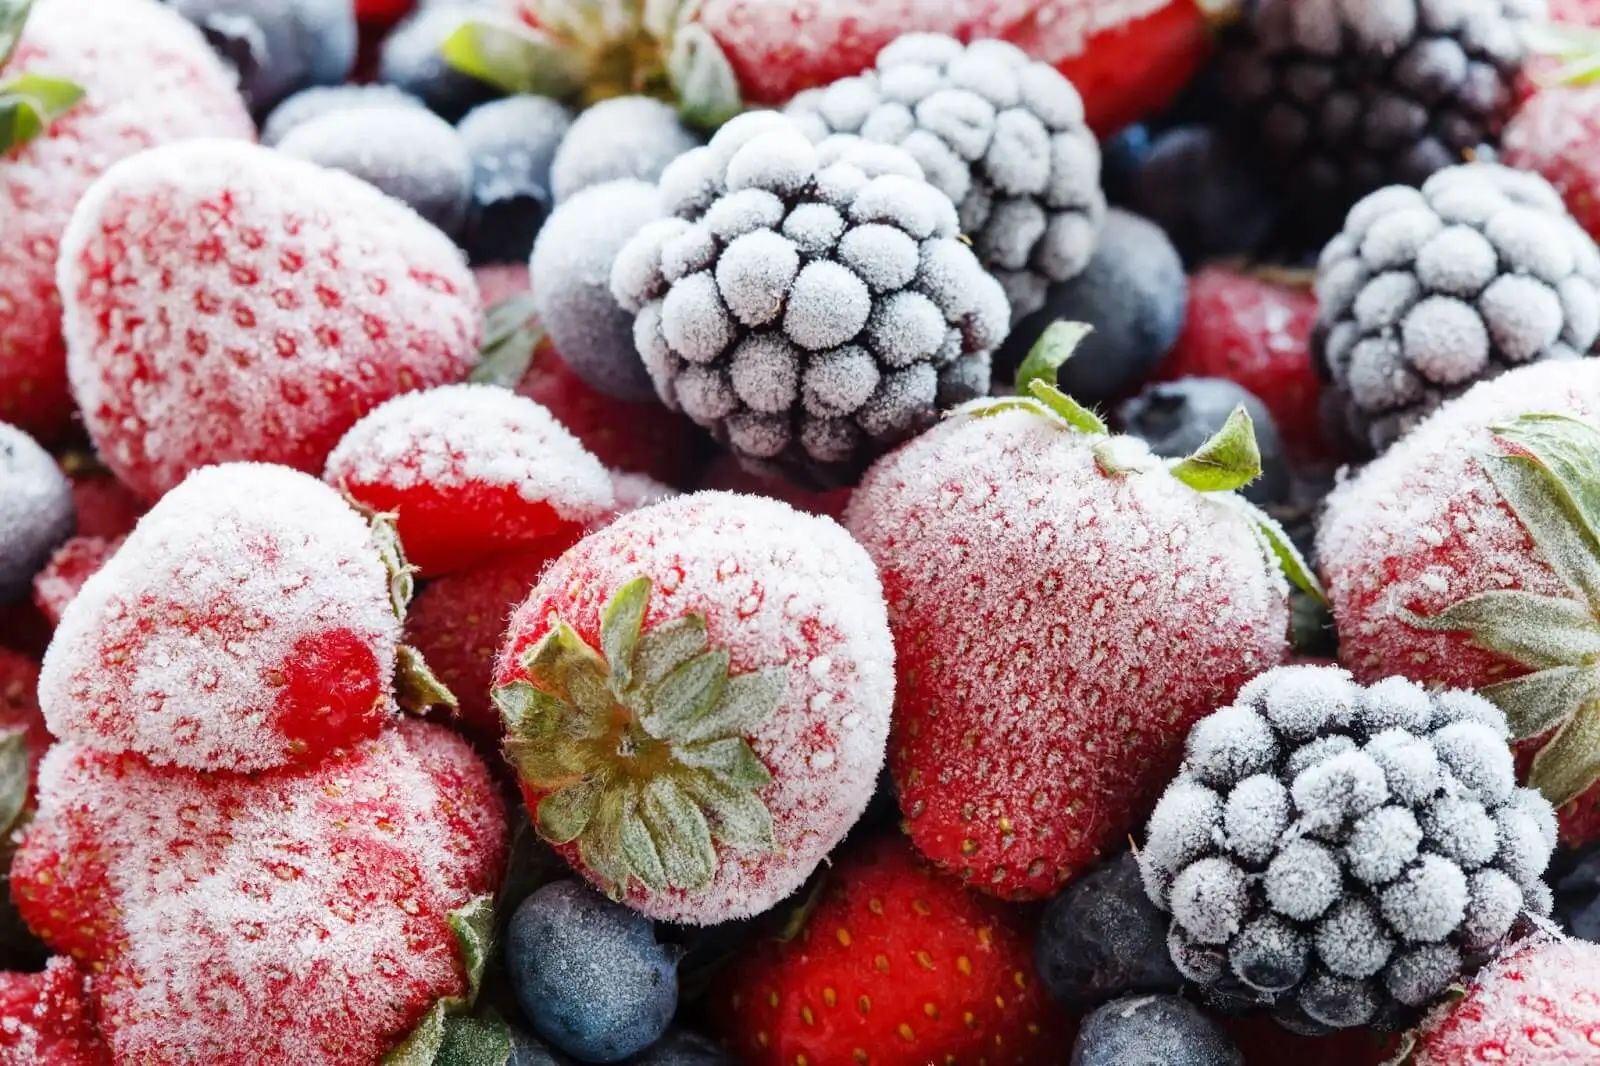
Experiment with frozen fruits to capture their beauty in a different light. Showcase the intricate ice crystals and the vibrant colors of frozen berries or citrus slices.

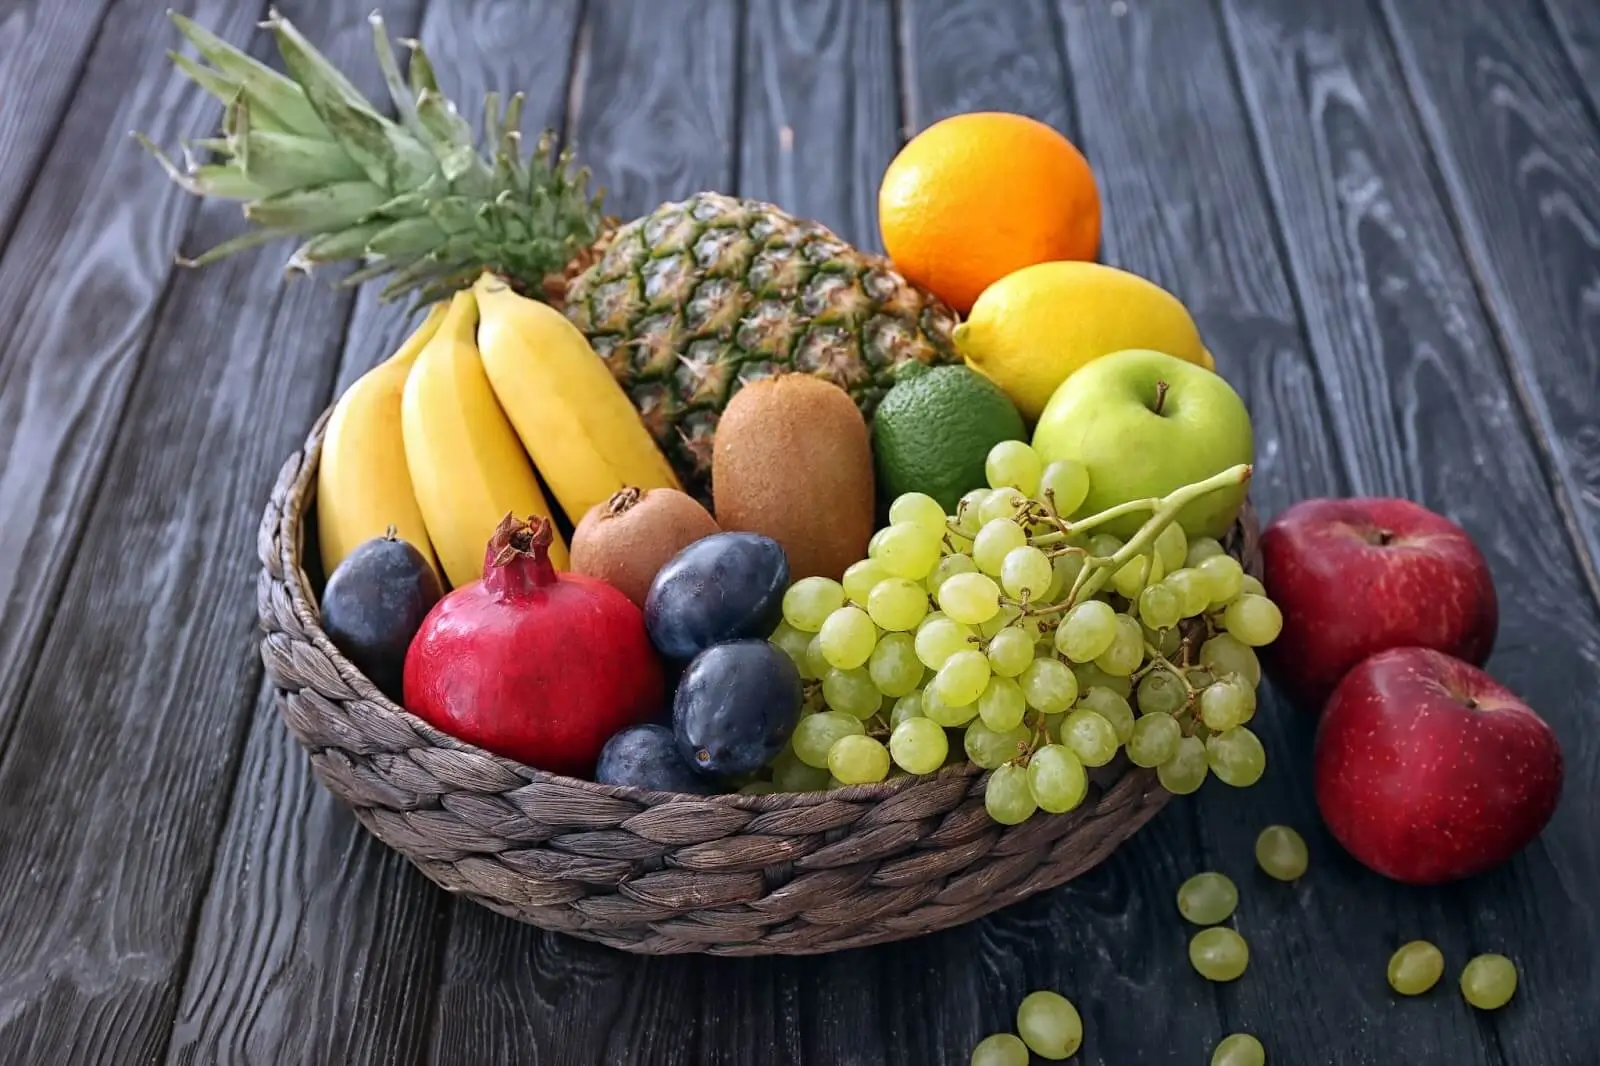
Introduce playful props like vintage crates, rustic baskets, or colorful linens to add interest and context to your fruit photography. Props can enhance the storytelling aspect of your images and create a sense of whimsy or nostalgia.

Food photography background ideas

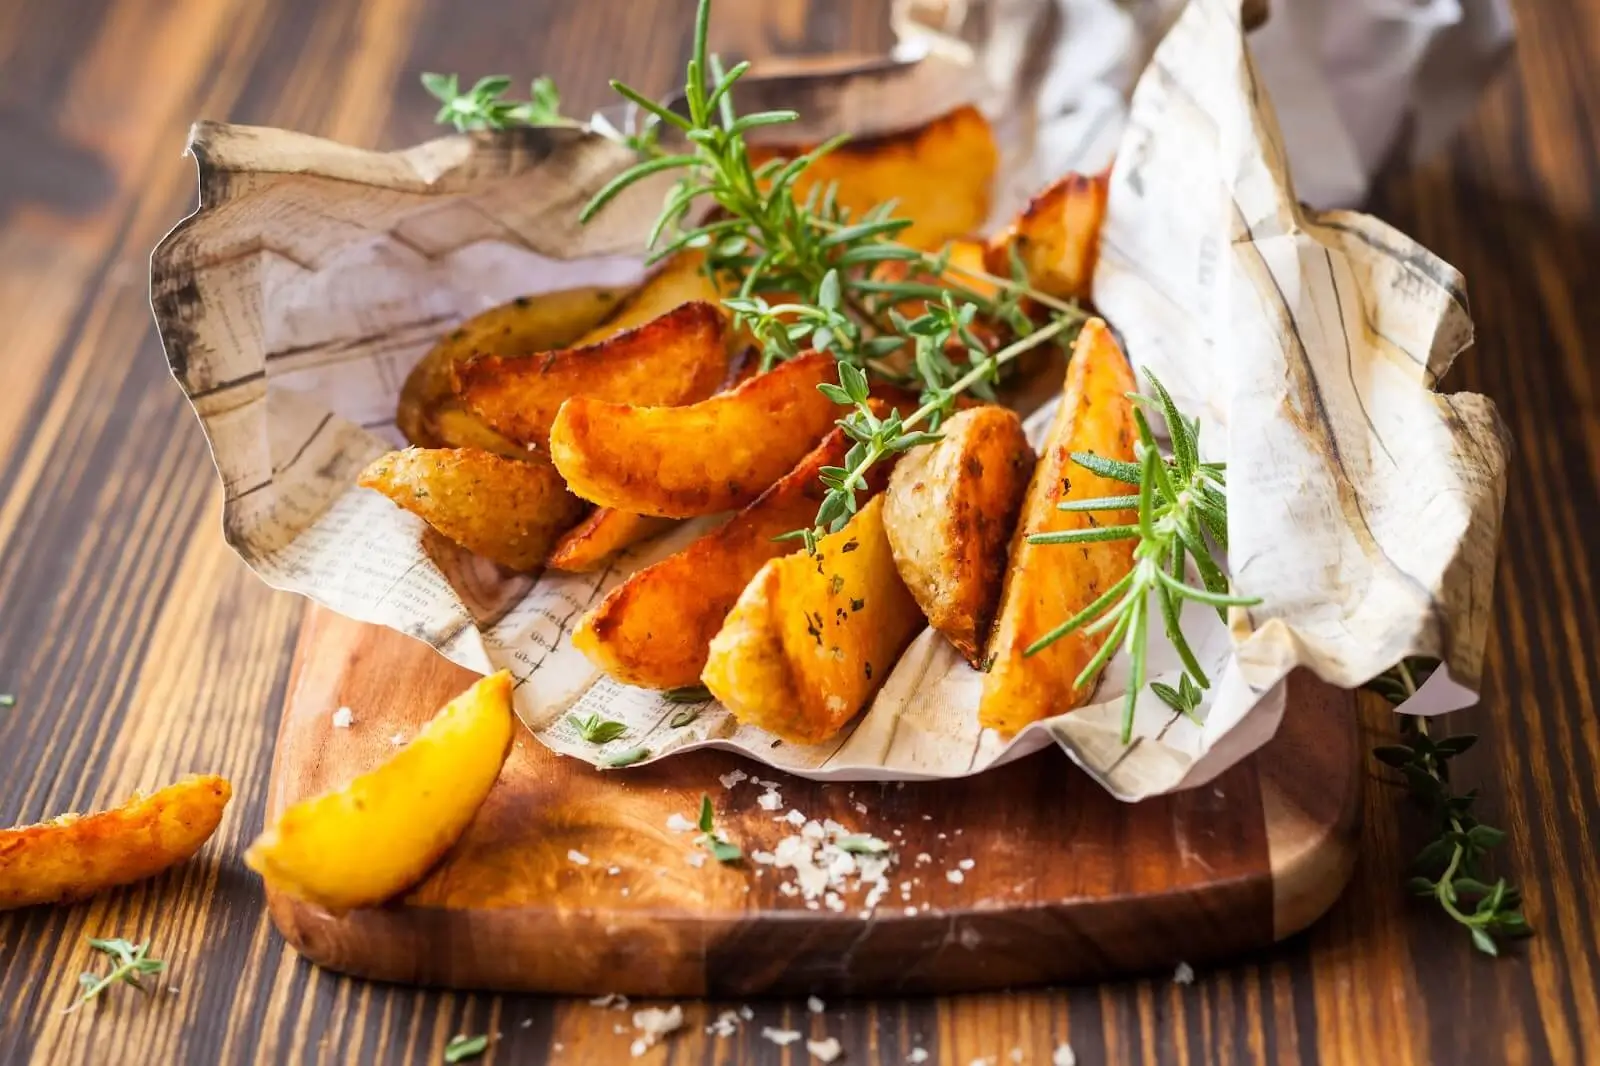
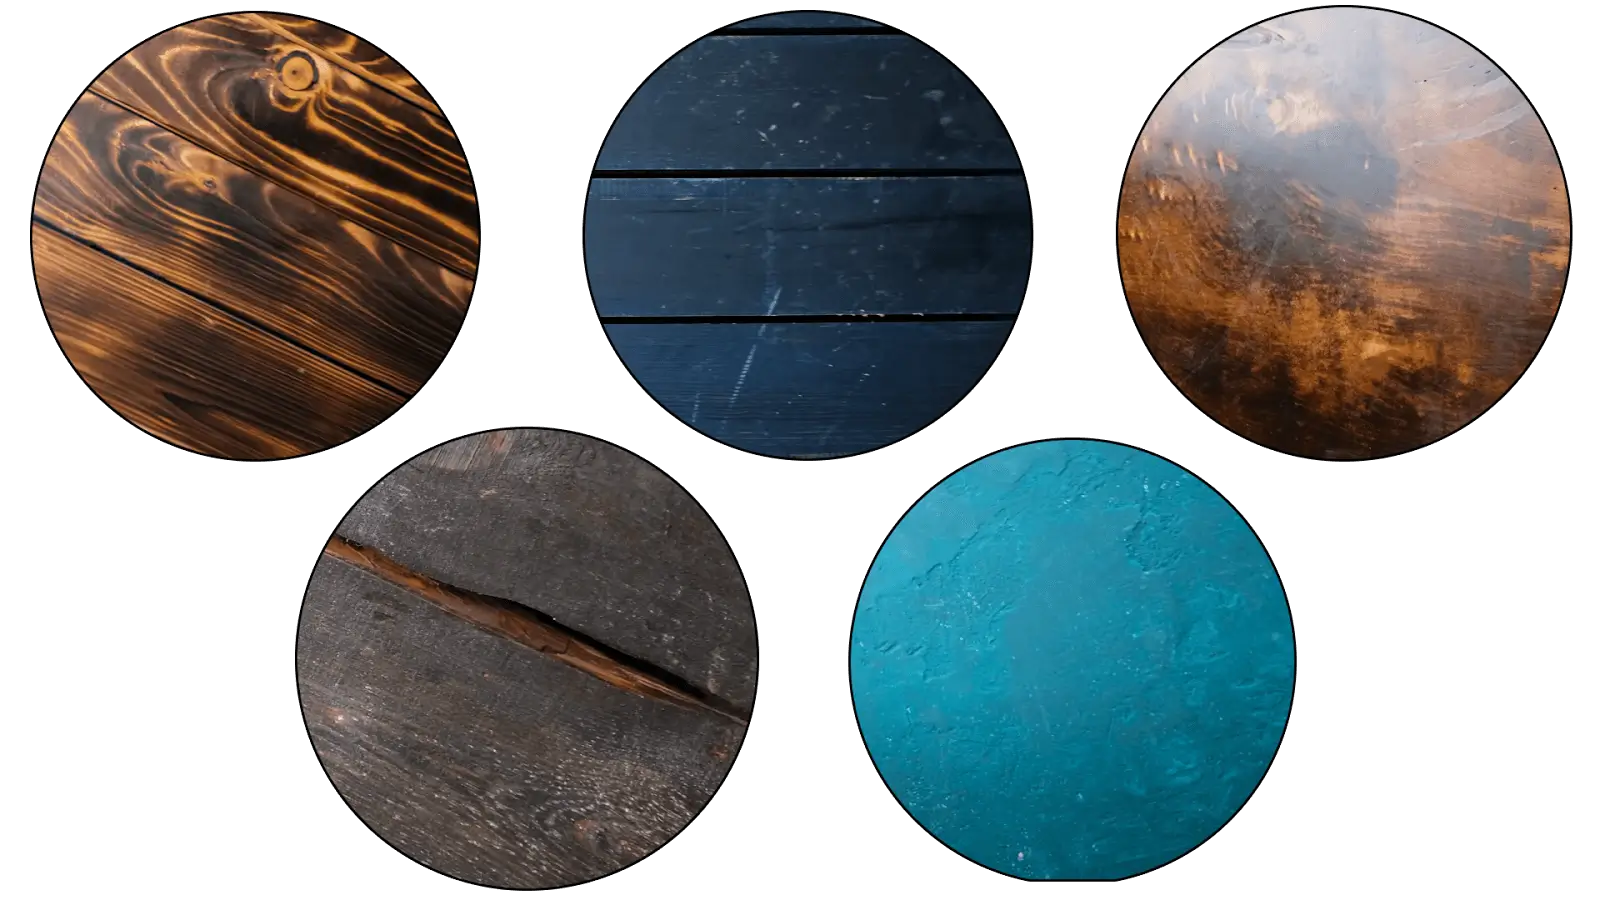
There are plenty of food backdrops to choose from, starting from dedicated and ending up with what you have at certain venues. The best and most used cases are the wooden backdrops of certain textures shown in the image below.

But the creative approach here is to embrace simplicity and minimalism. Let’s give a creative backdrop example of the mentioned fruits. By focusing on a single fruit or a small group of fruits against a clean, uncluttered background. Let the beauty of the fruit speak for itself in an elegant and understated composition.

Post-production measures

Resuming food picture ideas, it is worth mentioning that photo enhancements are a must-have despite how good the shot came out from a camera. Lightroom and Photoshop are the best friends of a professional photographer, however, if you struggle or have a lack of experience in editing, Product photo retouching comes in handy powered by RetouchMe Pro.
Share
Author
For commercial photographers
Retouchme Pro
Retouchme Pro
Retouching for Professional Photographers
Enhance your commercial photos with professional retouching!
Learn more
Our other products:
For mobile retouching
Before/after example
Transform Your Silhouette with RetouchMe
4.4
15570 Reviews
For TikTok influencers
bg
AppStore
Impressive effects for TikTok
Create videos with special effects like social media influencers!
4.2
47 Reviews
Learn more
For commercial photographers
Retouchme Pro
Retouchme Pro
Retouching for Professional Photographers
Enhance your commercial photos with professional retouching!
Learn more
Retouch your photos using packages

Colors & Cropping
Create order
Base Edit
Create order
Advanced Edit
Create order
High-End Edit
Create order
Wedding Light
Create order
Wedding Pro
Create order
Pro Color Correction
Create order
Subject Retouch
Create order
Clipping Path
Create order
Architecture Photo
Create order
Jewelry Retouch
Create order
Restoration Photo
Create order
Custom retouch
Create order
Portrait retouching
Download example
Body retouching
Download example
Newborn editing
Download example
Wedding editing
Download example
Pro color correction
Download example
Product retouching
Download example
Сlipping path
Download example
Real Estate photo
Download example
Jewelry Retouch
Download example
Portrait retouching | Basic
Download example
Portrait retouching | Advanced
Download example
Portrait retouching | Pro
Download example
Portrait retouching | High-End
Download example
Body retouching | Basic
Download example
Body retouching | Advanced
Download example
Body retouching | Pro
Download example
Body retouching | High-End
Download example
Newborn editing | Basic
Download example
Newborn editing | Advanced
Download example
Newborn editing | Pro
Download example
Wedding editing | Basic
Download example
Wedding editing | Advanced
Download example
Wedding editing | Pro
Download example
Wedding editing | High-End
Download example
Pro color correction | Pro
Download example
Product retouching | Basic
Download example
Product retouching | Pro
Download example
Сlipping path | Pro
Download example
Real Estate photo | Basic
Download example
Real Estate photo | Pro
Download example
Jewelry Retouch | Basic
Download example
Jewelry Retouch | Pro
Download example
Jewelry Retouch | High-End
Download example
The photo size is too small. Please choose another one.